
AutoHotkey is a scripting software Microsoft Windows 10/87/ to create keyboard shortcuts or hotkeys, software automation and fast macro-creation. It is free and opens source scripting language program to automate most of the Windows repetitive actions.
Our keyboard has come a long way, and with continuous updates and improvements of different useful programs, and the changes in the way we work, some keys are no longer useful in 2019. A few such keys are Insert, Page Up, Page Down, Scroll Lock, Menu key, etc. Besides that, a pair of Shift, Alt, Ctrl and Windows key can also look like useless rectangular cookies on our keyboard. But, pulling out those keys from their places will ruin the beauty of our keyboard and eventually our desktop, which isn’t a solution at all. How about reusing the keys to something really useful!
A few days ago, I have written an article on how you can use SharpKeys to edit the functionality of certain keys on your by making changes to the registry. SharpKeys is indeed a great tool, but there are some limitations. On SharpKeys, you can remap some keyboard keys with some other keys or use them to open some Windows programs, but not all. However, with AutoHotkey, you can remap keys on your keyboard to open one or many programs at once or run execute some script, which you manually execute frequently. AutoHotkey doesn’t even play with your Registry, so you will never end up with a broken registry. I mean, just in case!
Let’s find out why you should AutoHotkey instead of SharpKeys.
Major limitations of SharpKeys
Here are a few major limitations
- With SharpKeys, you can assign a keyboard key for another keyboard key or assign some common programs to a particular keyboard key. It isn’t possible to assign any program installed on your computer or present in a certain location to a keyboard key.
- You cannot assign an activity, program or another keyboard key for a certain key combination on your keyboard. That limits the possibility to a big extent and can be a deal breaker as using different key combination can practically help you automate anything on your Windows computer.
- With SharpKeys, it isn’t possible to assign mouse clicks at certain points or imitate mouse and scroll wheel movements to certain keys on your keyboard that you don’t use regularly.
So SharpKeys has its own limitations, and that’s where you will need AutoHotkey.
Install and use AutoHotkey on Windows 10/7
Now without any further delay, let’s get started with how you can use AutoHotkey to edit the functionality of your keyboard keys in the mightiest possible way.
Step 1: Download and install AutoHotkey
Download and install AutoHotkey for Windows. The installation process is similar to the installation of other Windows programs.
Step 2: Create an AutoHotkey Script
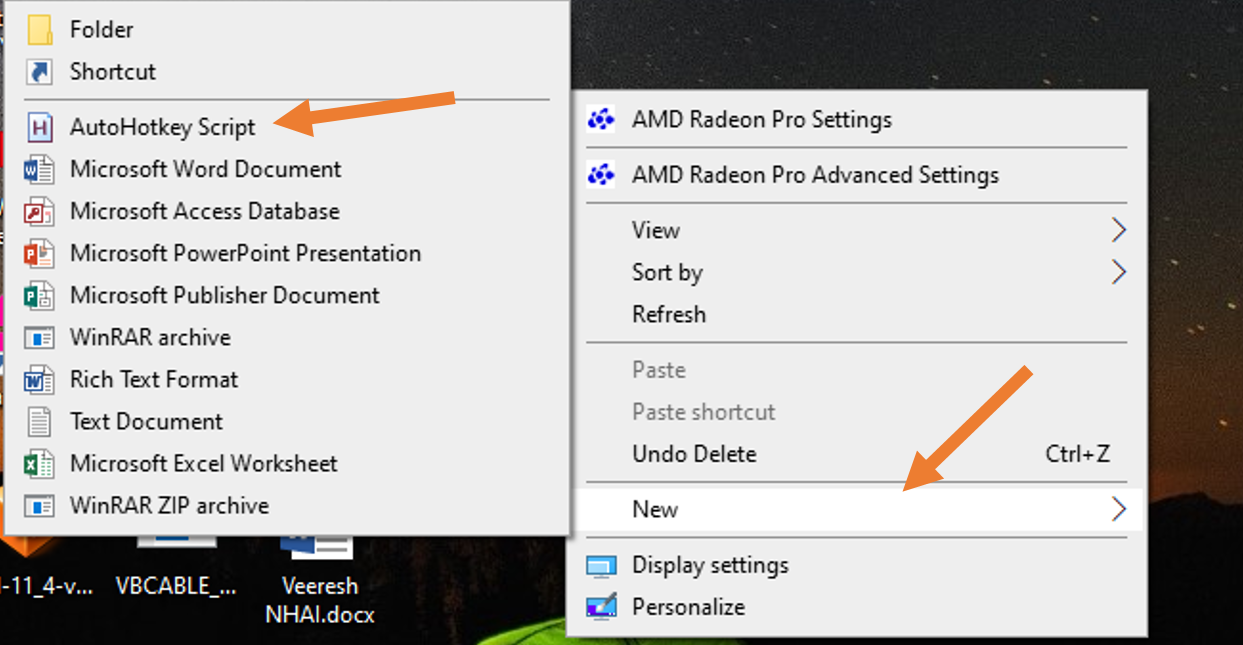
After installing the AutoHotkey software on Windows, go anywhere on the Desktop and right click. From the pop-menu select New and then click on the AutoHotkey Script.
Step 3: Start writing AutoHotkey scripts
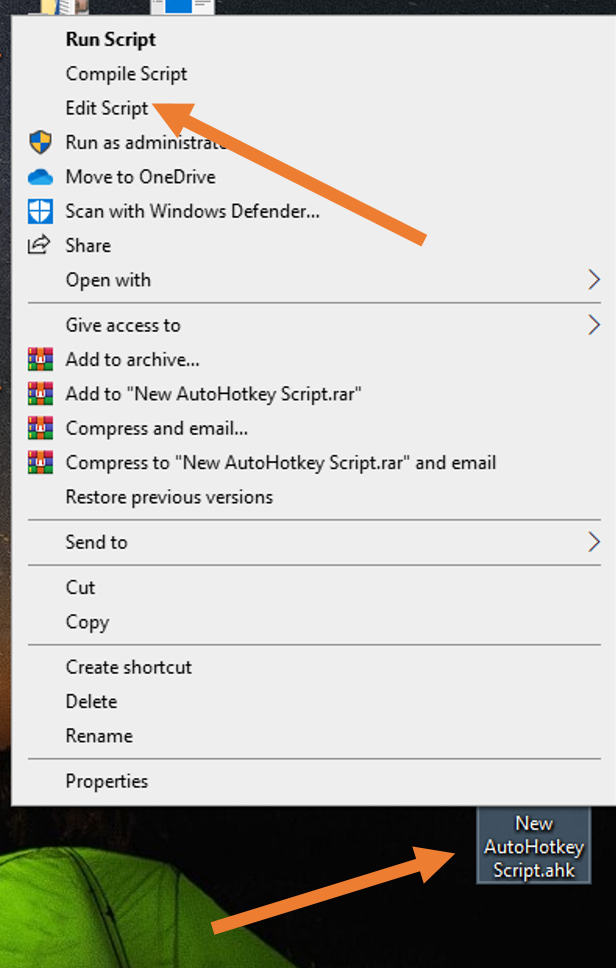
To begin writing your own script again right click on the newly created AutoHotkey script file and this time select an option Edit script.
It will open the Notepad to write scripts, however, rather using it you can download SciTE4AutoHotkey to write a script with Syntax highlighting, autoComplete, autoIndent, editing macros and more… Here we are using it for the tutorial.
SciTE4AutoHotkey to make it easy writing scripts for AutoHotkey and map certain activities or map keyboard keys without worrying about errors. The installation of SciTE4AutoHotkey is also similar to any other Windows program.
Once the download and installation are complete, open SciTE4AutoHotkey and write your desired script.
Each script should begin with the key which you want to map, followed by two colons (:), with the programs that you want to run, followed by the ‘Run’ command, and ‘return’ at the end.
Few examples of AutoHotScript usage:
Suppose you want to open the Calculator by pressing the Page Up button. Here is the command for the same.
PGUP::

Run Calc

return
You can even trigger multiple programs with a single key. Here is another example to use the Page Up key to open both Calculator and Chrome.
PGUP::

Run Calc

Run Chrome

return
In a single AutoHotkey script, you can even assign programs for multiple keyboard keys, or assign separate tasks for different keyboard keys, each partitioned with a return command.
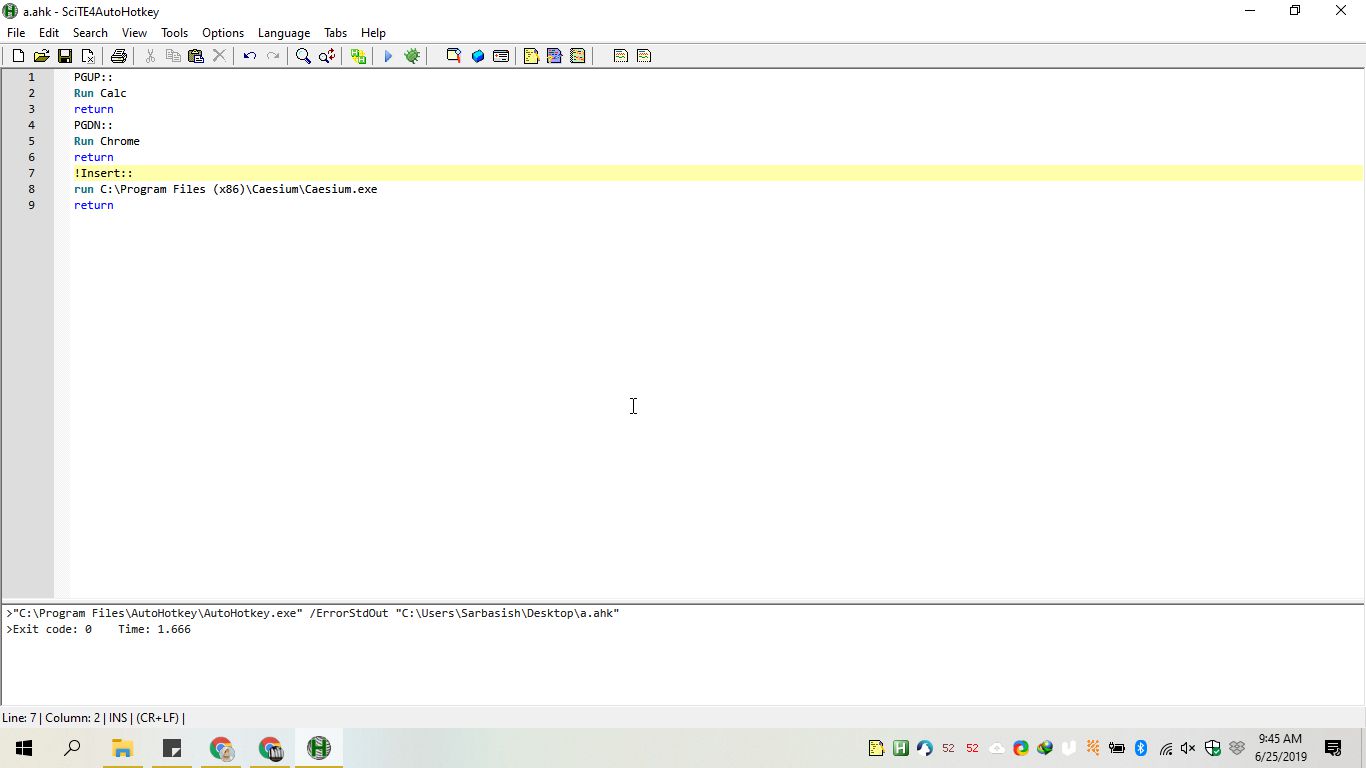
Here is a script, which will open Calculator with Page Up, Chrome with Page Down, and a program Caesium, that I often use to compress images, with the Insert key.
PGUP::

Run Calc

return

PGDN::

Run Chrome

return

Insert::

run C:\Program Files (x86)\Caesium\Caesium.exe

Return
You can even map certain key combinations with certain programs and jobs, but you should use the appropriate shortcut for the Ctrl, Alt, Shift, and other keys to make that work, as given in the list below.
! : Alt

^ : Ctrl

+ : Shift

# : Windows key
You can find the complete AutoHotkey tutorial here if you want to enjoy the maximum potential of the utility.
Step 4: Save the script
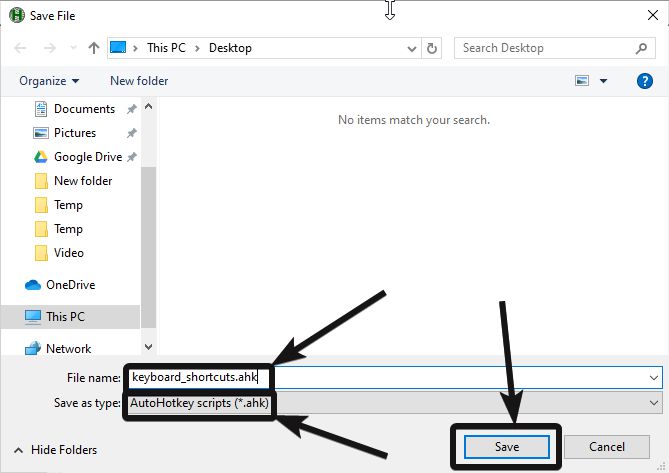
Once you are done writing the script, you have to save the text file in ‘.ahk’ or AutoHotkey format. If you are using SciTE4AutoHotkey, the program will take care of things, but you will have to manually assign the extension, if you are using some other text editor like Notepad, Notepad++, etc.
Step 5: Run Script using within SciTE4AutoHotkey or directly from the file
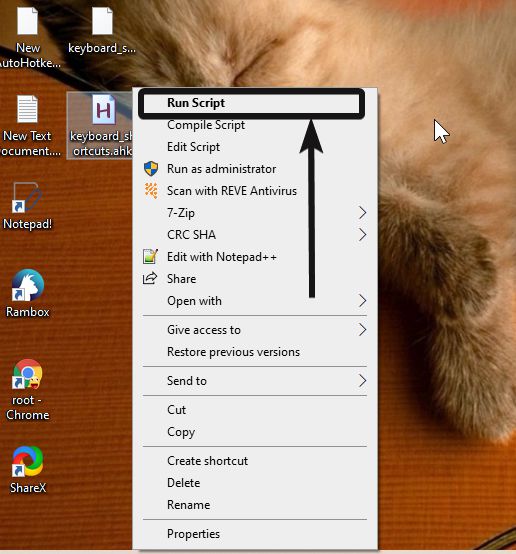
Once saving is complete, you can run the script from within SciTE4 AutoHotkey, by clicking on the ‘Run script’ button, or the ‘F5’ key. Alternatively, you can do the same from the right-click context menu.

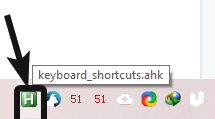
Step 6: AutoHotkey script running in the system tray as a background process
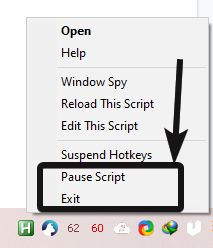
You can see the AutoHotkey script running in the system tray. The keyboard shortcuts and the task assigned through the script will keep working as long as the AutoHotkey script is running in the background. You can pause or exit the same if not necessary by right-clicking on the same, followed by choosing the appropriate option.
You can even run the scripts on Windows computers, where AutoHotkey is not installed. You will need to compile the script and create an executable file in order to do so.
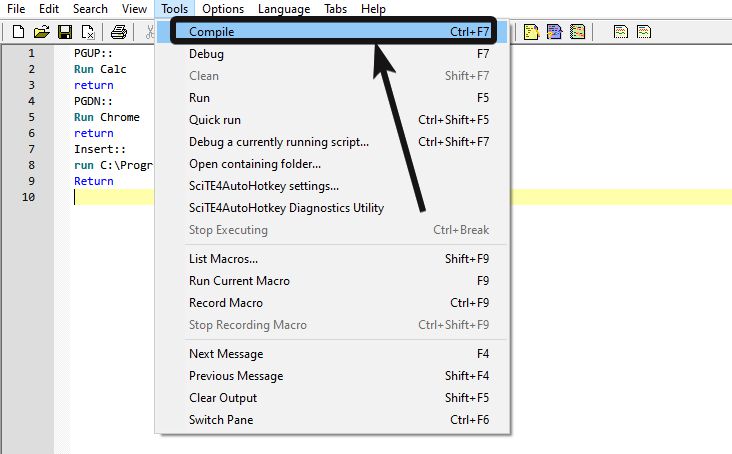
Just open the script in edit mode with SciTE4AutoHotkey. Click on ‘Tools’ and then on ‘Compile’. Alternatively, you can even use the ‘Ctrl+F7’ key combination.
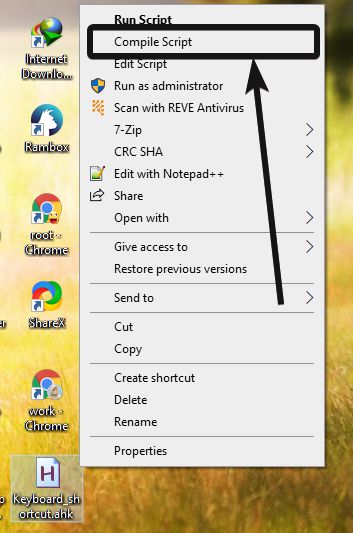
You can even compile a script by right-clicking on the script, and then by clicking on the ‘Compile Script’ option.
In both ways, the executable script will be present in the same folder as the script file.
You can even remap Esc key on Windows 10 to close the active window. Just run this script to do so.
!Esc::

SendInput !{F4}

Return
Here I have used Alt+Escape instead of the Esc key as the Esc key has its own task to close a menu or exit a program with no window controls. Nevertheless, you can only use the Esc key to close windows instead of the Alt+Esc key by removing the ‘!’ before ‘Esc’ in the above script.
What I explained in the article is just the tip of the iceberg. You can even assign mouse clicks on certain parts of the screen, assign mouse wheel movements and so on, with AutoHotkey, as well. The possibilities are unlimited with AutoHotkey.
So that was all about how you can assign any task with the help of keys on your keyboard. Do you have anything to add or say? Feel free to comment the same down below.
Related Posts
How to create email groups in Gmail? Send one email to multiple recipients in a matter of seconds.
Getting the right dashcam for your needs. All that you need to know
How to Install 7-Zip on Windows 11 or 10 with Single Command
Install Google Earth on Windows 11 or 10 Using a Single Command
How to install Gaming Services on Windows 11
How to Install Telnet Client on Windows 11 Using PowerShell