VMplayer is a popular virtualization platform for Windows, macOS, and Linux. It uses VDMK file format for VMware Virtual Disks to store all data of any virtual machine created on the VMware platform. Here we will learn how to use any existing VDMK file or virtual hard disk with VMware.
Many times to install some operating system on VMware or VirtualBox, we download the pre-built disk image files. So, if you are getting one in VDMK format that is the default supported format for Vmware, then how to use it? Because if we open it directly in the Workstation Player, an error will come up i.e VMX file is either corrupted or not found. Thus, here is the proper way to use any existing VDMK file in Player.
Add and Use existing VDMK hard disk file in Vmware workstation Player
We can use this virtual hard disk in two ways either create a new virtual machine and add the existing VDMK to it or use it in any existing VM. The method will be the same for the scenarios, the choice is yours.
1. Open VMware Player
Here we are creating a new Virtual machine for adding and using the existing virtual hard disk. Thus, open the Vmware player, click on Create a Virtual Machine.
2. Installation Source
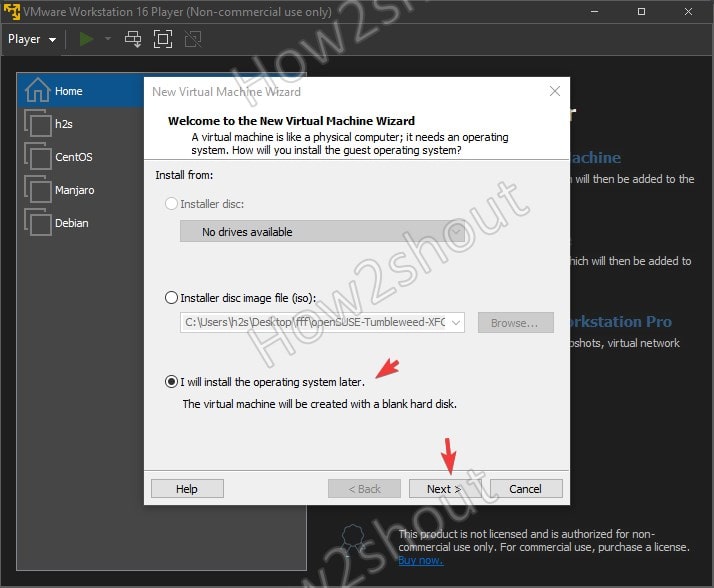
We are not going to install anything here on the new virtual machine we are about to create, thus select the “I will install operating system later” option.
3. Select a Guest operation system
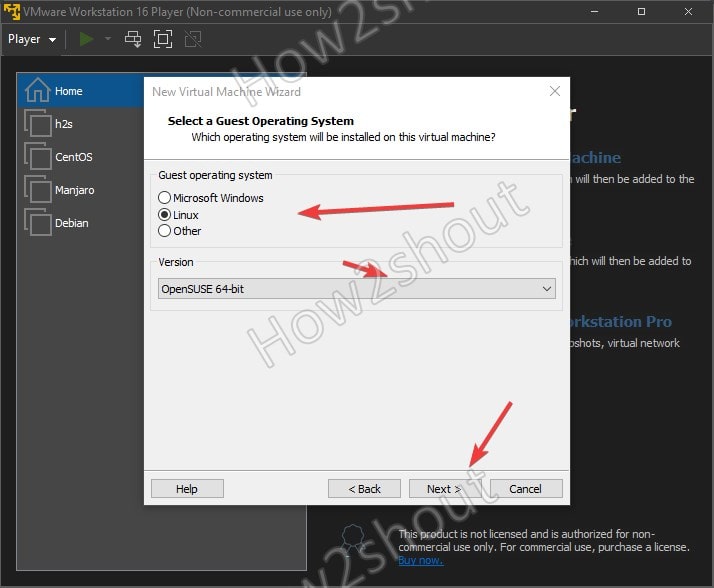
As we are creating a new virtual machine, thus select what kind of operating system you are planning to use in the VM. Here we have the VDMK file of OpenSUSE Linux, thus creating a machine for the same.
4. Create Virtual machines’ VDMK hard disk
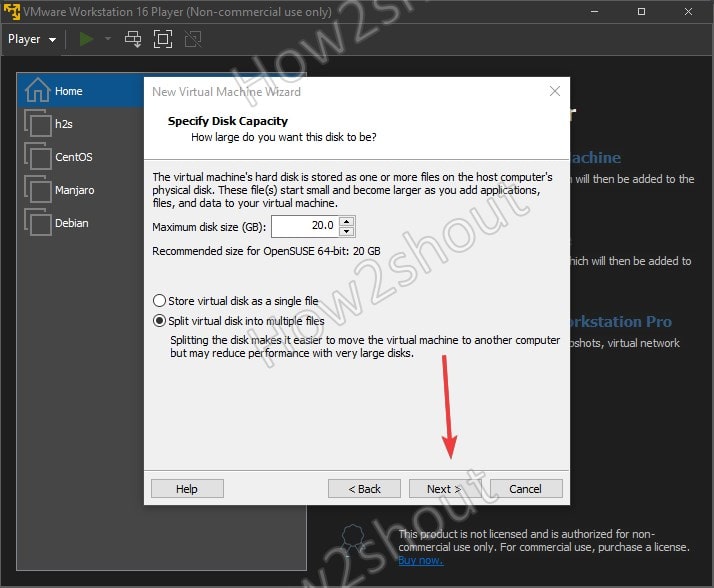
When VMware asks you to create a new storage disk, then leave the default value for space as it is and just create it. Because later we will remove it from our machine.
5. Edit Virtual Machine Settings
Select the newly created virtual machine by you from the interface of the Vmware player showing under the Home area and select the “Edit virtual machine Settings” option.
6. Add New Hardware
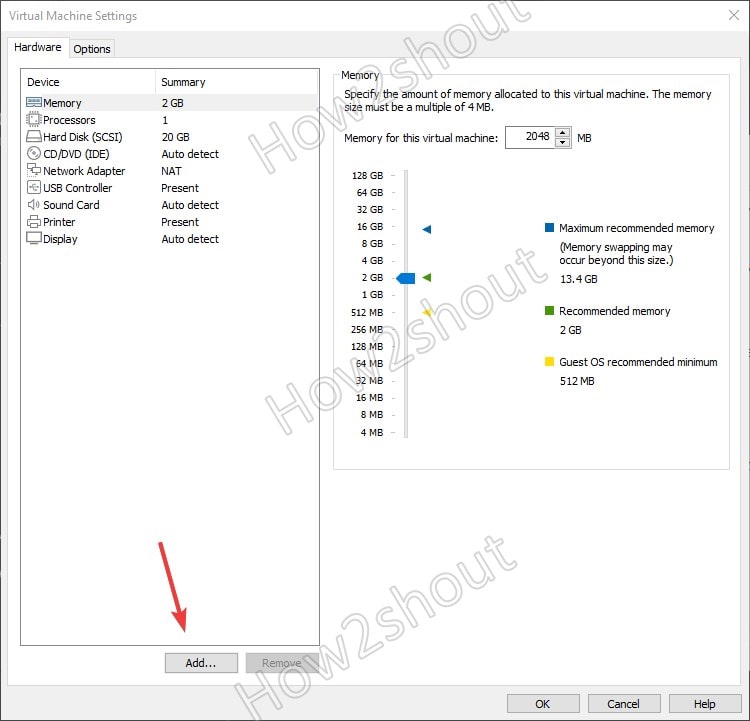
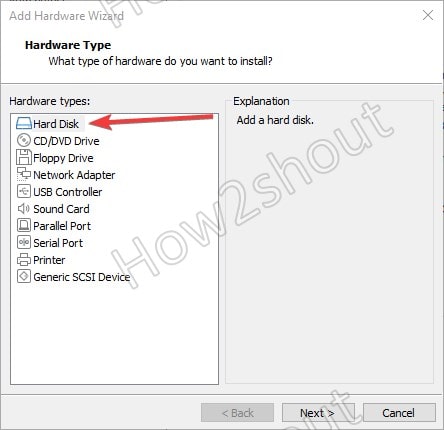
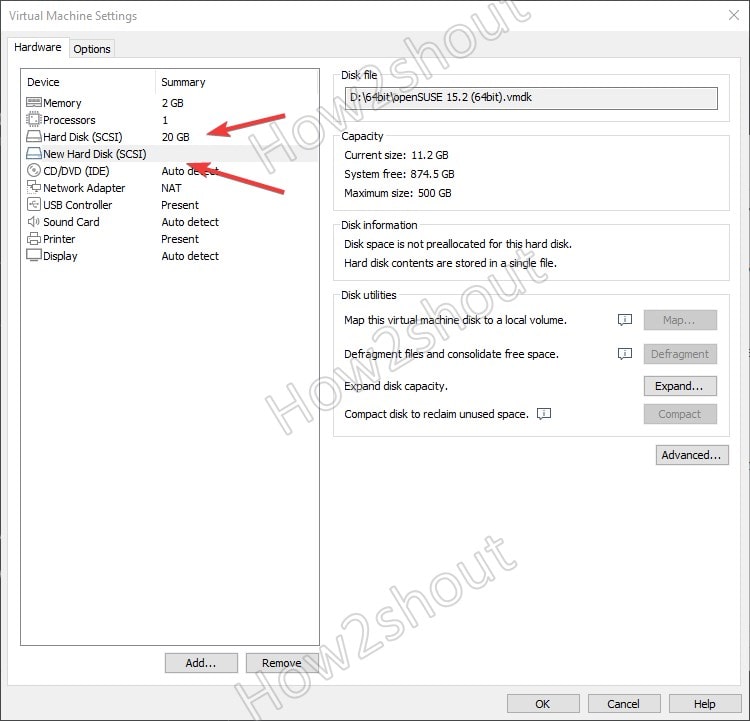
You will see a 20 GB hard disk (SCSI) already attached in the Summary area of the Virtual machine, well we don’t want that instead, we want to use our existing VDMK file. Thus, click on the Add button to attach a new Hard disk drive.
7. Select a Disk Type
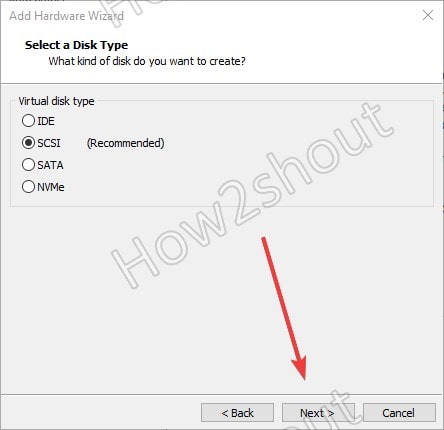
By default the type of Virtual disk to add to the VM is SCSI, selected. You can change that to some other as well. However, here we are going with the recommended option.
8. Use existing VDMK hard drive file
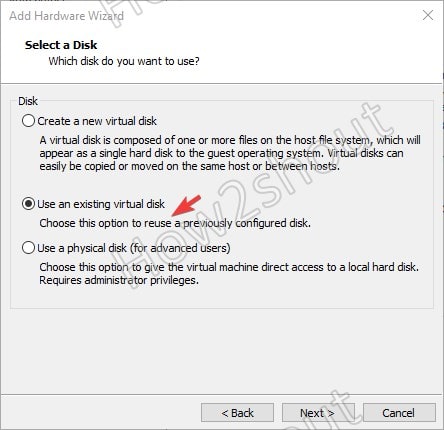
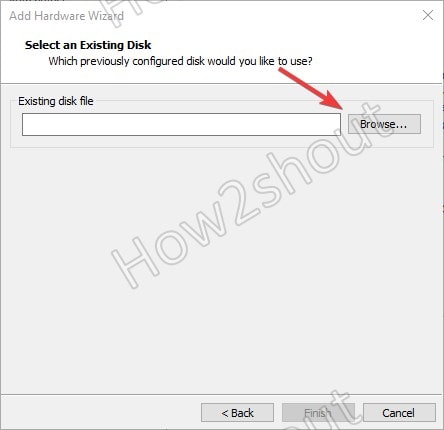
Now, here is the main task to do. Select “Use an existing virtual disk” to get an option for selecting files available directly on your local or remote drives.
Now click on the Browse button, file explorer will open, select the VDMK file of the OS you want to use with your machine.
9. Remove Hard disk
This step could be optional, however, then you have to set the boot priority of the virtual machine you have created that would be a little difficult for newbies.
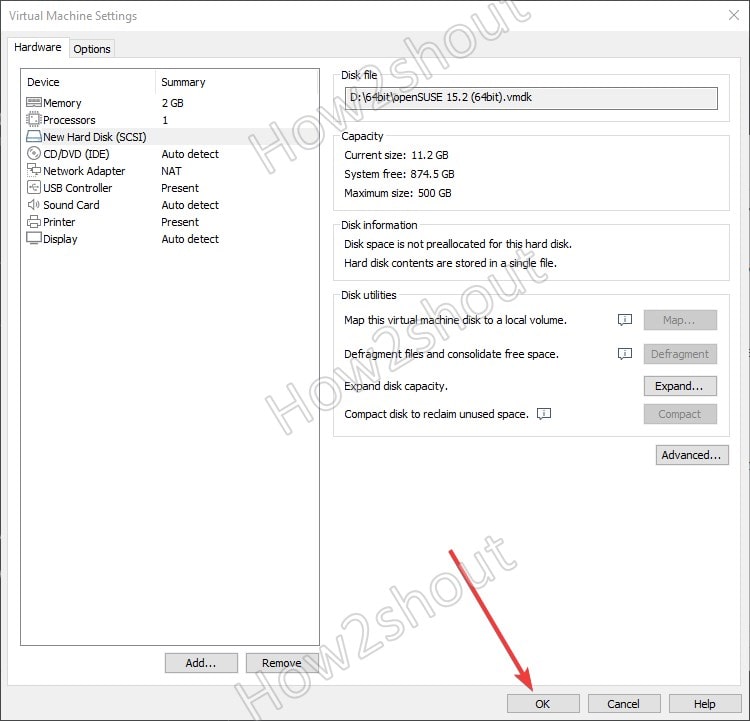
Thus, it would be a great idea to remove it. For that simply select the 20 GB Virtual hard drive we have created at the beginning of the article and hit the Remove button.
That’s it. You have successfully attached an existing VDMK virtual hard drive to your newly created virtual machine.
10. Start Virtual Machine
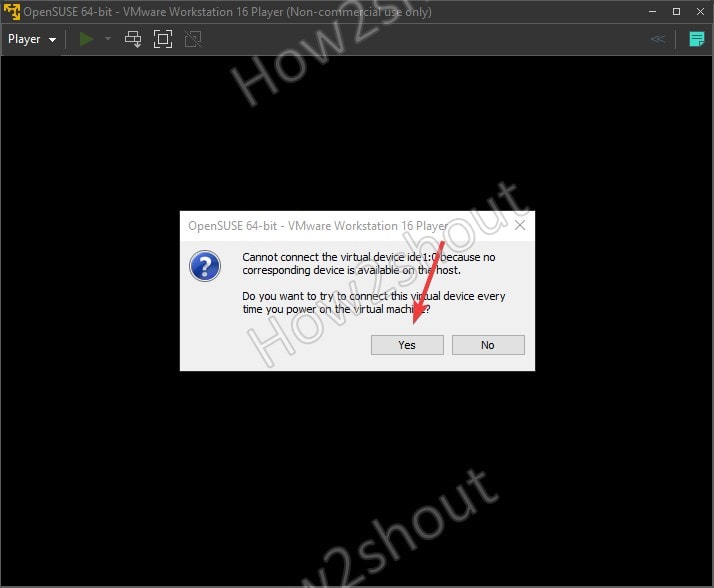
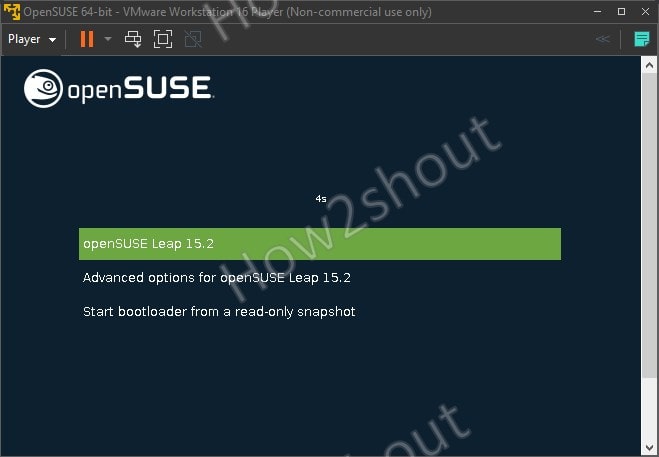
Now, start the created virtual machine, you may see a message that, virtual device ide1:0 cannot connect. It is because we have removed it. However, don’t worry simply select the “yes” option and every time the machine will boot with the attached existing VDMK Virtual hard disk.


Related Posts
How to create email groups in Gmail? Send one email to multiple recipients in a matter of seconds.
Getting the right dashcam for your needs. All that you need to know
How to Install 7-Zip on Windows 11 or 10 with Single Command
How to Install ASK CLI on Windows 11 or 10
How do you install FlutterFire CLI on Windows 11 or 10?
How to create QR codes on Google Sheets for URLs or any other text elements