Python is a well-known programming language when it comes to solving Data Science related problems. It helps in easing down the work of Data Science with the help of its fast execution of codes because of its built Object-Oriented Programming but, there is a problem with this language as well.
Many Pythonists find it difficult to access the correct Python version because of too many Python versions present in their computer system. Due to this, they face problems in downloading the necessary packages in the correct Python version they want.
This leads to many problems in code executions as well as creates confusion for the computer to throw which version at what time.
Now, the question arises of how to resolve this issue and how to add the desired Python version say 3 as the default version on Windows 7/10/11.
The answer to this question is simple and given below. Just make sure that you have 2 or more 2 Python versions downloaded in the system to follow these steps of fixing the issue.
Steps to Change the Default Python Version on Windows 10/11 to Python 3
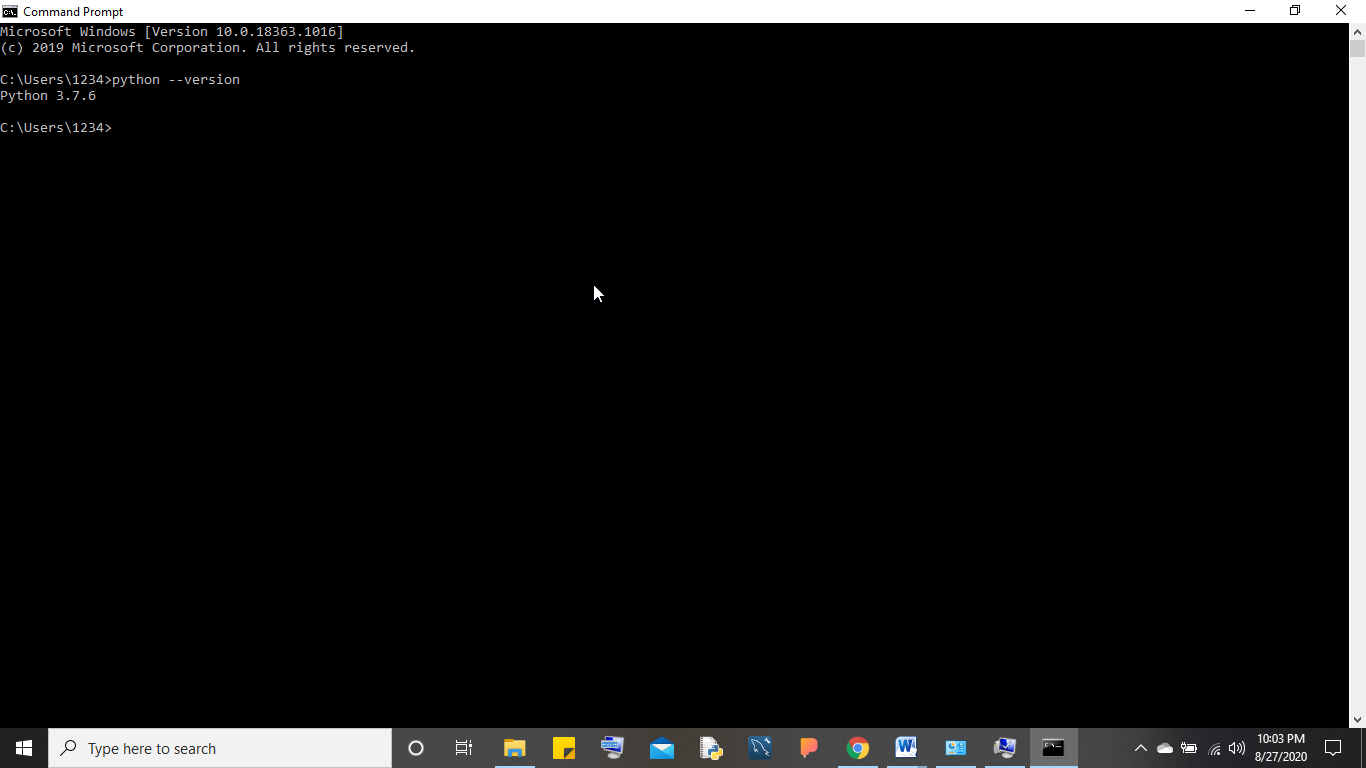
- Open your command prompt and check the current Python version the system is using. This will help you get to know which version you are using right now and with which version you want to replace the same.
python --version
- After checking the Python version find the path of your Python versions that will be present most probably in C Drive under the Program Files folder.
- Open the Program Files folder and locate your Python versions. After locating the same click on the versions and copy the path of the scripts folder of all the Python versions installed.
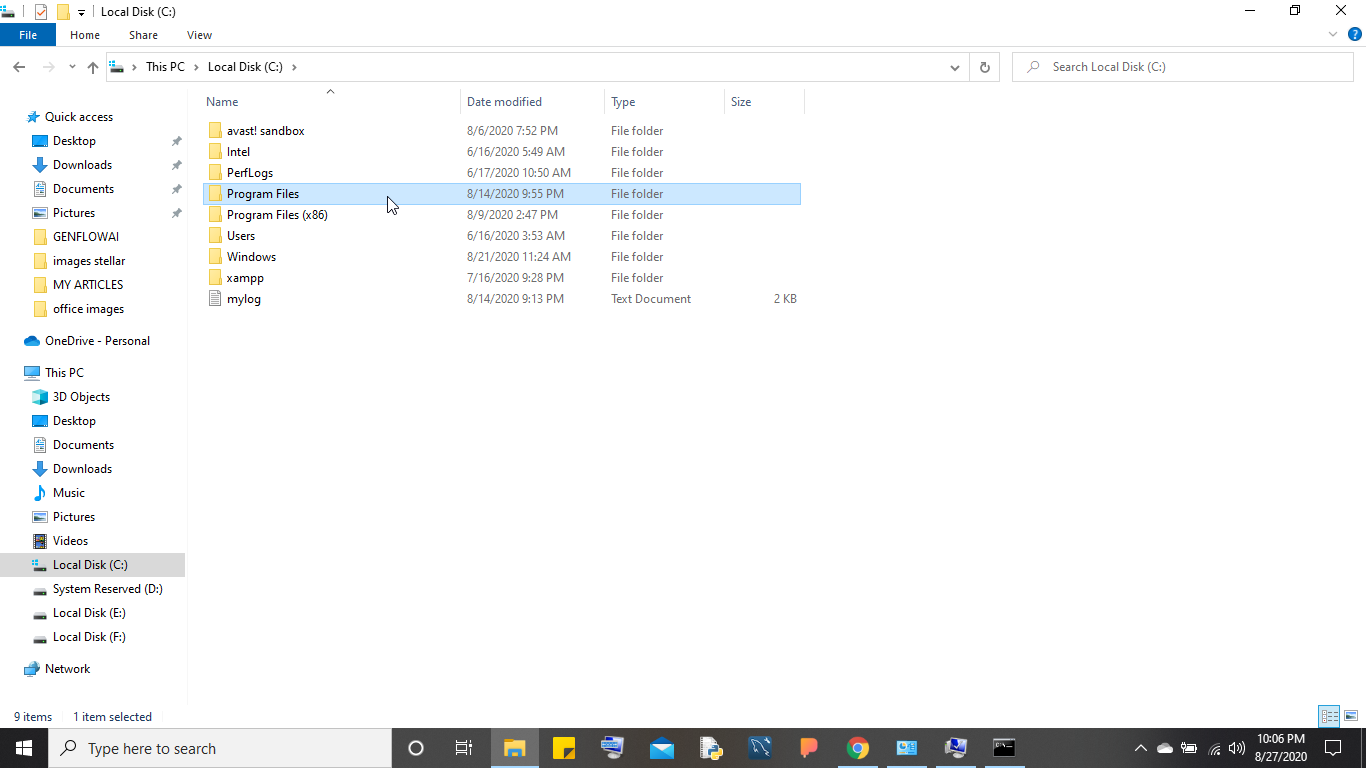
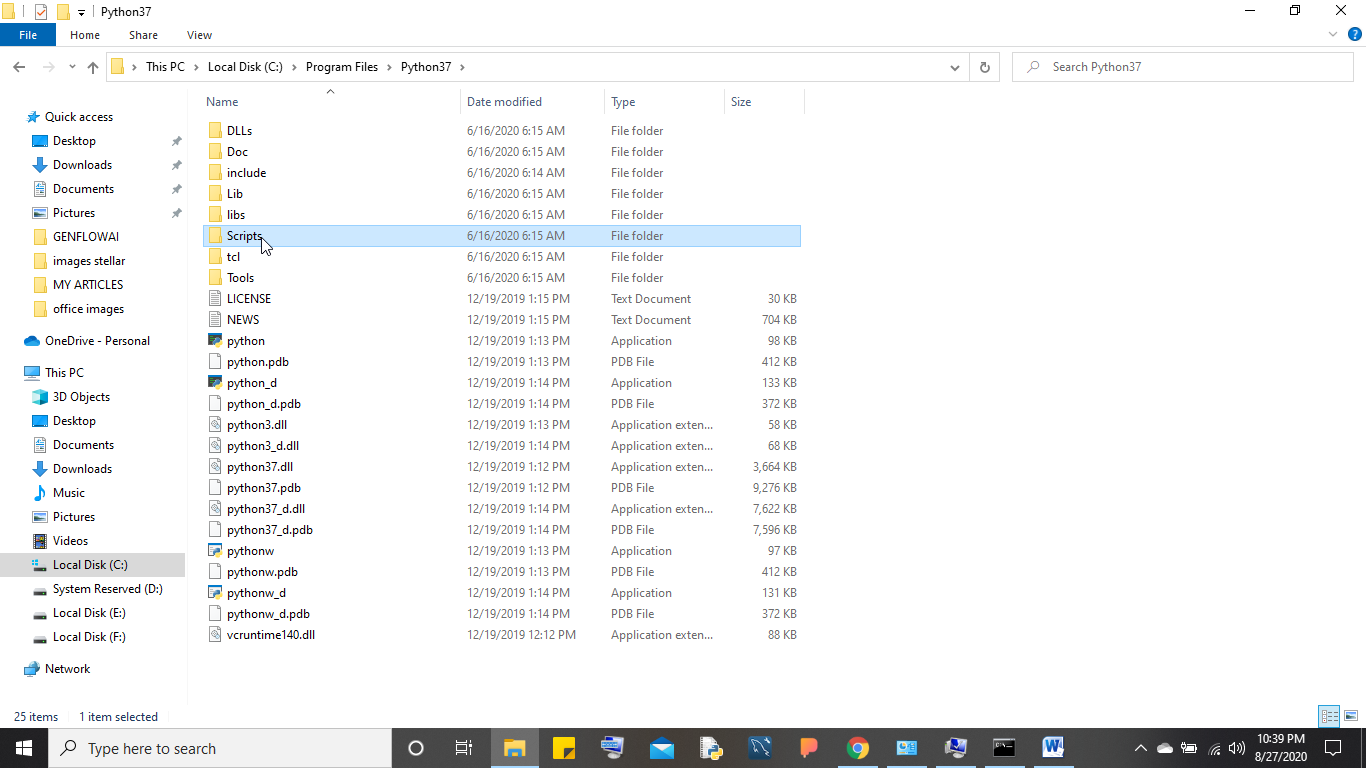
- Also, copy the path of the Program Files being present in C Drive.
- Once the paths are copied the next step is to locate your Environment Variables for the computer. This can be done by right-clicking on the “This PC” option of your computer and clicking on the Properties option. After clicking on the same click on Advanced System Settings under the Properties option.
- Once done, a pop will come on the screen displaying various options out of which you need to click on the Environment Variables option. The Environment Variables will open up for you and you can see all the system variables present there.
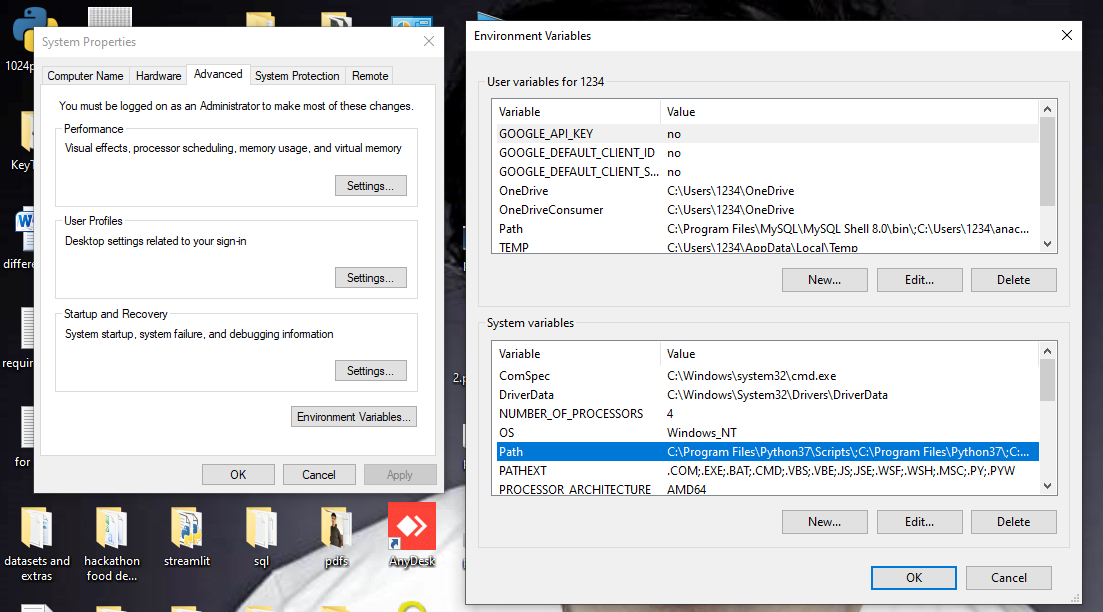
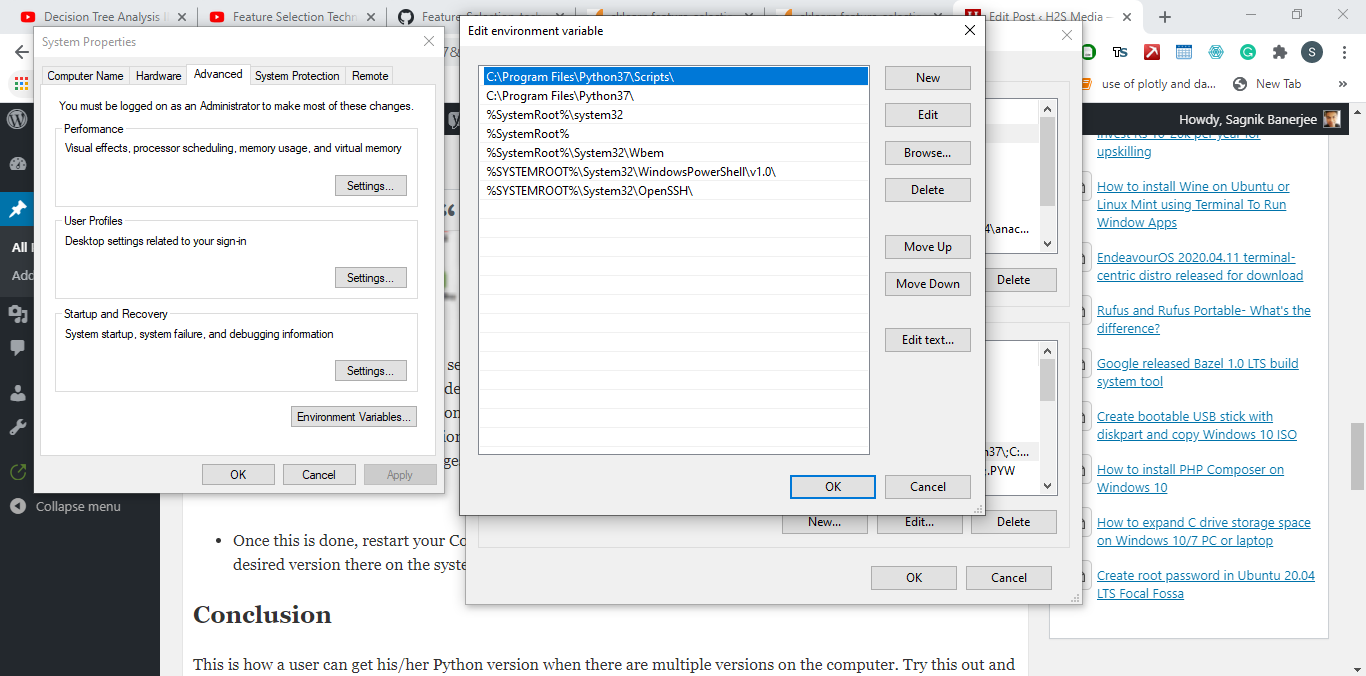
- The Environment Variablsegregatedgintendednto two different parts that are User Variables and System Variables. Just locate the Path option under the System Variables and click on the same.
- After clicking on the Path option make sure to put the Scripts and Program Files path of different Python versions that you currently want to use and work in, and where you want to store all your necessary packages should be put first followed by others. Simply, click on the Browse button and select the path of the Script folder and the Python3 itself.
- Note: Remove any other Python Version available in the System variables, for example, Python2. Select its path and click on the Delete button.
- Press the OK button to save the changes in the Windowgovernmentalentaltal Variables.
- Once this is done, restart your Command prompt and again type
python --version. Now you will find the desired version there on the system and ready to be usable by the coder.
Conclusion
This is how a user can get his/her Python version when there are multiple versions on the computer. Try this out and start coding with your desired version.
Related Posts
How to create email groups in Gmail? Send one email to multiple recipients in a matter of seconds.
Getting the right dashcam for your needs. All that you need to know
How to Install 7-Zip on Windows 11 or 10 with Single Command
Install Google Earth on Windows 11 or 10 Using a Single Command
How to install Gaming Services on Windows 11
How to Install Telnet Client on Windows 11 Using PowerShell