Saving our programming work to access it anytime can be done through many services like saving inside the computer containing separate folders, saving the work in DropBox, Google Drive, and many more. But what if we get a place that is specially meant to save our codes and helps us access the same without any kind of hassle??
Yes, it is possible with a special service of Version Control System called Github. This is a cloud-based service where one needs to create his/her account first and then create different repositories where he/she will be able to save coding related work. People all over the world are using Github as the standard code saving platform because of the huge vault size that this cloud platform provides. Any code related to any programming language can be saved in Github whether Java, R, C#, C, Python, and many more.
The main thing is to create a repository and then commit the changes within this repository. Now coming to Python, Pythonists all over the world do know how to save their work in this Version Control System using the Git command prompt or the command prompt that comes inbuilt in the computer but, there is one more way to upload your work in Github using the Google cloud-based service that is, Google Colaboratory. Let’s take a deep dive and understand how to save our work in Github using Google Colab:
Pre Requisites before Starting
- A working Github account must be there.
- Google Drive account must be there and signed in to access the Colab from the same.
- Internet connection must be proper.
Steps to use Colaboratory for uploading Python files to Github
- Open Chrome and type Github.com and then enter your login credentials.
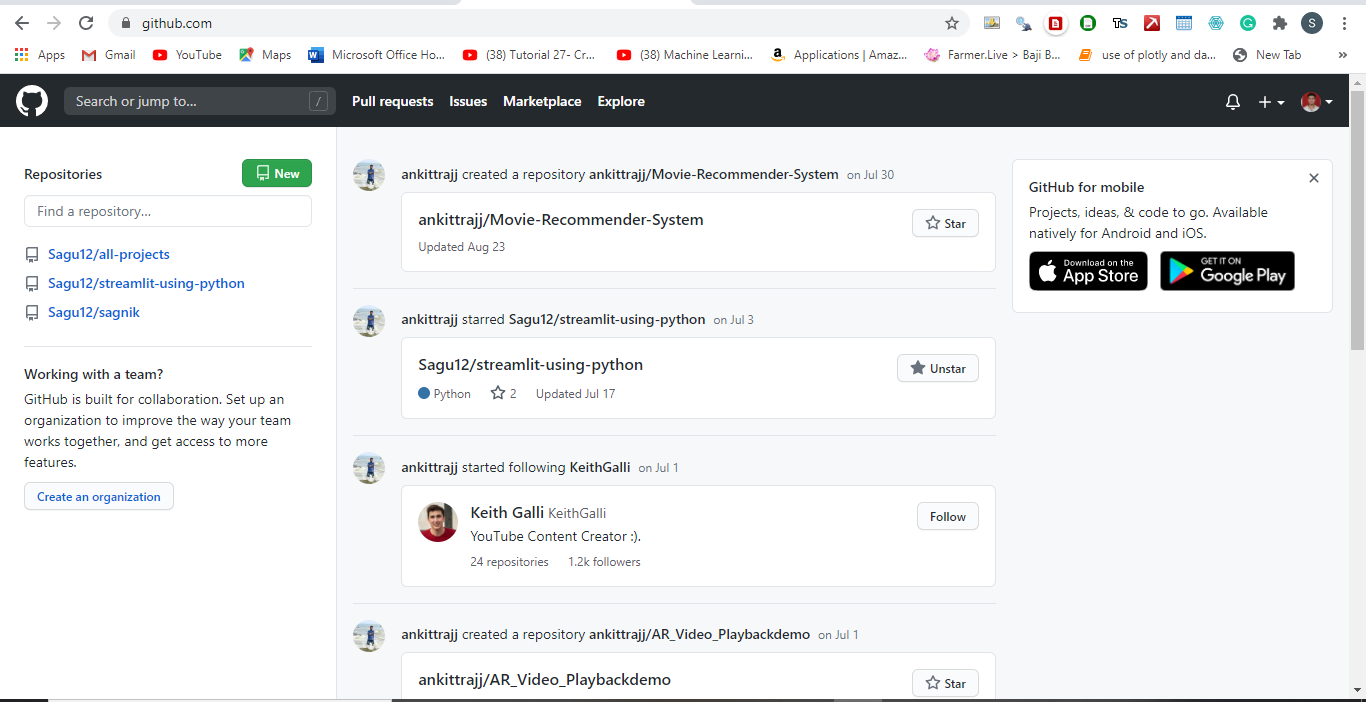
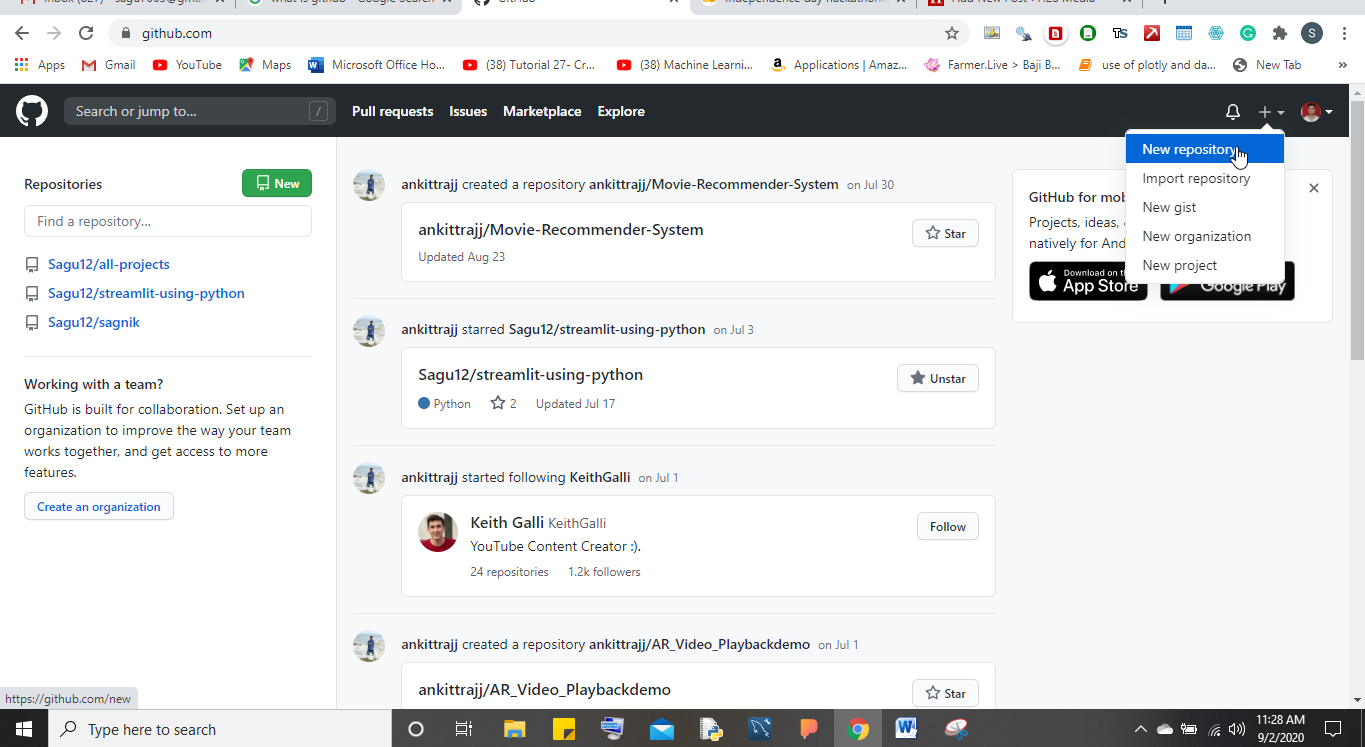
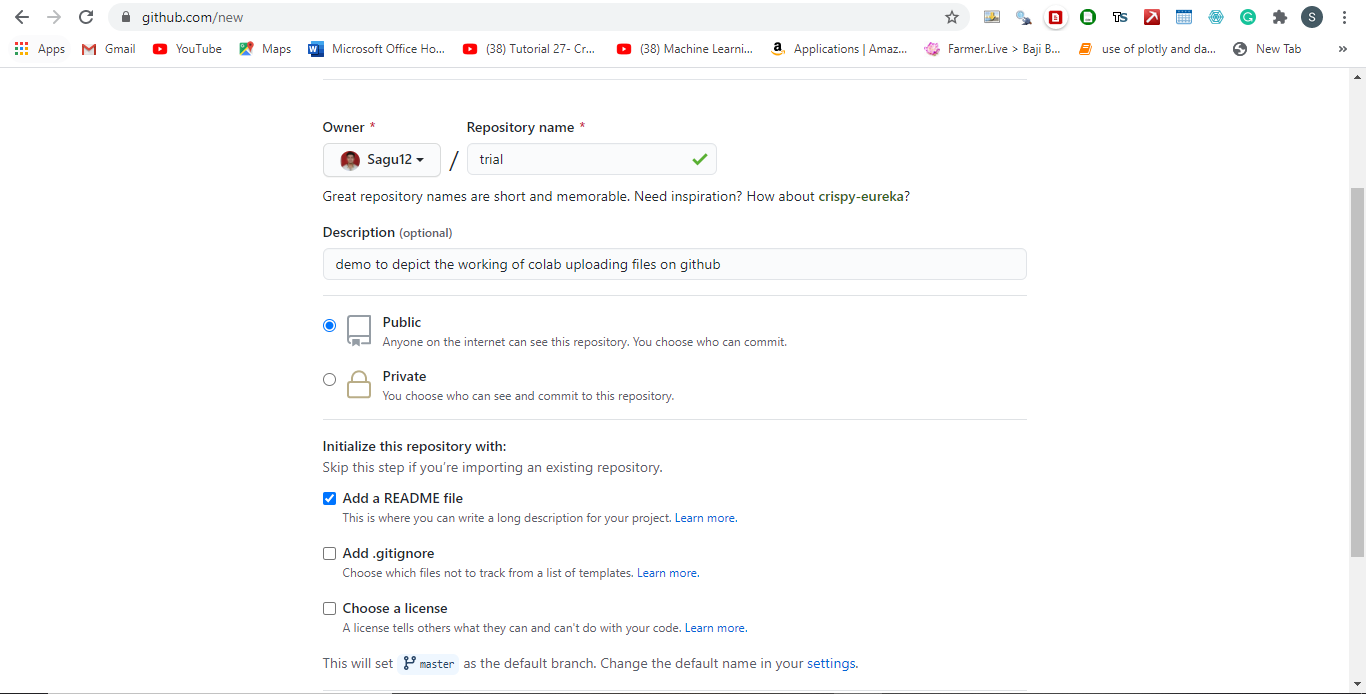
- Once done create a fresh repository in Github along with the README file.
- Now type Google Colab on the Chrome browser and open your Colab account.
- Create a new IPYNB file and save the changes.
- Now at the top left-hand side of the menu bar, you will see a File option. Just click on the same and read the Meta options contained within File.
- Here you will find various uploading and saving options out of which you will get to see two Github options i.e., save it as a Github Gist or in the Github Repository.
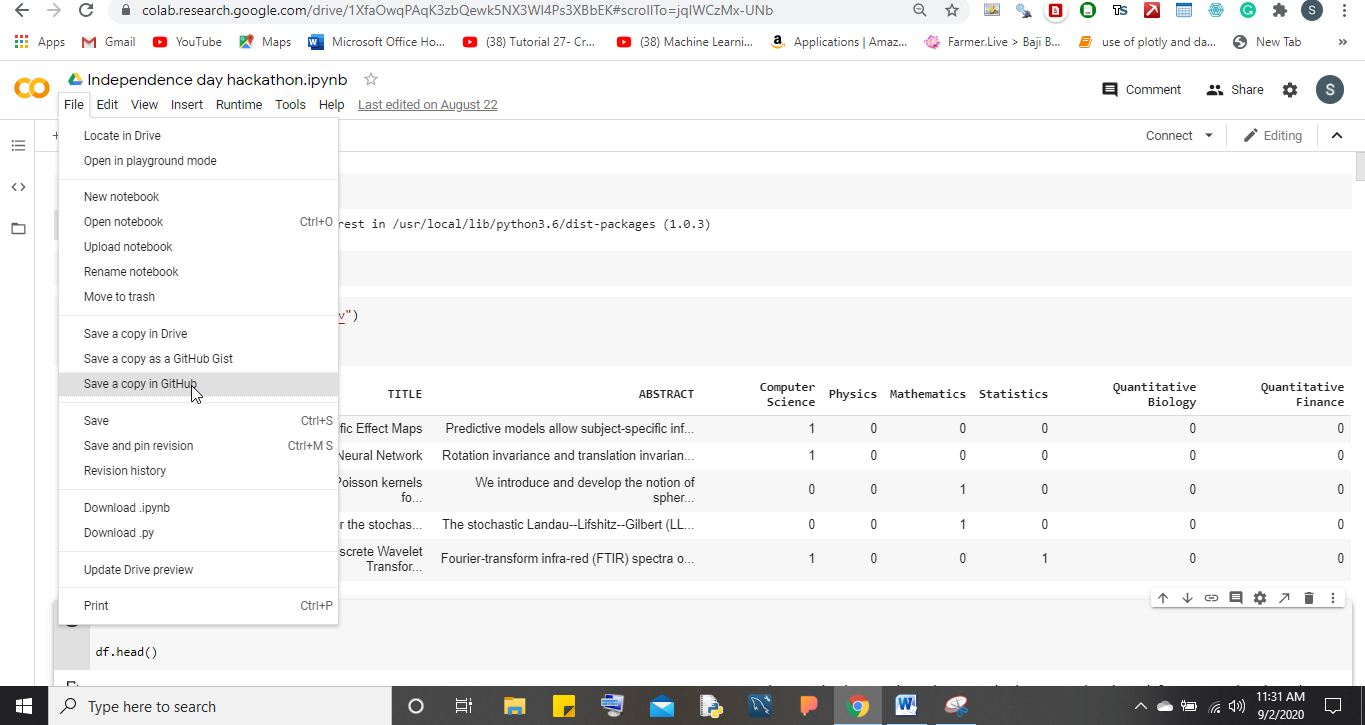
- The difference between Gist and Repository is that in Gist we don’t create folders for saving our work and we can instantly show our work to the world. But, in the case of Repository, we need to create separate ones for our work. Also when it comes to safety then Repository is much safer than Gist and also maintains the data differentiation.
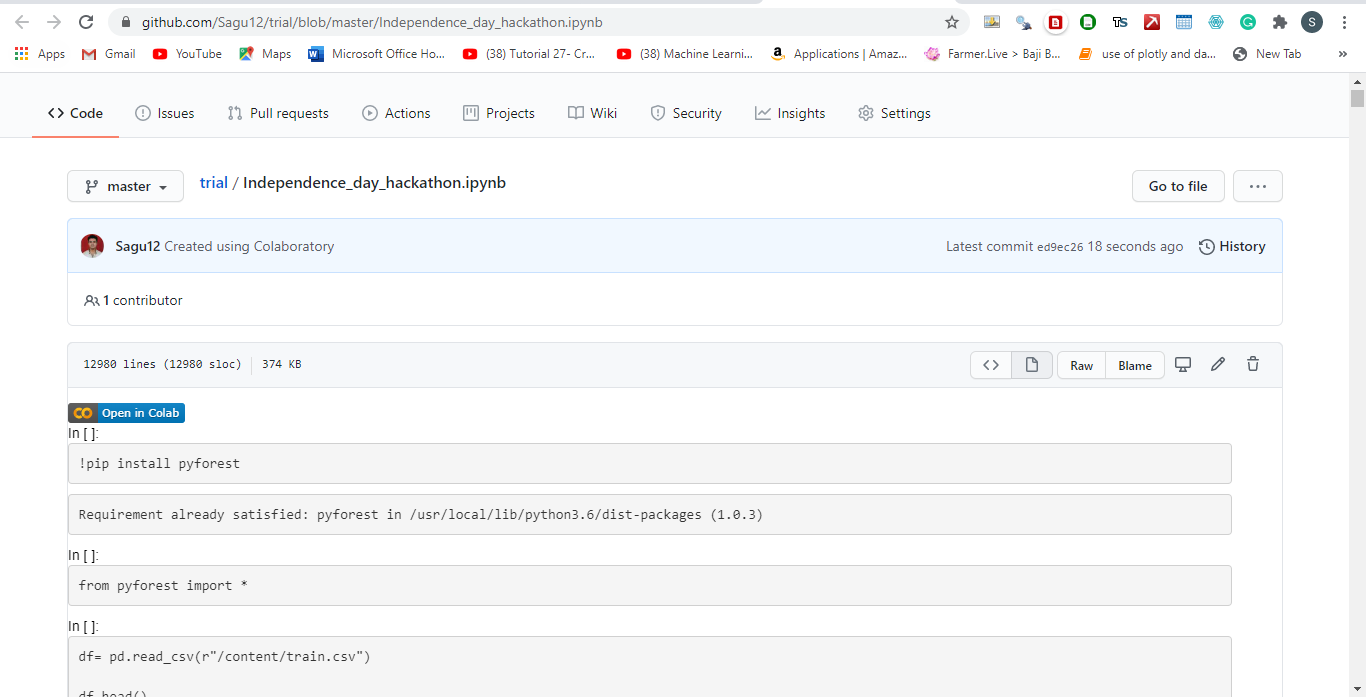
- Select the option of saying save a copy in Github. A popup screen will come on the screen asking for the Repository where you want to save your work and will also ask whether you want to show a Google Colab link on top of your work so that users can access the same. Select your desired options and then click ok.

- Once done, then wait for the file to get uploaded in Github. Congratulations as you have successfully uploaded your work and can view the same anytime and anywhere you want.
Conclusion
So, this is how one can upload his/her work in Github using Colab. Also, this is a very handy tool to upload your work without doing any kind of hardcore coding stuff.
Related Posts
How to create email groups in Gmail? Send one email to multiple recipients in a matter of seconds.
Getting the right dashcam for your needs. All that you need to know
How to Install 7-Zip on Windows 11 or 10 with Single Command
How to Install ASK CLI on Windows 11 or 10
How do you install FlutterFire CLI on Windows 11 or 10?
How to create QR codes on Google Sheets for URLs or any other text elements