Learn the steps in the guide to download and how to install Apache Maven on Windows 10 or 111 using PowerShell or a Command prompt.
Maven is based on a model-based, declarative approach to realizing the build process. Instead of implementing the individual build goals. With the “Apache Maven” tool, the building management of software projects becomes significantly more efficient, secure, and transparent.
Especially when proceeding according to the continuous integration model, a software project requires a permanently stable version of the code. With the Maven build tool, you can automate the process of creating a stable build version.
The process follows a fixed cycle that you can adapt to your specifications, i.e. you do not have to fully integrate it. However, it is particularly advisable to include all components in distributed project teams. The process is configured using so-called POM files. These are XML files that define the process and dependencies.
In addition to tests, dependency resolution, and of course compiling, you can always monitor the current build status thanks to Maven. In this way, you and other developers always know the quality and completeness of the current version.
Steps to install Apache Maven on Windows 10 or 11 via command
1. Open Powershell or Windows Terminal
As we are here going to use the pure command-line method to download and install Apache Maven, hence as per your Windows system run the command-line app under administrative rights.
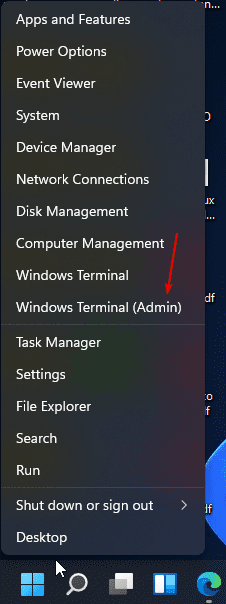
To run the CLI app, simply right-click on the Windows Start Menu, and then on Windows 10, you will have PowerShell (Admin) to select whereas the Windows 11 user will get Windows Terminal (Admin), by default.
2. Install Chocolatey on Windows 10/11
Now, simply on your Windows terminal or Powershell, copy & paste the below-given command, and hit the enter key. This will install the Chocolatey package manager on your system.
Set-ExecutionPolicy Bypass -Scope Process -Force; [System.Net.ServicePointManager]::SecurityProtocol = [System.Net.ServicePointManager]::SecurityProtocol -bor 3072; iex ((New-Object System.Net.WebClient).DownloadString('https://community.chocolatey.org/install.ps1'))
Once the installation is completed, close the Powershell (Admin) or Terminal (Admin) and open it again.
3. Command to Install OpenJDK
As we know Apache Maven needs Java, as it is the only key system requirement to run this tool properly on your system. Hence, if you already have JAVA on your Windows system then you can skip this step. However, make sure the Java_Home path is in your system environment variable. If you don’t have JDK, then run the below-given command:
choco install openjdk
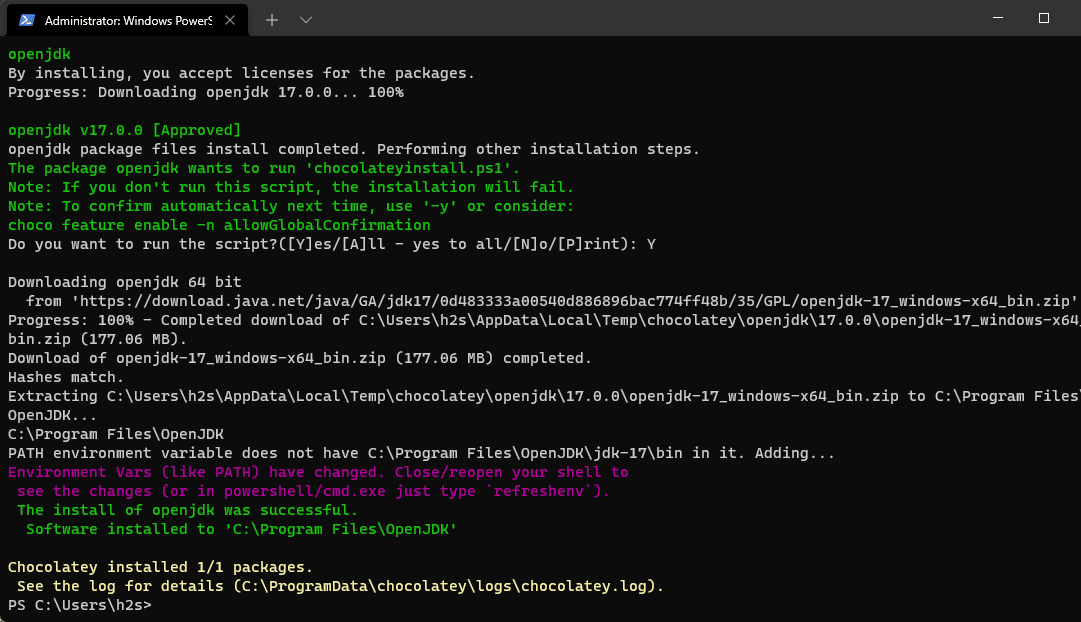
Once the process is completed, close the PowerShell (admin) or Windows terminal (admin) you are using and open it again so that it can recognize the Java path.
4. Download & Install Apache Maven on Windows 10/11
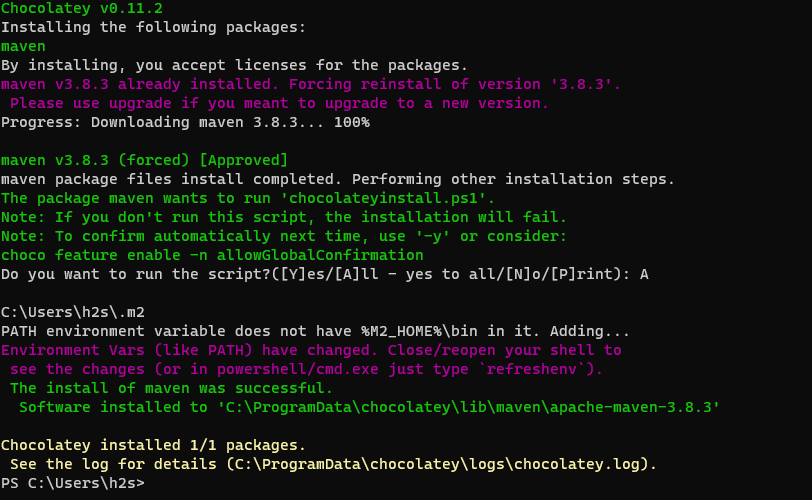
Now, run the final command that will automatically download and install the Apache Maven on your Windows system without any struggle. This will also recognize the installed Java and its environment variable.
choco install maven
5. Check the Maven version or command
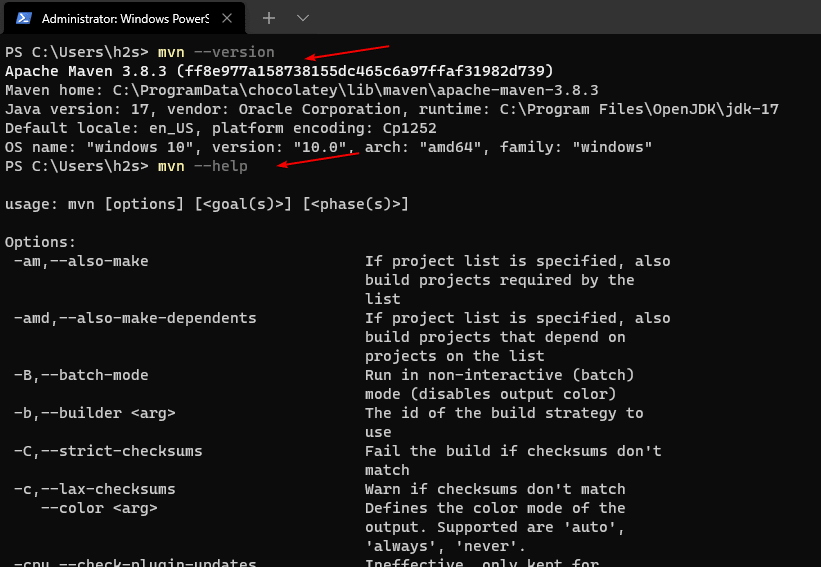
First, after the installation, restart your Windows Terminal. Then to check whether the Maven has been installed on our system successfully or not and to know its version you can go for the following commands.
mvn --version
mvn --help
6. Create your first project
Well, those who are familiar with Maven would already know what to do for creating a project, whereas the new ones can check out the official Apache Maven website to know more to fiddle with it around. Nevertheless, just to give an idea of how to start with this tool, here are the commands:
Create a project
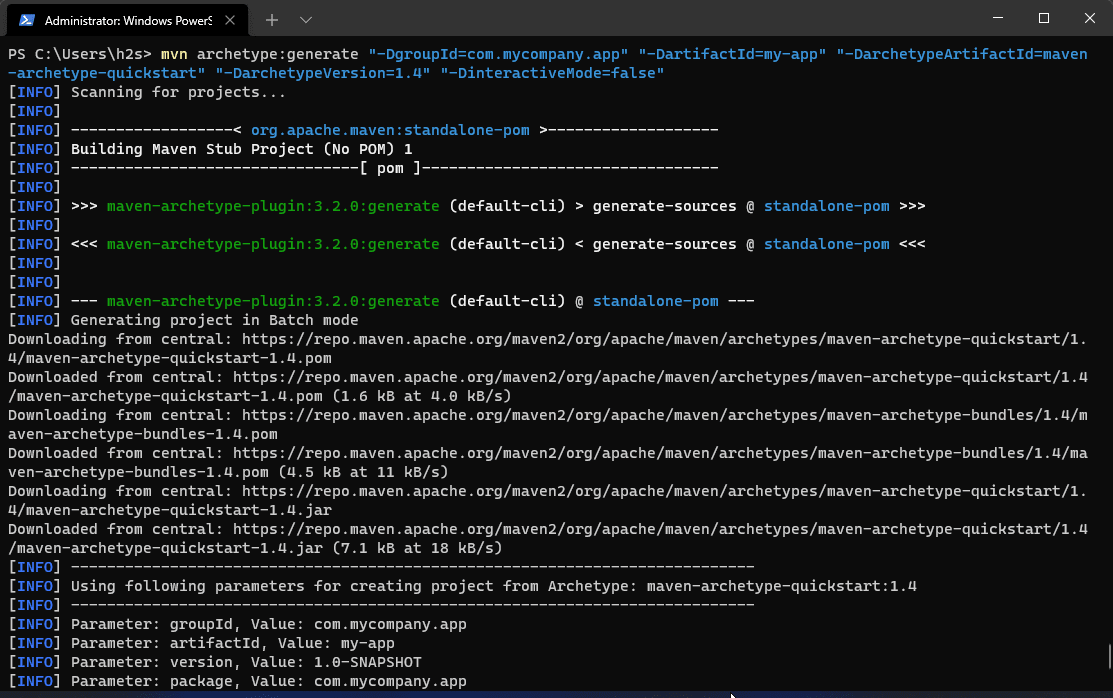
Paste the given commanding your terminal. You replace the group ID, artifact ID, and other values as per your choice.
mvn archetype:generate “-DgroupId=com.mycompany.app” “-DartifactId=my-app” “-DarchetypeArtifactId=maven-archetype-quickstart” “-DarchetypeVersion=1.4” “-DinteractiveMode=false”
Note: In Windows, we have to use every parameter inside quotes otherwise you will face the following errors:
[ERROR] The goal you specified requires a project to execute but there is no POM in this directory (C:\Users\h2s\raj). Please verify you invoked Maven from the correct directory. -> [Help 1]
[ERROR]
[ERROR] To see the full stack trace of the errors, re-run Maven with the -e switch.
[ERROR] Re-run Maven using the -X switch to enable full debug logging.
[ERROR]
[ERROR] For more information about the errors and possible solutions, please read the following articles:
[ERROR] [Help 1] http://cwiki.apache.org/confluence/display/MAVEN/MissingProjectException
Switch to your App directory: Here is my-app
cd my-app
For further information, please see the official documentation on the building of the Maven project.


Hallo..thanks for the article.
In step 5 – to verify that maven works, maybe it would help a bit if you added something like “after installation restart Windows Terminal before running the mvn –version or mvn –help commands”.
Thanks again for the article..it was helpful.