The Microsoft has enabled lots of good options for developers to ease their work by featuring the Developer option in the Windows 10. One of such features is a native support to OpenSSH client and server in the Windows 10 Fall creators update. The Windows 10 OpenSSH client and server features are still in beta stage.
The OpenSSH in Windows 10 allows you to directly connect to remote servers using command prompt or PowerShell without the need of any third party software.
As it is still in beta stage, so be sure that you are using it for testing purpose in a secure network.b As per one GitHub report the OpenSSH in Windows 10 still has bugs so if you need something for production you can use the PuTTY. It is one the oldest and steals strong program to establish a Secure Shell (SSH) connection over the unsecured network.
If you have metered the Windows update, so be sure before performing this tutorial your Windows 10 is fully updated.
To check the updated before moving further go to Settings then Update & Security after that click in Windows Update to check for any new available Updates.
Install the Windows 10 OpenSSH Client
There are two methods to install the OpenSSH client one is using the Windows 10 graphical method and second is via Powershell command line.
#Enable Developer Mode in Windows 10
Step 1: Under Windows update setting you will find an option called “For Developers”, click on that.
Step 2: By default, the Developer setting is set for “Windows Store apps” but we need to select the “Developer Mode”

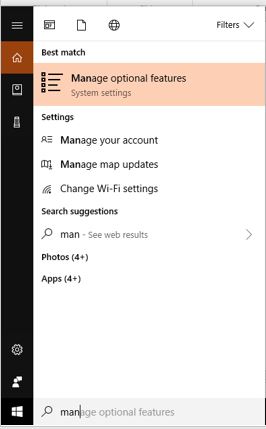
Step 3: Now search for Manage Optional Features
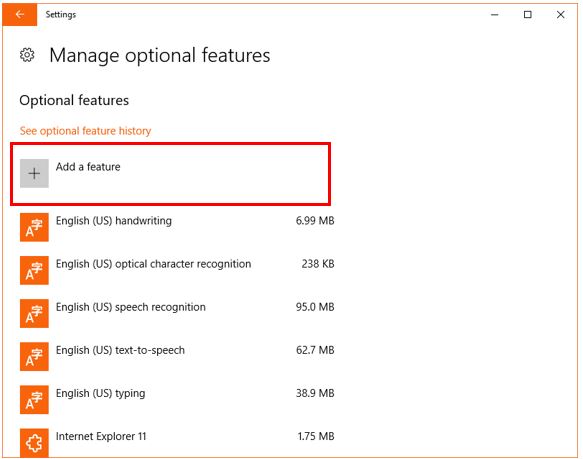
Step 4: From Manage Optional Features, click on Add a Feature and look for OpenSSH Client.
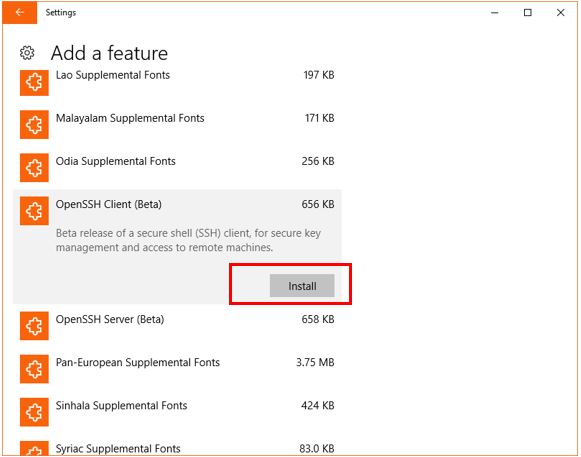
Step 5: Click on Install to add the OpenSSH to Windows 10.
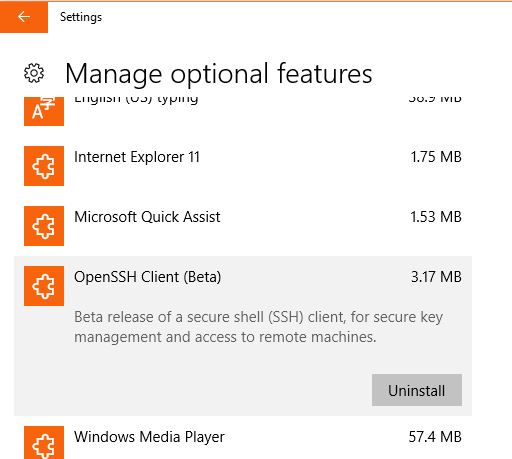
Step 6: After installation, you can uninstall the Windows 10 OpenSSH client from the same place, if you want in future.
#Enable Native Windows 10 OpenSSH using Powershell
If you are familiar with commands then you can enable the OpenSSH using the Windows 10 Powershell command line.
Step 1: Search for Powershell or just use the shortcut Windows + X and run Windows Powershell Admin.
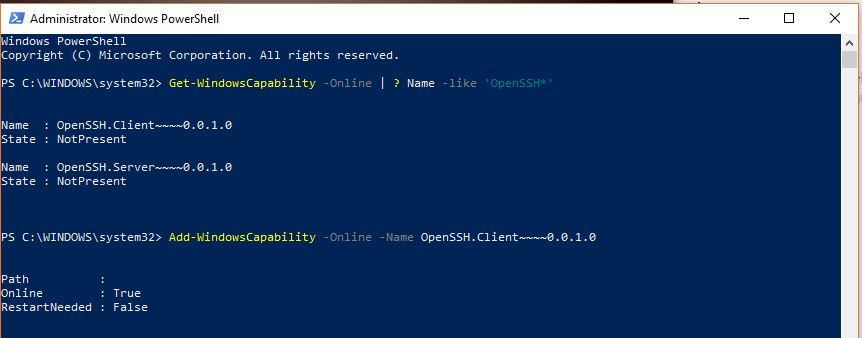
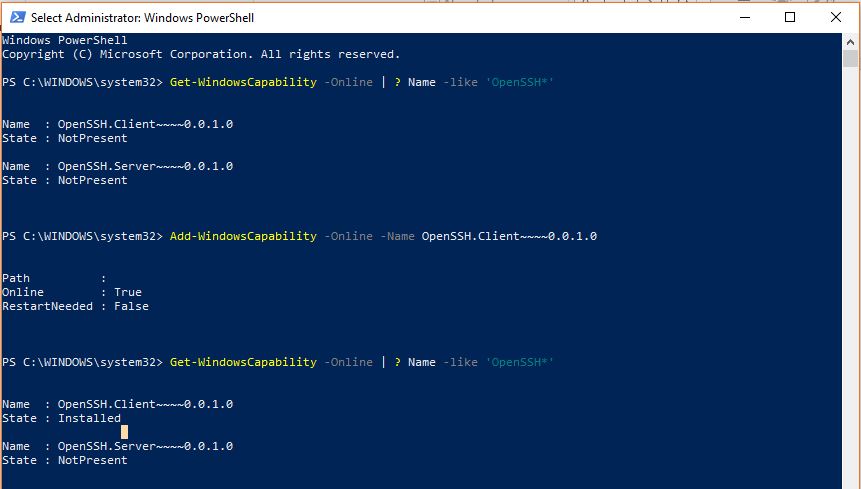
Step 2: Run the following command to check the status of OpenSSH client.
Get-WindowsCapability -Online | ? Name -like 'OpenSSH*'

If you are getting the status NotPresent that means the OpenSSH is not enabled on your computer so far and now move to the next step.
Step 3: To install the Windows 10 OpenSSH client run the following command.
Add-WindowsCapability -Online -Name OpenSSH.Client~~~~0.0.1.0
Step 4: Again run the step 2 command to check the status of the OpenSSH. And this time you will get the status in return for the OpenSSH client is Installed.
Step 5: Now you can natively connect to the remote server using the Windows 10 native OpenSSH. You can use the command prompt or Powershell to run the SSH commands.
For example:
In the above command, the test is the user and test.com is the domain you want to connect via SSH. By default, the port number for SSH is 22 and if you want to use some other port number then use –P followed by the custom port no.
For Example
ssh [email protected] -p 55555


thank u so much