The easiest method to connect and manage Amazon (AWS) Elastic Beanstalk instances via SSH Command line from Windows, Linux or macOS.
Elastic Beanstalk is one of the many services provided by Amazon Web services (AWS). It is meant to provide a cloud platform where administrators and developers can easily deploy their codes or apps with automation. It provides scalability, monitoring, supports to Go, Java, .NET, Node.js, PHP, Python, and Ruby.
We already have done a tutorial where we had discussed the way to install WordPress on AWS Elastic Beanstalk. While implementing any project on Beanstalk, we definitely get a situation where we need to connect Elastic Beanstalk instance command line. Although we can use AWS official EB CLI tool that one needs to set up to connect Beanstalk. We tried to use that and it was cumbersome for use, thus we decided to use SSH to connect Elastic Beanstalk. Here we have explained the same step by step, in case someone wants to try it out.
1: Go to Elastic Beanstalk EC2 Instance
I am assuming that you already have created or in the process of creating an environment for your Beanstalk app. So, to use SSH, first, we need to create a private key. That will use to authenticate the instance from a remote SSH tool like putty.
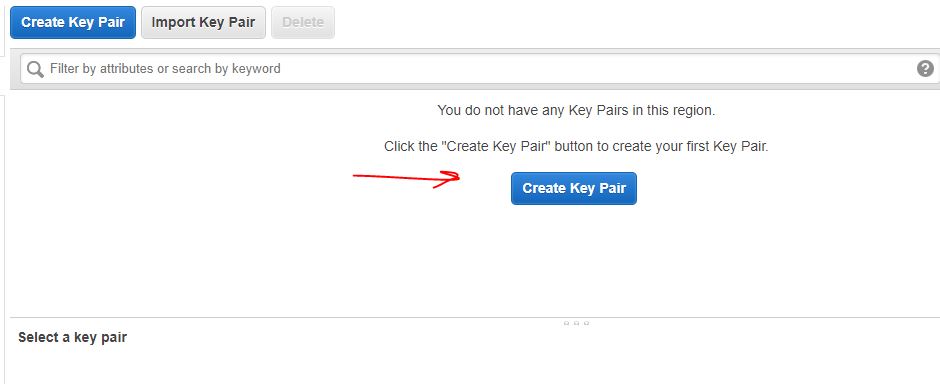
Go to EC2 Home, on the left side pane scroll down to find out Network & Security services. Click on Key Pairs option given under that.

2: Creating a Private key for SSH
On the Key Pairs page, you will see an option “Create Key Pair” click on that.
Give some name to your Key. It could be anything you want. Here we are giving it a name: H2stestkey
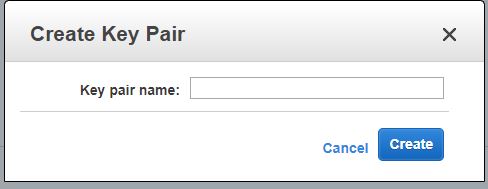
The moment you will click on the Create button, a pop-up will appear to download the created private key on your local system. Store it somewhere safe because we are going to use it later to connect to BeanStalk.
3: Access BeanStalk environment Configuration

Now, go to Elastic Beanstalk and click on your created App’s environment, on the left side of that you will see an option called Configuration. Scroll and find out Security Category and there will be a Modify button just exactly in front of that. Click on that to modify its settings.
4: Attach Private Key pair to Elastic BeanStalk Instance
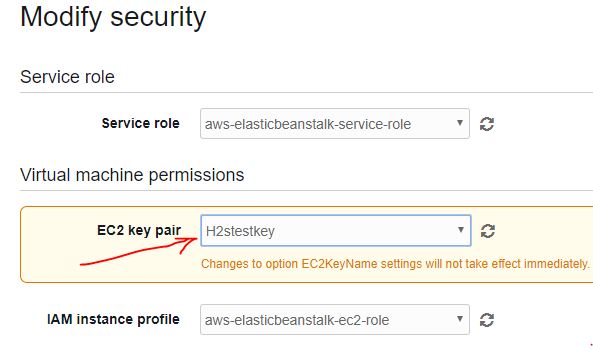
Select the created Private key from the Drop-down box of EC2 Key pair and then click on Apply.
Note: If you are trying to attach a key to some already existing EC2 Beanstalk instance, the settings will not take effect immediately. Each of your existing EC2 instances will be replaced and your new settings will take effect then.
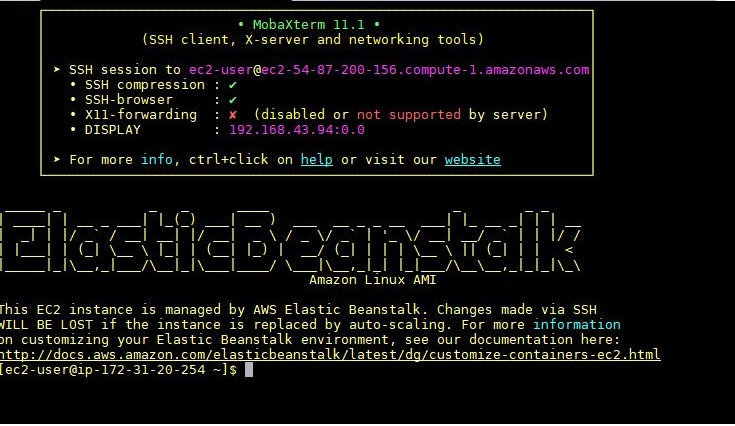
5. Connect Elastic Beanstalk via SSH
Now again go to EC2 instance home page where you have created Key pairs and this time from left side panel select Instance option.
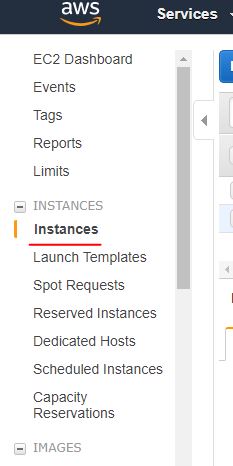
On the right side, you will see all your running instance; select the one which is being in use by Beanstalk. Select that and click on the Connect button.
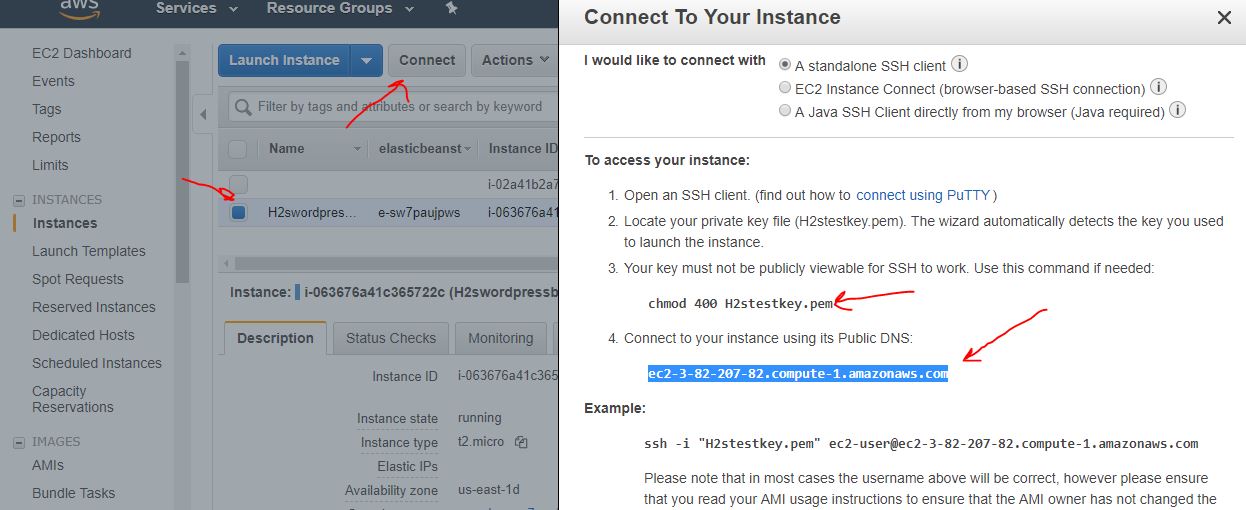
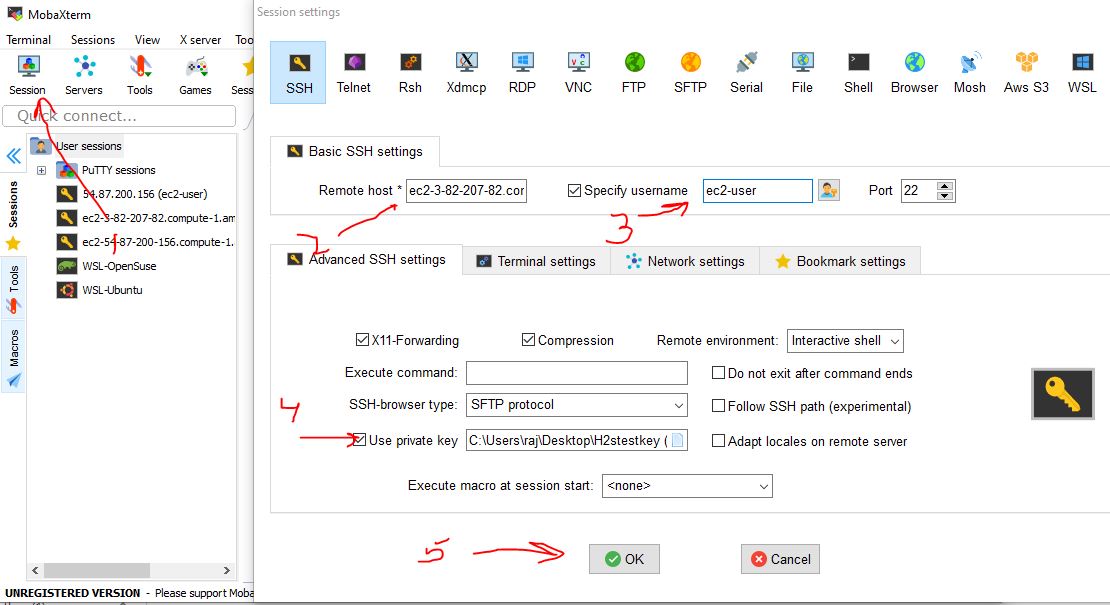
You can use EC2 Instance browser-based SSH connection, however, it didn’t work for us, thus we used our local application called MobaXtream, one of the best apps to connect server via SSH.
You can use any other app like Putty or simply your Command Terminal or prompt to connect Beanstalk.
Username, for Instance, is- ec2-user
Port is: 22
Hostname: Mentioned on the pop-up when you click on the Connect button, as shown in the above screenshot.
Related Posts
How to create email groups in Gmail? Send one email to multiple recipients in a matter of seconds.
Getting the right dashcam for your needs. All that you need to know
How to Install 7-Zip on Windows 11 or 10 with Single Command
How to Install ASK CLI on Windows 11 or 10
How do you install FlutterFire CLI on Windows 11 or 10?
How to create QR codes on Google Sheets for URLs or any other text elements