Data correctness is very important for proper data analysis and getting actionable insights. However, it all depends upon the one entering the data to enter the correct information. Among the several ways to prevent the user from entering invalid data is to use drop-down menus. If you are using Google Sheets or any other spreadsheet program to collect data, and there is a field, where some fixed set of data is supposed to be entered, it is possible to use drop-down menus.
That way, it will no longer be possible to enter something invalid or enter something that is beyond the set of choices provided. Creating a drop-down menu in Google Sheets requires the sheet designer to maintain the set of options so that at the time of entering the data, only those options appear in the drop-down menu. But it is not at all complicated to create a drop-down menu in Google Sheets.
So, today I will talk about how to create a drop-down in Google Sheets, in the guide below. I will discuss both the ways to do that.
Before starting
Before I start, let me first talk about how the drop-down menus will work on Google Sheets. In Google Sheets, instead of entering some data in a cell through a keyboard, we will be using a drop-down menu to directly allow users to select the input for the selected cell.
That said, we first have to maintain the selections for every drop-down menu before distributing the sheet for data entry operations.
So, let’s get started with how to create a drop-down menu.
First, we have to select the cell, where the user can make a selection through a regular drop-down menu. So, let the drop-down menu be present in cell B2.
Select the cell, click on ‘Data’ in the menu bar, and finally click on ‘Data validation’.

The Data validation panel will hence open up on the right side of Google Sheets.
Just click on ‘Add rule’.

You can start adding new rules now. By default, the criteria will be set to ‘Dropdown’, and there will be two options, which is the minimum every time you need to make a choice.
Just add the text that will be displayed in the drop-down menu, against the options. Simply click on ‘Add another item’ to add a new option, and do this until you add all the options that will be available in the drop-down menu.
It is also possible to change the color of the cell based on the input to quickly have an understanding of the inputs. This is optional, however.

There are other optional settings, as well. Simply click on ‘Advanced options’ to do more with the drop-down menus.
You can display a help text for the drop-down menu that will be displayed if incorrect data is entered. Just mark ‘Show help text for a selected cell’, and hence enter the help text in the subsequent text box.
If the data entered is invalid, it is possible to either show a warning or reject the data right away. Select the preferred option.
Lastly, you can select the style. You can choose ‘Chip’, ‘Arrow’, or ‘Plain text’, where the drop-down menu will not be displayed. So, it is better to go with ‘Chip’ or ‘Arrow’.
Once all the options regarding the drop-down menu are up to the mark, click on ‘Done’.

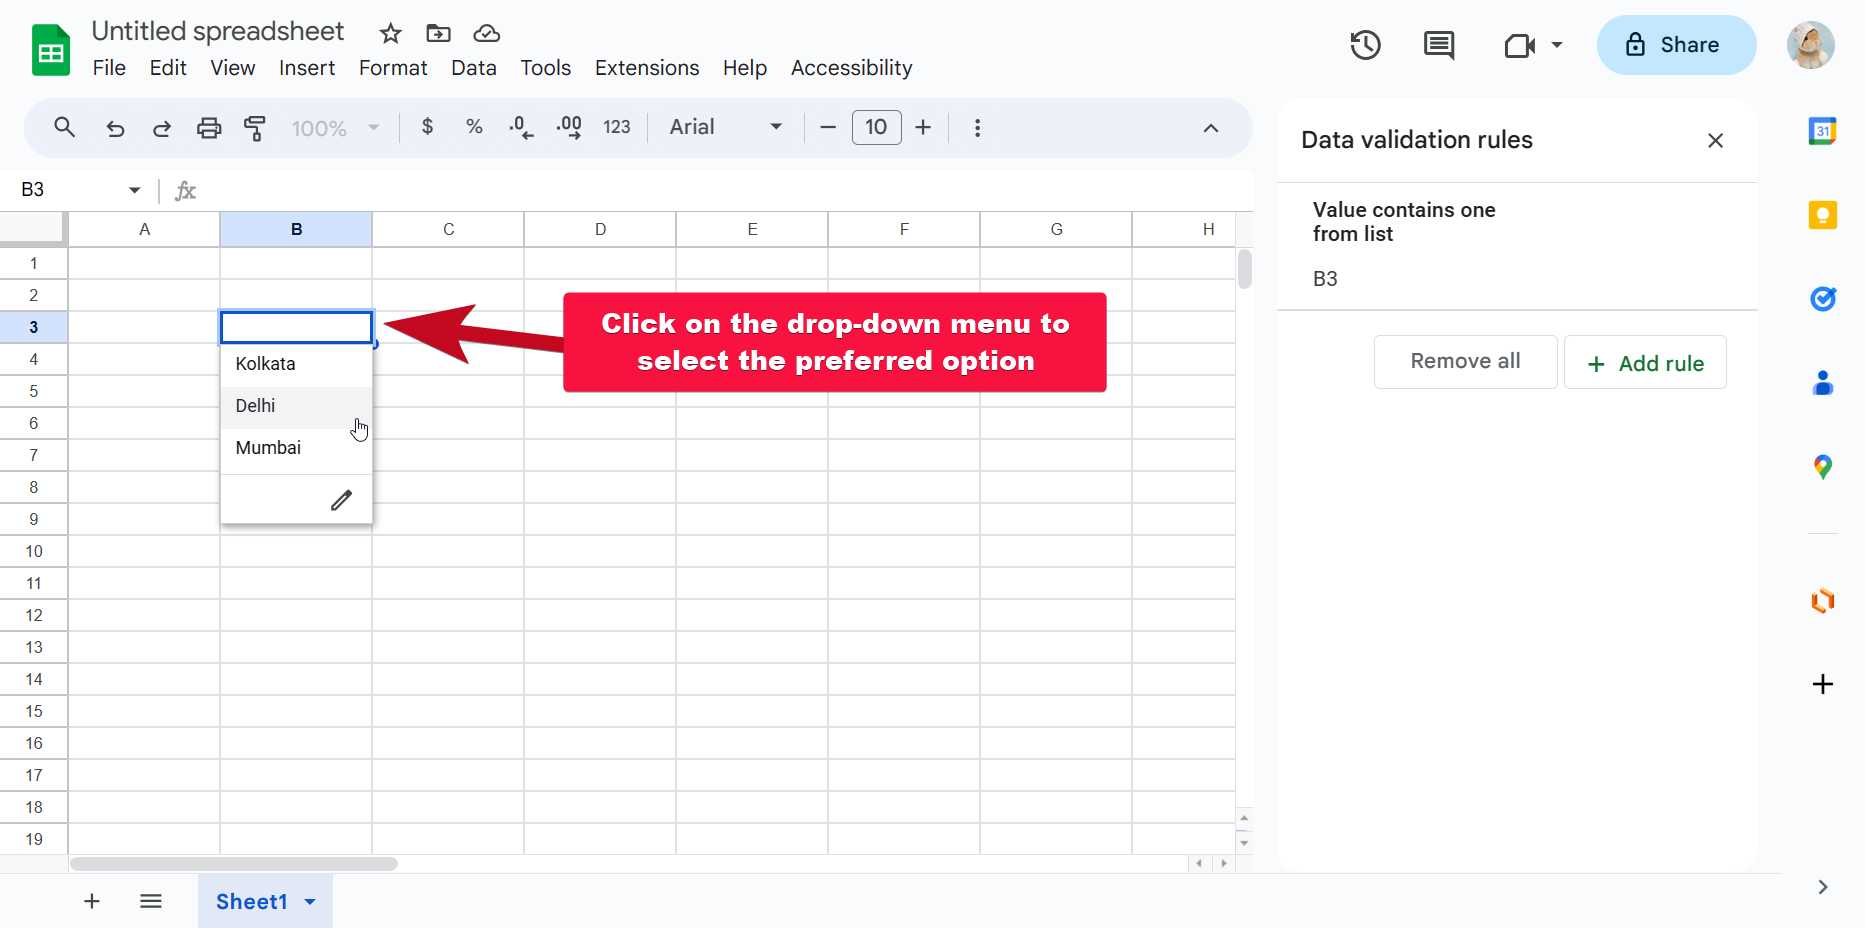
Now, you can click on the drop-down menu, and select the preferred option.

Creating a drop-down menu from a range
Besides entering the options one by one, it is also possible to display a range in the drop-down menu.
Say, for example, we want a drop-down menu that will display a range of inputs in cell B3.
So, simply select cell B3, and open ‘Data validation’ just the way we did last time.
Instead of ‘Dropdown’ in the criteria, select ‘Dropdown (from a range)’ as the criteria.
Hence, select the range of cells where the options are present.
You can have the options in a locked sheet within the same file, in a different file altogether, or within the present sheet. You just need to make sure that the entries are present in a continuous block. It means, do not have a blank cell while entering the options.
Once you are done entering the range where the options are present, you can configure the advanced options, which are optional, and finally, click on ‘Done’.

Here the selections for the drop-down menu are present in the same sheet for your understanding. However, it is better practice to place the selections on a different sheet so that the one entering the data cannot tamper with the data in any way.
In all the cases, you can apply the same set of data validation rules, i.e. use drop-down menus in the subsequent cells by dragging the small dot on the bottom-right corner of the cell in the next cells.
So, that’s how to use the drop-down menu in Google Sheets. Do you have any questions? Feel free to comment on the same below.
Related Posts
How to create email groups in Gmail? Send one email to multiple recipients in a matter of seconds.
Getting the right dashcam for your needs. All that you need to know
How to Install 7-Zip on Windows 11 or 10 with Single Command
How to Install ASK CLI on Windows 11 or 10
How do you install FlutterFire CLI on Windows 11 or 10?
How to create QR codes on Google Sheets for URLs or any other text elements