Amazon Lightsail also offers a provision to create a database separately from the installed instances with its own dedicated storage space. Yes, it is paid and comes in different plans. The standard price plans available for Amazon Lightsail Databases in one Availability Zone only, with no redundancy, are:
Amazon LightSale available plans for Instance.
- $5- 1GB Memory, 1 vCPU, 40 GB SSD Storage, and 2TB transfer
- $10– 2GB Memory, 1 vCPU, 60 GB SSD Storage, and 3TB transfer
- $20– 4GB Memory, 2 vCPU, 80 GB SSD Storage, and 4TB transfer
- $40– 8GB Memory, 2 vCPU, 160 GB SSD Storage, and 5TB GB transfer
- $80– 16GB Memory, 4 vCPU, 320 GB SSD Storage, and 6TB GB transfer
- $120– 32GB Memory, 8 vCPU, 640 GB SSD Storage, and 7TB GB transfer
Here we let you know how to create a Mysql Database on AWS LightSail, however, you can also see- how to install WordPress on AWS Lightsail to know more about it.
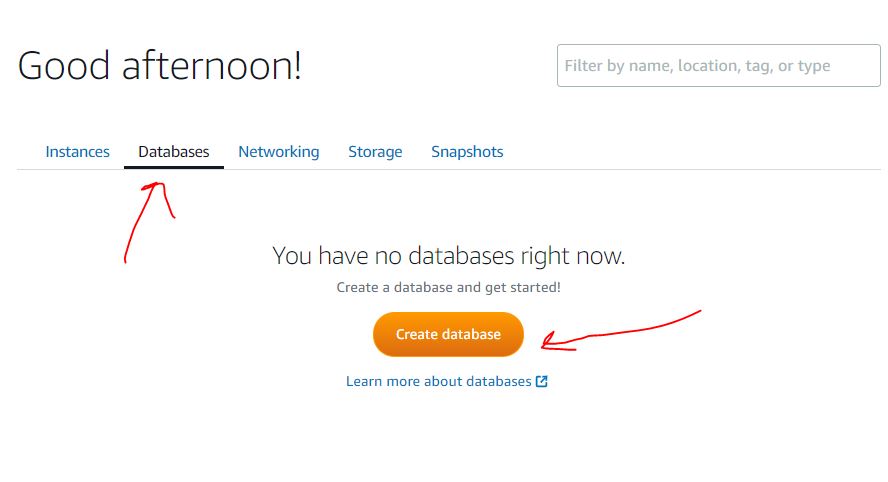
Step 1: Go to amazon Lightsail Home, select Databases
Like the Lightsail instance plan, the starter plan of Amazon Lightsail Database is also free for one month. To check it out you can simply signup for Amazon Lightsail using a credit card; don’t worry they will not charge before one month at all. Here is the link to the Signup page.
So, coming to the point, if you already have some instance or web app and want to have a MySQL database for the same, you can create it on a fast server of Amazon AWS.
At the home page of Amazon Lightsail click on the Databases tab and then on the Create database button.
Step 2: Select the Lightsail Database location
The first thing in the direction of creating an Amazon Lightsail database is to select the data center location where you want to host your database and its data. Select the nearest one to your vicinity, it helps to reduce the response time and gives you better service and speed. For example, if your target audience is in the USA, then select the US location for low response time and better performance for your website or app visitors.

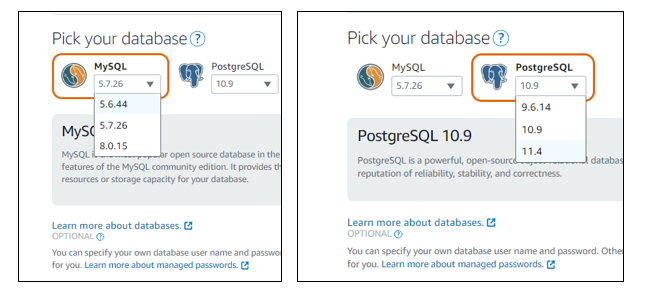
Step 3: Pick your database- MySQL or PostgreSQL
On AWS Lightsail, we have offered two kinds of databases AWS, one is the most popular and widely used i.e MySQL and another one is PostgreSQL. However, PostgreSQL has a very good reputation and stability but because most of the users use MySQL, thus we select it to install. Nevertheless, the process of installation will be the same for both databases.
While writing this tutorial, the versions of the Amazon Lightsail MySQL database available to install were 5.6, 5.7, and the latest one 8.0. In the same way for PostgreSQL- 9.6, 10.9, and 11.4.
Click on Mysql to select it and from the drop-down box the version you want to install.
Step 4: Opt for Lightsail database pricing
These are the standard plans of Lightsail Database, select the one which is feasible for you and move to the next step.

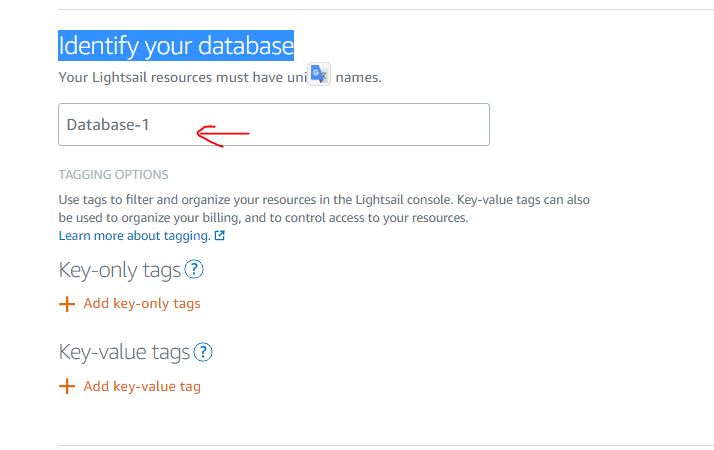
Step 5: Name your Amazon Lightsail database
By default, the name assigned to Database is Database-1, however, you can efface it and type the one which you can remember or as per the project. For this tutorial, we are using the default one.
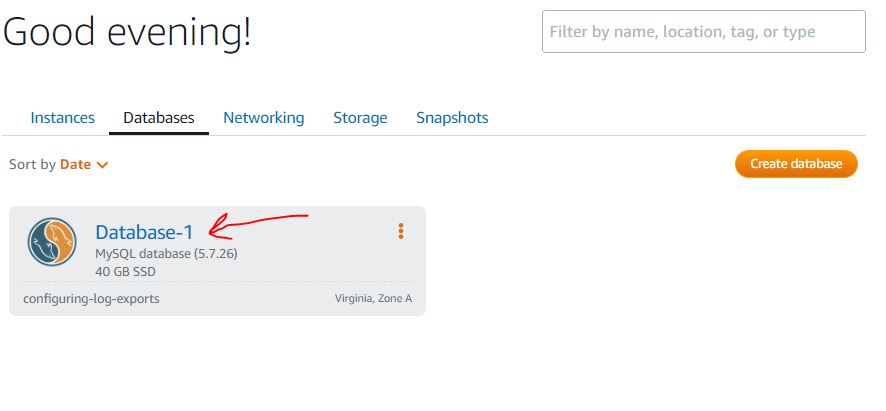
And finally, click on the Create Database button.
Step 6: How to access the Lightsail database
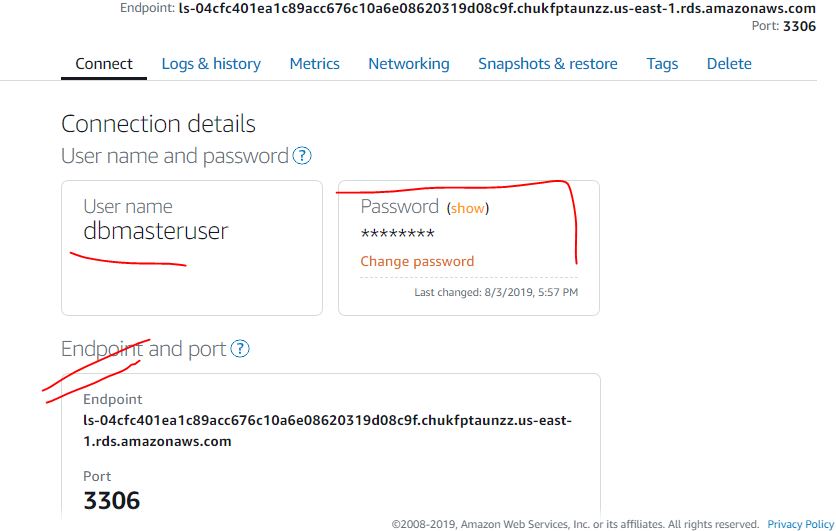
Once the Database gets created, click on that to open and access its connection details.
On the next page, you will find Amazon Lightsail Database connection details such as username and password including Endpoint address along with default port.
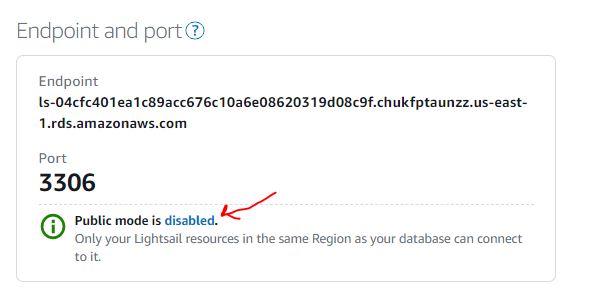
Step 7: Enable Amazon Lightsail Database external access
By default, we can’t connect our created database, so to connect and access it externally we have to enable it. Just under the Endpoint and port section, clicking on the Public mode is a disabled option.
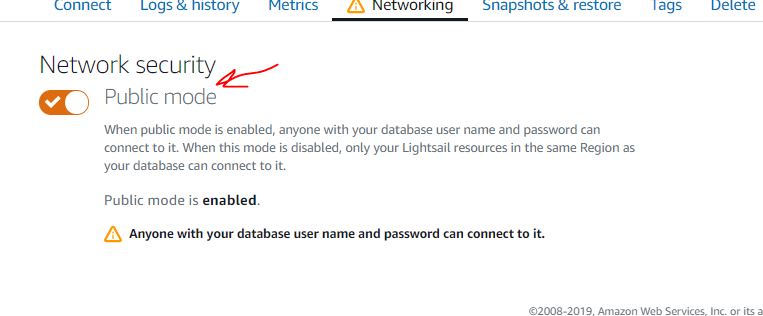
After that enable the Network Security Toggle button for Public access.
Step 7: How to Connect to the Lightsail Database
There are a couple of ways to connect to MySQL database, the popular one is via phpMyAdmin, however, if you don’t have installed it then use some Graphical user interface Database Manager tool such as the official one known as MySQL Workbench. To know more about open source MySQL GUI Manager Tools see Best opensource MySQL GUI Tools for Windows and Ubuntu/Linux.
Here we are using MySQL workbench on Windows 10 to access and manage our Amazon Lightsail MySQL Database remotely. It is free to download and use. Here is the link to get it.
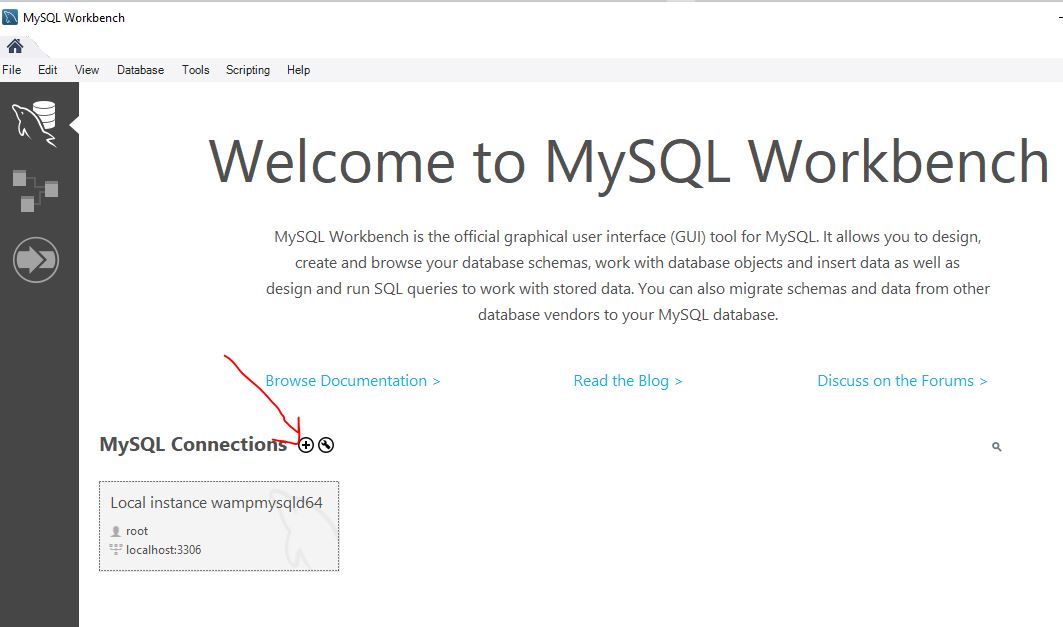
First, install MySQL workbench on your system and then open the same.
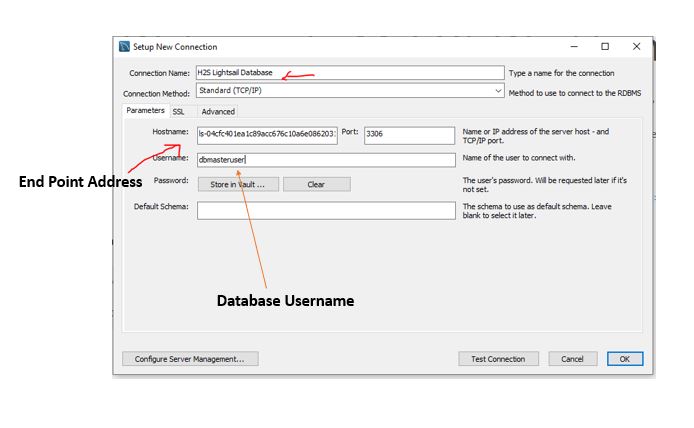
Click on the + icon to add a new connection.
Enter the following Details.
Connection Name: Type Whatever you want to remember the connection to Lightsail Database.
Connection: Select between Standard TCP/IP or
Hostname: Copy and paste the Endpoint address available on your Amazon Lightsail Database.
Username: Type the username created by Lightsail for your Database
Finally, Click on the OK button.
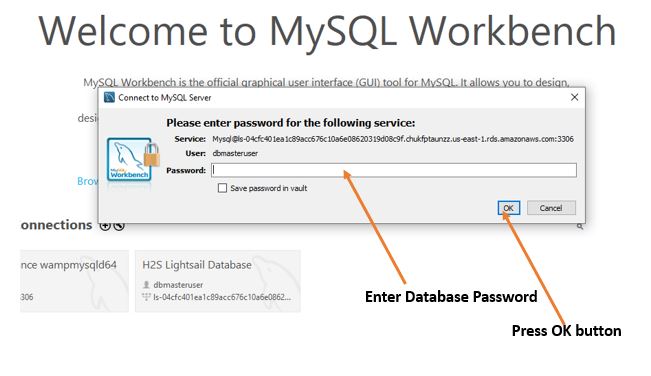
Enter the Password which has on Lightsail and then click on the OK button. You can also check the Save Password in Vault to save yourself from entering it every time you want to connect to the database.
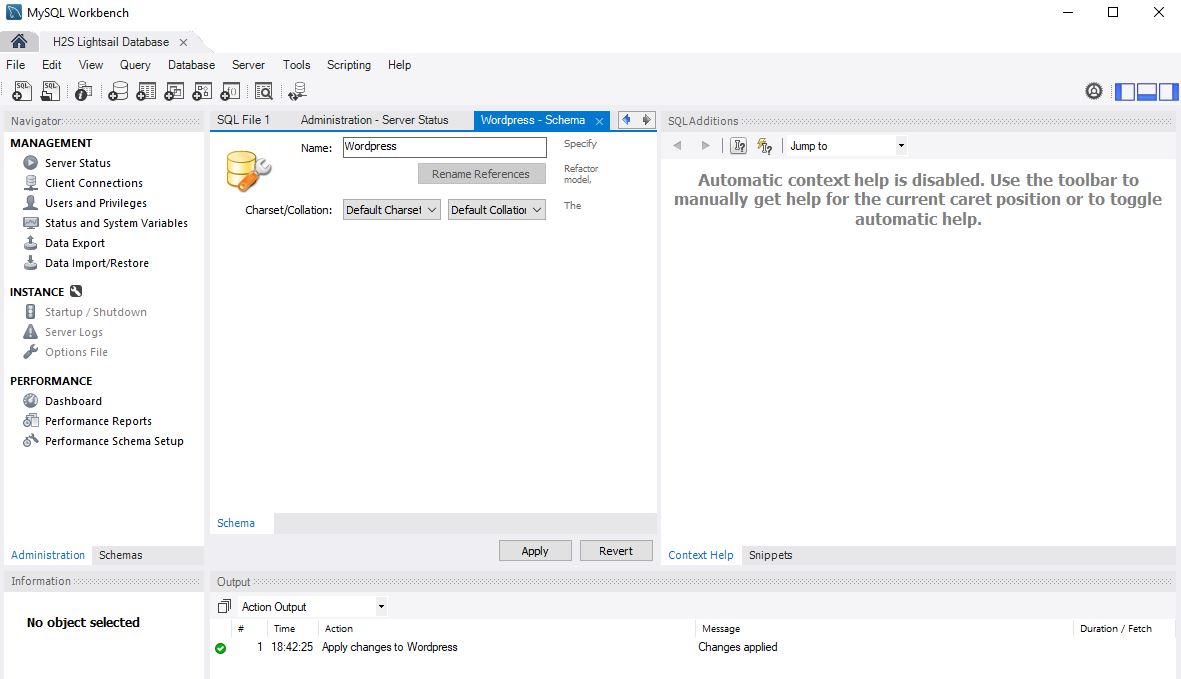
Finally, you will see it has been connected and now you can use it to create, delete and edit database schemes including running different SQL queries.
Related Posts
How to create email groups in Gmail? Send one email to multiple recipients in a matter of seconds.
Getting the right dashcam for your needs. All that you need to know
How to Install 7-Zip on Windows 11 or 10 with Single Command
How to Install ASK CLI on Windows 11 or 10
How do you install FlutterFire CLI on Windows 11 or 10?
How to create QR codes on Google Sheets for URLs or any other text elements