Do you want to run a Virtual machine inside a Virtual Box VM then you have to enable nested virtualization. But how? Here in this tutorial, we let you know the command to enable the nested VTX/Amd-V option in VirtualBox if that appears grey and you are unable to check its box.
What is nested Vt x AMD V?
In simple words, when we run a virtual machine inside some existing virtual machine is called nested virtualization. For example, if you have VirtualBox installed on your system and inside that, you run another virtualization environment such as Hyper-V on the Windows guest operating system or KVM/VirtualBox on the Linux distro.
However, in VirtualBox, we have a nested virtualization option but in grey out, I mean we can’t check its box to enable the same, at least in my case I couldn’t. If you are seeing the same problem in your Virtual Box and want to enable nested VTX/Amd-V for any guest operating system then use the command given in this article.
Enable Virtualbox nested VTX/AMD-V
Turn on the VirtualBox nested VTX/AMD-V for Guests on Windows 11 or 10, MacOS, or Linux…
Step 1: Open the Command Prompt as Admin
On Windows 11/10/7 or some previous version run the command prompt with administrative rights whereas for macOS or Linux distros (Ubuntu, CentOS, Linux Mint, Debian, etc.) use the command terminal.
Switch to VirtualBox Directory (for Windows):
cd 'C:\Program Files\Oracle\VirtualBox'Step 2: Run the modifyvm command
Now the second step is to run a command to make the nested virtualization accessible.
.\VBoxManage modifyvm "VM-name" --nested-hw-virt on
Note: Replace the “VM-name” with the VM or Guest operating system name for which you want to enable the nested VTX/AMD-V. Also in Linux you don’t need to use “.\” before the command.
For example, we have Proxmox named VM on Virtualbox, thus the command will be like this:
.\VBoxManage modifyvm "proxmox" --nested-hw-virt on
Step 3: Enable nested VTX/Amd-V option
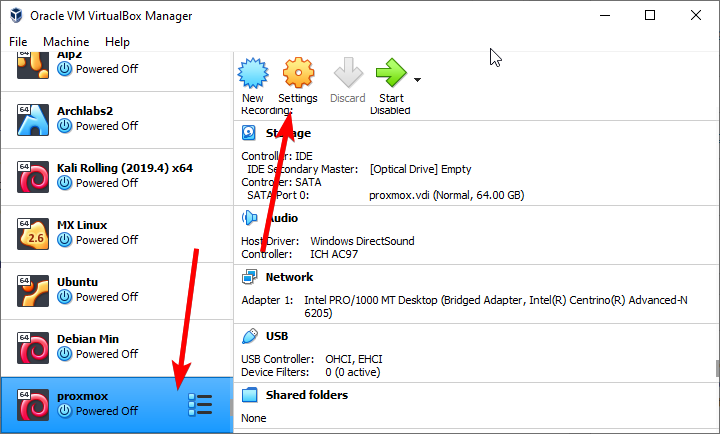
Now, open the VirtualBox software installed on your host operating system and select the VM for which you have enabled it. For example, we want this nested virtualization for the Proxmox bare-metal platform and activated for the same, thus we select it. You can select the guest VM used in the above command.
After selecting the VM, click on the Settings option given in the VBox menu.
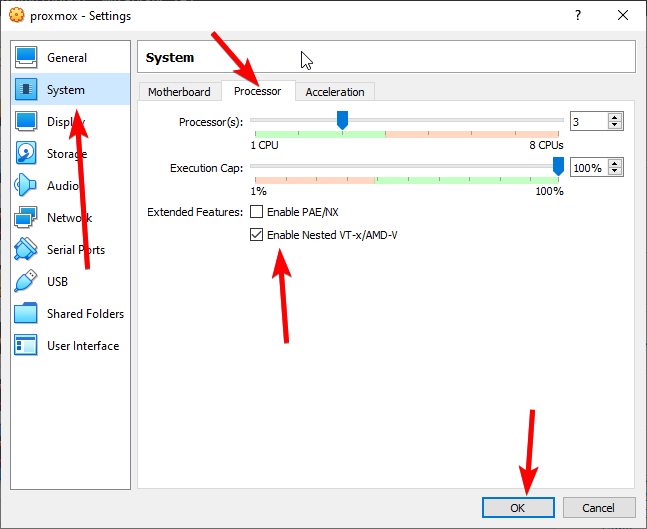
Now, from the left side panel select the System settings->Processor Tab and then check the box of the option called “Enable Nested VT-x/AMD-V” and hit the OK button.
That’s it, now you can install and start virtual machines inside your VirtualBox.
Related Posts
How to create email groups in Gmail? Send one email to multiple recipients in a matter of seconds.
Getting the right dashcam for your needs. All that you need to know
How to Install 7-Zip on Windows 11 or 10 with Single Command
How to Install ASK CLI on Windows 11 or 10
How do you install FlutterFire CLI on Windows 11 or 10?
How to create QR codes on Google Sheets for URLs or any other text elements