Windows Recycle Bin feature is known by everyone and has been so popular that almost every OS has a similar feature for storing deleted files on a PC. The key purpose of the Recycle bin is to hold the deleted files temporarily unless and until the users delete them permanently. The benefit of using Bin is, that we can restore our removed files in case we need them or realize their importance later. However, many users would like to have a clear Desktop, hence to declutter it, or have a customized view they want to hide the Recycle Bin icon and in this article, we learn how to do that.
1: Using Desktop Context Menu
1. Right-click on Windows 11 Desktop:
First, right-click anywhere on your Windows 11 Desktop space to open the context menu.
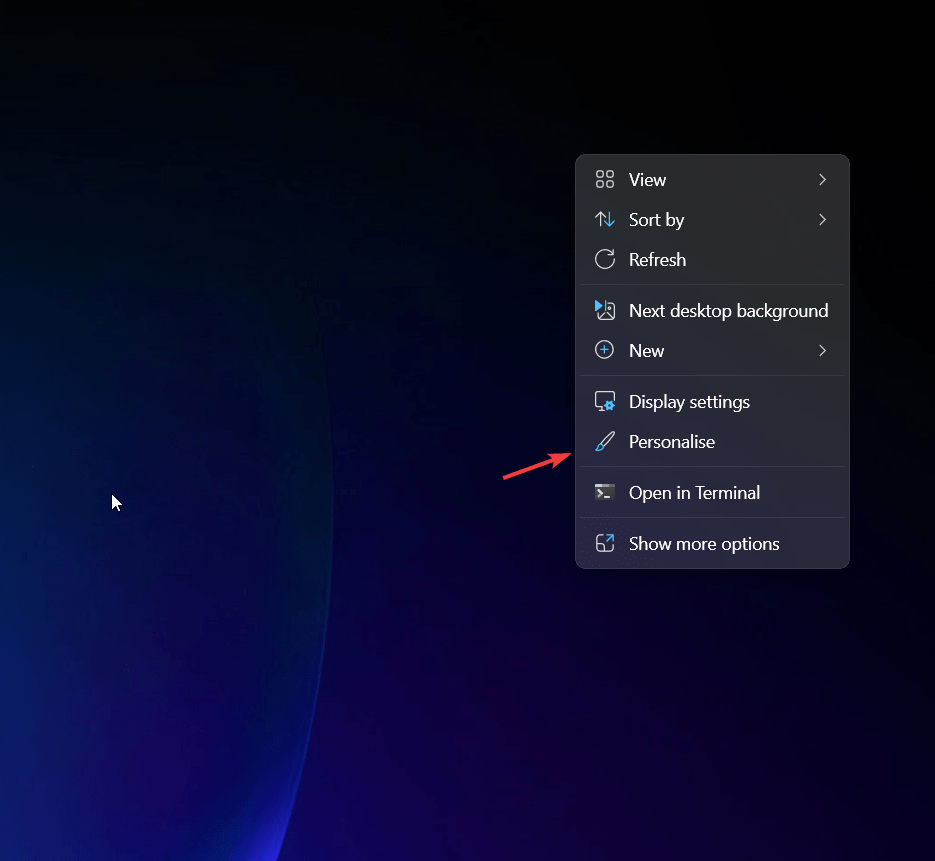
2. Select the “Personalize” option:
Once you have the Context menu opened, from there select the “Personalize” option which will open the further Personalisation Settings available for customizing and personalizing the OS.
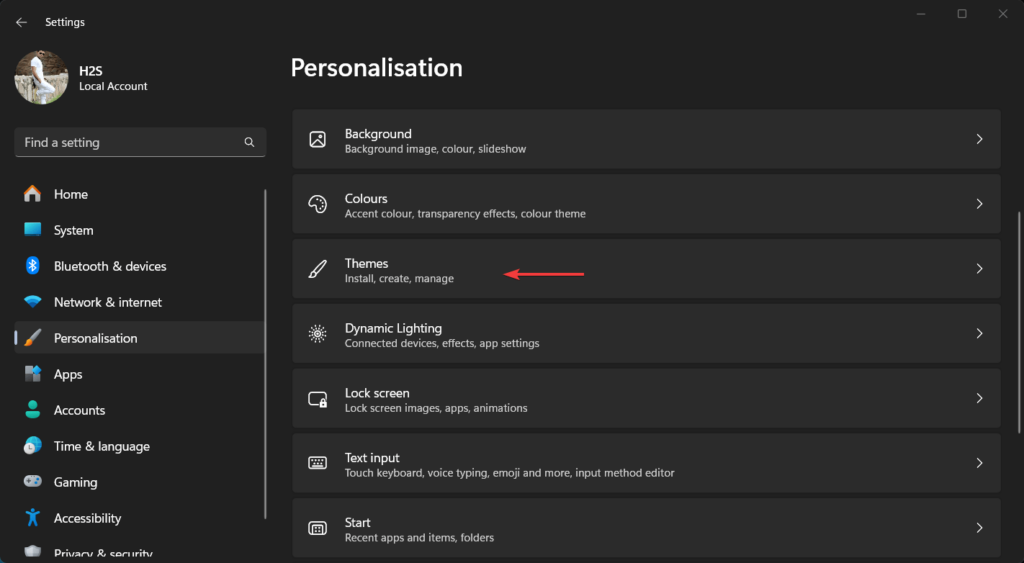
3. Open Desktop Icon Settings:
You will find a bunch of settings that we can use to customize the look and feel of Windows 11 OS, for now, leave the rest of the options and just click on “Themes“.
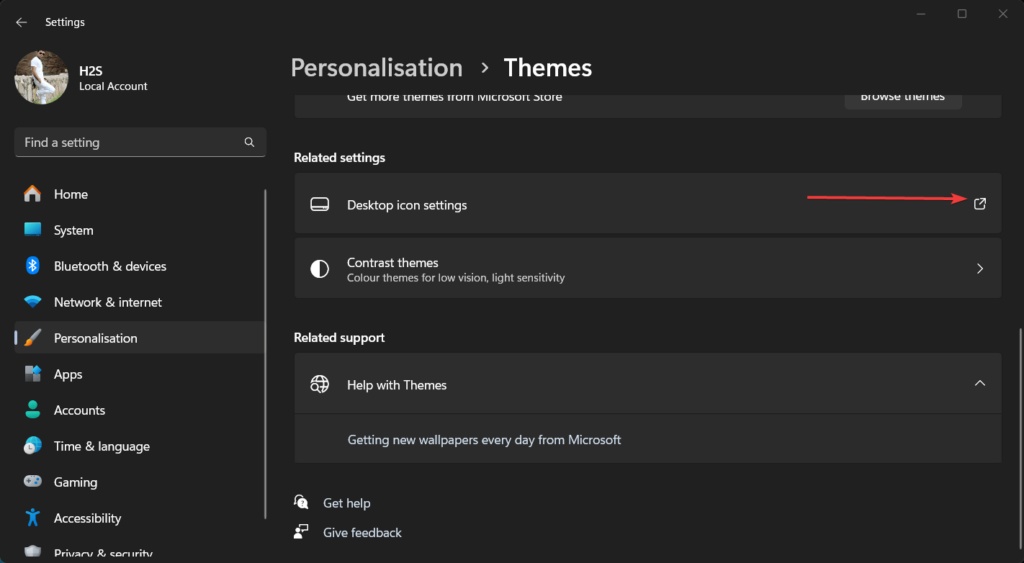
After that click on the arrow icon to reveal the Desktop icon Settings options.
4. Disable or Enable Recycle Bin Visibility on Windows 11:
As the Desktop Icon Settings window opens, all the Desktop icons set to default by the system will appear such as Network, This PC, Recycle Bin, and File Manager.
Now, to hide the Recycle Bin icon from our Windows 11 or 10 Desktop, just uncheck the tick from the box given next to “Recycle Bin” and click the “OK button”
Similarly, in the future, if you want to unhide the Recycle Bin then again follow the above given steps check the box next to “Recycle Bin” and click “Apply” followed by “OK.”
2: Disable Recycle bin Using Registry Editor (Advanced)
Apart from the above simple method of hiding and unhiding the Recycle bin, there is one more using Windows Registry, which is a little bit complicated for new users, hence recommended to advanced users only.
1. Open Registry Editor:
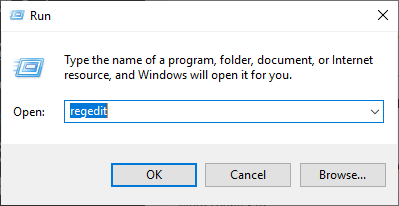
Search for Registry in the Windows Start menu or press Win key + R to open the RUN box there type – regedit and hit the Enter key to open Registry Editor.
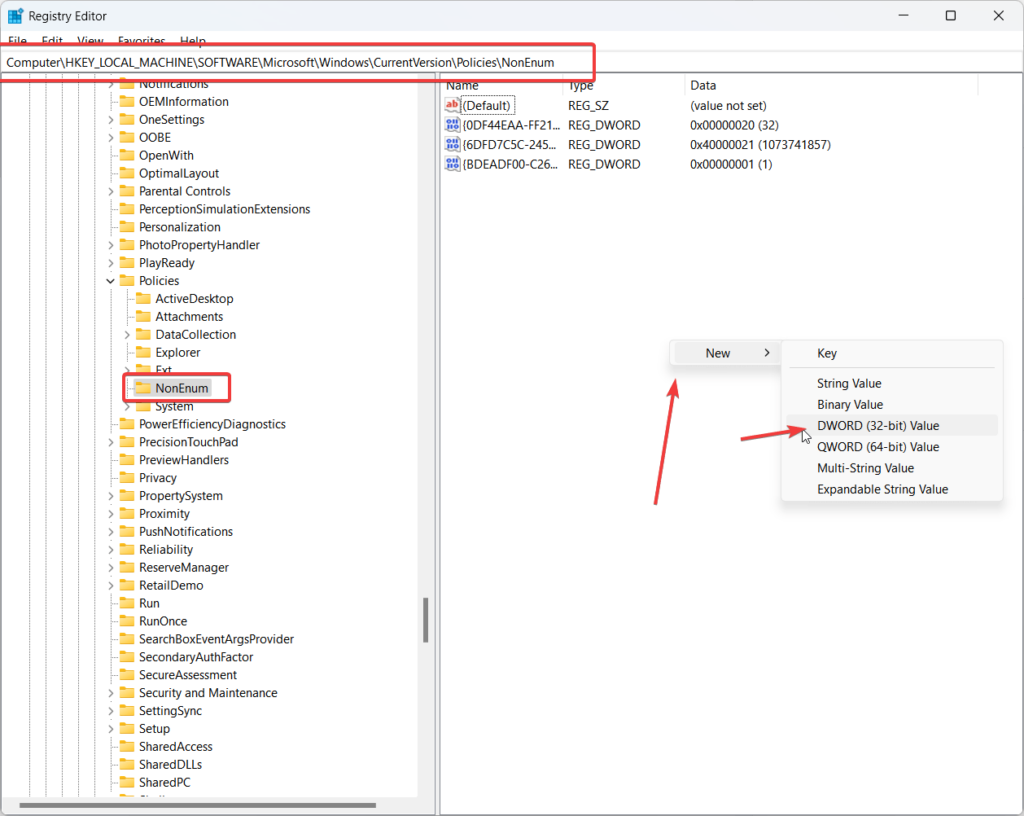
On the Registry window, navigate to “\HKEY_LOCAL_MACHINE\SOFTWARE\Microsoft\Windows\CurrentVersion\Policies\NonEnum”
Note: Instead of navigating through each folder you can paste this path in the address bar and hit the Enter key to quickly switch to the “NonEnum” folder.
3. Create a DWORD key to disable Recycle Bin:
As you select the “NonEnum” folder, a space with few keys will appear on the right side. Now, we need to create a DWORD key. For that, right-click on the empty area, select DWORD (32-bit) value, and name it – 645FF040-5081-101B-9F08-00AA002F954E
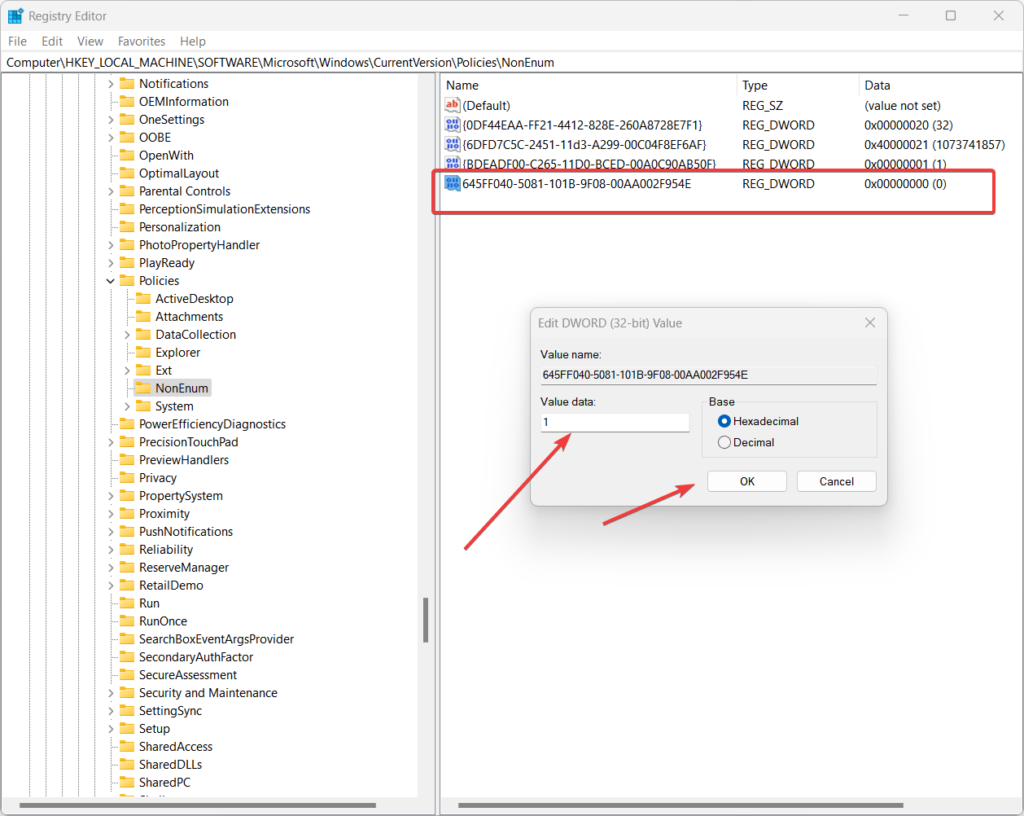
Now double-click on the created key and set its value to 1 to hide the Recycle Bin. Click “OK” to save the changes.
To apply the changes, Log out and log in to your Windows 11 or 10, and the Recycle Bin will be hidden.
4. How to unhide in the future (optional):
Now, in the future, if you want to unhide the Recycle Bin again then go to Registry Editor and change the value of the created “645FF040-5081-101B-9F08-00AA002F954E” DWORD key value from 1 to 0, alternatively, you can also delete the key.
Other Articles:
- How to Install Sandbox in Windows 11 or 10 Home Editions
- How to install and open Windows 11 sandbox using CMD?
- Clear Cache in Windows 11 or 10 Using CMD?
- How to Open Device Manager using CMD
Related Posts
How to create email groups in Gmail? Send one email to multiple recipients in a matter of seconds.
Getting the right dashcam for your needs. All that you need to know
How to Install 7-Zip on Windows 11 or 10 with Single Command
Install Google Earth on Windows 11 or 10 Using a Single Command
How to install Gaming Services on Windows 11
How to Install Telnet Client on Windows 11 Using PowerShell