Step by step guide to install Ghost CMS on Windows 10 or 7 locally to test and further local developments of theme or any other module.
If someone is not much with technology complication of setting up Content Management Platforms; then he/she must go for the one which already popular and has tons of tutorial over the internet i.e WordPress.
On the other hand, if someone has technology expertise and wants to be different, where he can explore new skills, the Ghost CMS could be the option. However, indeed before migrating from WordPress to Ghost CMS you should first try it locally on your Windows or Linux systems. Learn it curves and weather it really meant for you or not.
However, because of new in the race the Ghost CMS has less tutorial and documentation as compared to other popular dominated CMS like WordPress. Thus here we are with one if you are thinking to try Ghost CMS on Windows 10/8/7 for local development; before going finally for a live production website here is the tutorial.
Step 1: Install Node.js for Ghost CMS on Windows 10/7
To install and try Ghost CMS locally on Windows 10 or 7 we will use Node.js package manager NPM. Thus, go to its official website and download the Node.js. It is available in Windows MSI installer and just needs few clicks to get installed. Here a tutorial on that: Download and install Nodejs & NPM on Windows 10.
Note: Here we are using windows 10 operating system but the steps of installation will be the same for Windows 8 and 7.
Step 2: Install Ghost-CLI on Windows using NPM
To install the Ghost blog on Windows locally, we need a command-line tool called Ghost-CLI. It will help us to download its packages and set up it over Windows quickly.
Thus, after installing Nodejs NPM, go to Windows search and run Windows Powershell under the administrative privileges.
Now, run the following command:
npm install ghost-cli@latest -g
Step 3: Install Ghost CMS locally on Windows
Finally, type:
cd\
To switch to the main drive.
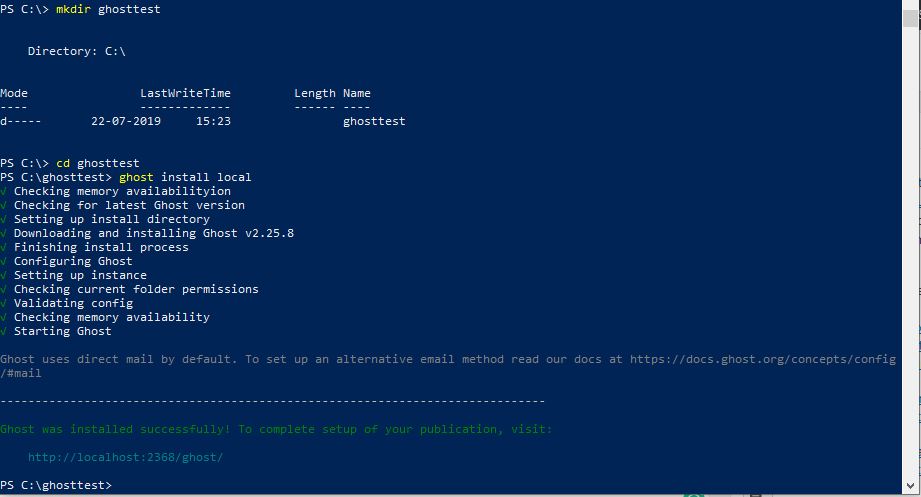
Now create a directory to install the files of Ghost using the below command. The name of the directory of the folder we are giving is Ghosttest, however, you can give something else as per your convenience.
mkdir ghosttest
Enter into the created directory
cd ghosttest
Command to download and install Ghost files under that directory.
ghost install local
While installing, the setup will ask to allow the Ghost on Windows firewall to access it over the local network. Allow that and you will get the local link to open Ghost CMS in a local browser.
Step 4: Access Ghost CMS backend in browser
After all the installation and setup process, its time to access our locally install CMS in the browser. For that simply open your Windows system browser, for example, Mozilla or Google Chrome and point to –
http://localhost:2368/ghost
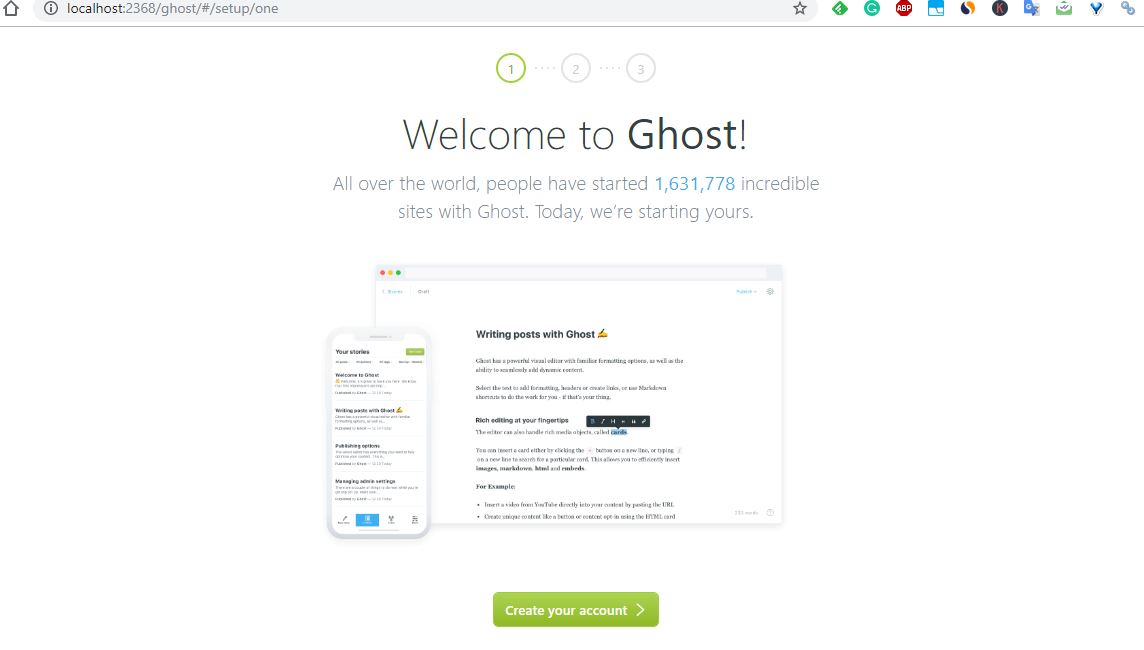
Step 5: Welcome to Ghost setup
Finally, the welcome screen will appear on your screen, and its time to mover further for its setup. Click on the Create your account button.
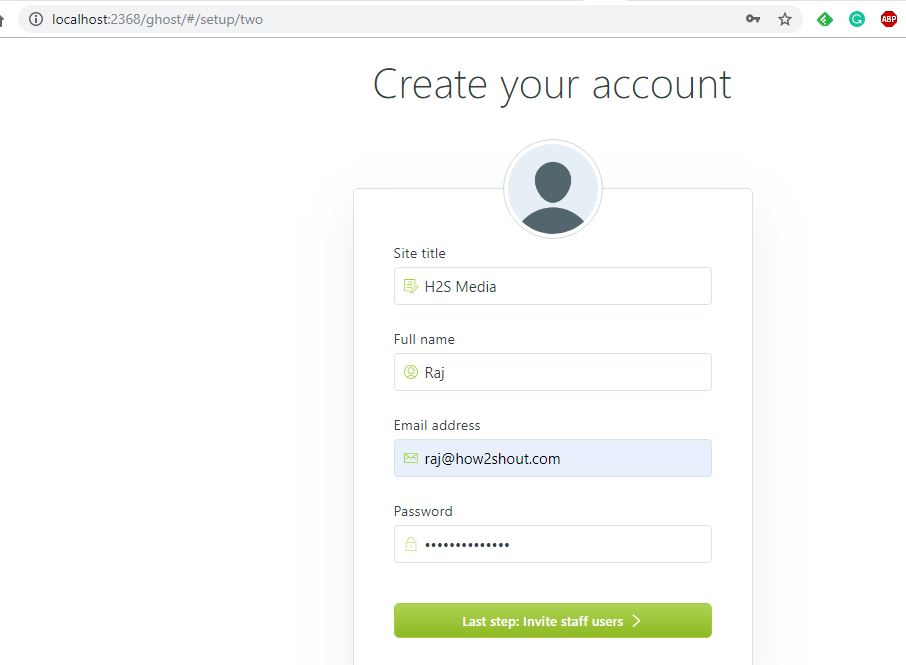
Step 6: Create a Ghost Admin Account
Enter Site Title which you want to give your testing website. Then full name, email address and password to use as administrative credentials for logging at the backend admin panel of Ghost CMS.
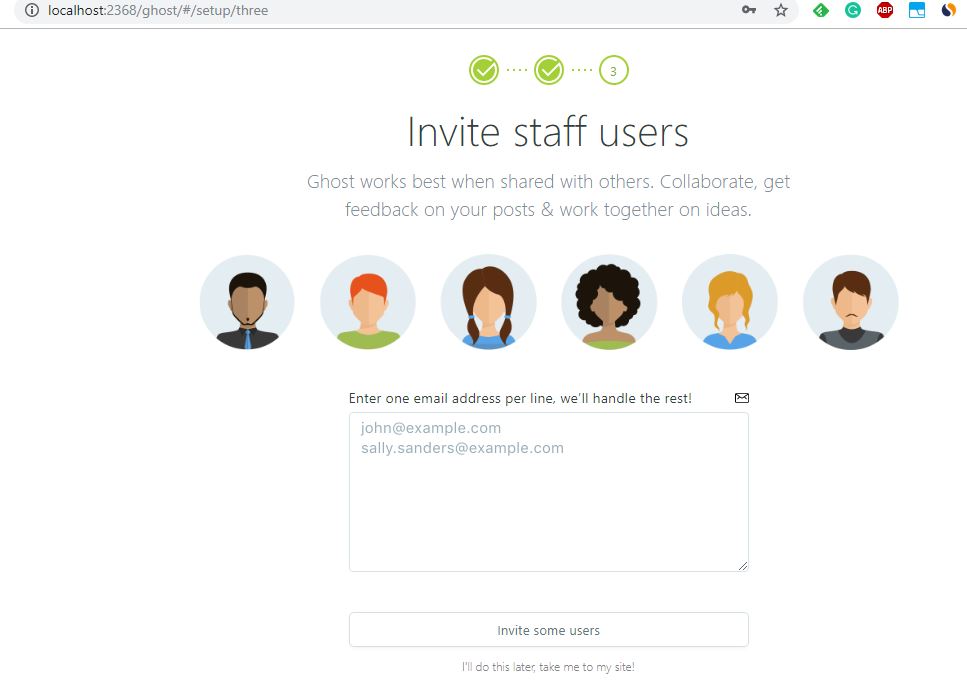
Nest, it will ask you to invite some staff or the people in the team to manage the website. However, we have installed it locally just for testing purpose, thus, click on “ I will do this later, take to site!“.
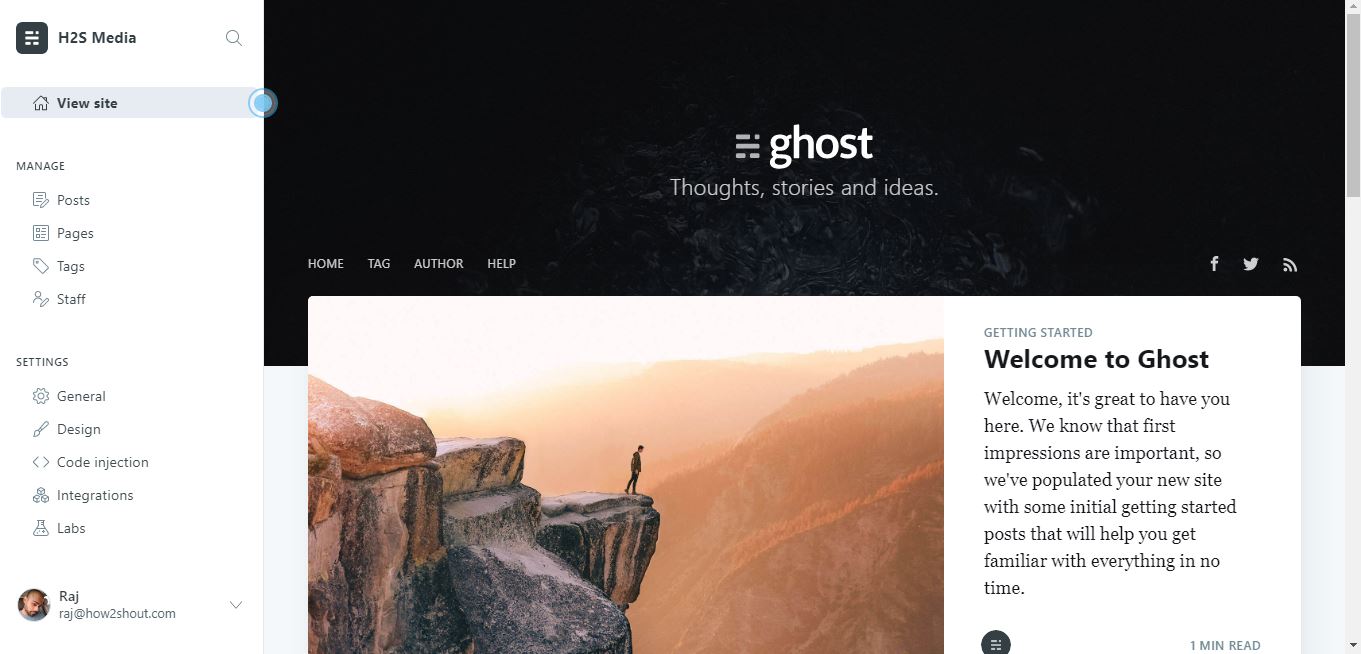
Step 7: Admin Backend of the website
So, we are here now, at the Admin panel of local Windows installed Ghost; from where we can create posts, install different integrations to Ghost, can develope themes to test and more… Locally on Windows.
Few useful commands to manage Ghost
Installed Ghost CMS is running using an individual background process in Nodejs over Windows, thus while using Nodejs blank windows will always running parallel. If you closed that, the working of this CMS will get stopped. Thus, to start it again we need to type start command again in Windows Powershell. The commands to manage it are:
To stop Ghost
ghost stop
To start Ghost
ghost start
Views logs
ghost log
To list all running Ghost blogs
ghost ls
For listing all ghost commands:
ghost help
All the content and data available on CMS will reside in a folder name /content/data/ under the directory you have created to install this CMS. In your case, its ghosttest and might be different in yours. Themes are under /content/themes/
If you are a ghost theme developer, then you can use Gscan to check the compatibility of your created them with CMS.
Commands to install Gscan and use are:
# Open Windows Powershell and install gscan globally
npm install gscan -g
# Scan a theme directory for compatibility
gscan /path/to/ghost/content/themes/casper
# Scan a theme zip file for compatibility
gscan -z /path/to/downloads/theme.zip
aaa
Related Posts
How to create email groups in Gmail? Send one email to multiple recipients in a matter of seconds.
Getting the right dashcam for your needs. All that you need to know
How to Install 7-Zip on Windows 11 or 10 with Single Command
Install Google Earth on Windows 11 or 10 Using a Single Command
How to install Gaming Services on Windows 11
How to Install Telnet Client on Windows 11 Using PowerShell