NPM is the package manager for Node.js to install and build different applications; while the Node.js is the framework or you can say a base to the built application using Node javascript. It can be installed on Windows, Linux, MacOS and FreeBSD. Also available as a Node.js Docker image.
Node.js offers the creation of modules that developers or its users can install separately to extend the functions of the applications. For example, Grunt module which is JavaScript Task Runner can be installed using the NPM package manager for Node.js applications.
How to install NPM & Node.js on Windows 11/10?
Step 1: Download Node.js on Windows
The first step to install the NPM is to obtain the Node.js executable file contains Node libraries for Windows 10/8/7. Go to Node official website; as we are installing the NPM & Node.js on Windows, needless to say, click on the Windows Installer (.msi). It offers both 32-bit and 64-bit version, depending on your system selects and downloads the same.

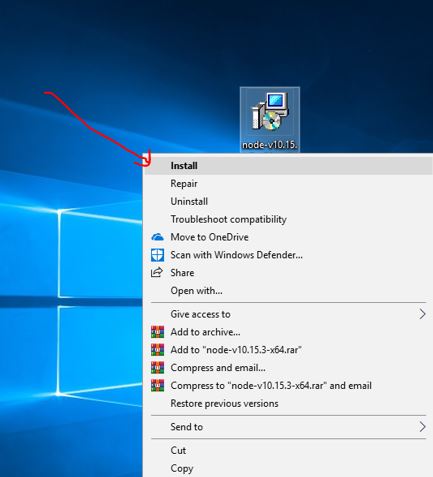
Step 2: Run the Node.js Installer
Right click on the downloaded executable msi file and click on Install option.
Step 3: Welcome to the Node.Js Setup Wizard
As soon as you get the first screen of NPM and Node.js wizard click on the Next button.

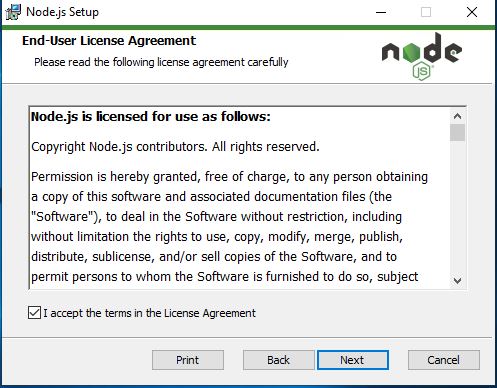
Step 4: License Agreement for Node.js
Check the box given for “I accept the terms in the License Agreement” and then click on the Next button.
Step 5: Destination folder to Install NPM and Node.js
At this point in the setup wizard, it will give you a provision to change the installation folder path for Nodejs, in case you want. Otherwise, leave the default one as it is and click on the Next button.

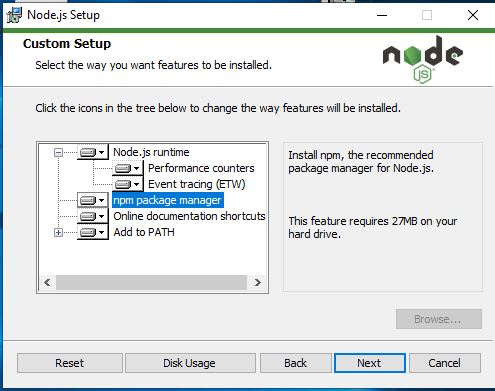
Step 6: NPM installation on Windows 10/8/7
All the packages that are going to be installed on Windows along with Nodejs will show at this step and one of them is NPM package manager. Leave everything as default and just click on the Next button.
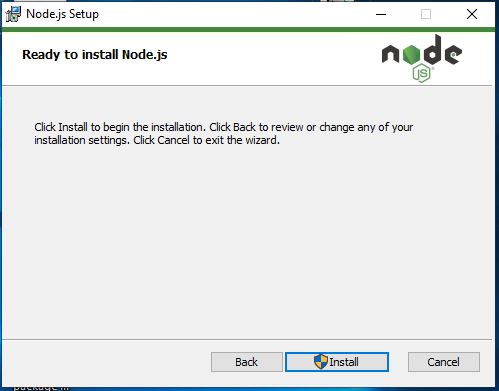
Step 7: Ready to install Node.js
Everything has been set up now, what you have to do just click on the Install button.
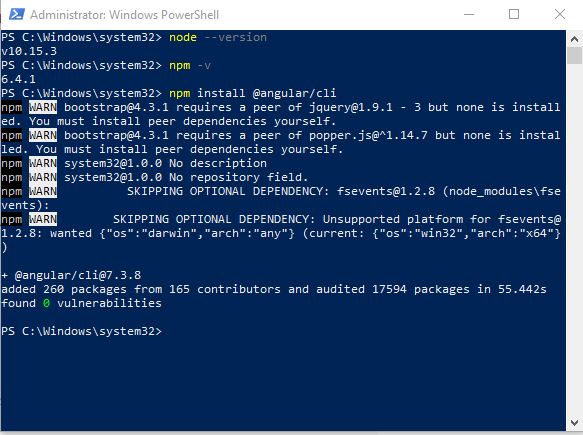
Step 8: Check NPM and Node.js version on Command line prompt
You can check or confirm the NPM installation along with Node.js using either Command prompt or PowerShell. The command is:
node --version
npm -v
Furthermore, to use the NPM for some package installation you can use it as in the following way:
npm install <package name>
for example, here we want to install Angular CLI using the NPM package manager on Windows for Node.js app development. So, the command is:
For locally:
npm install @angular/cli
Fo Globally: -g syntax refers to the global
npm install -g @angular/cli
Step 9: NPM update command
Commands for NPM will be same for all OS. It means the update command for NPM will be the same which we use on Linux or MacOS i.e.
npm install npm@latest -g
To list all versions fo NPM you can use :
npm view npm versions --json
To install some old or specific version of NPM use this command:
npm i -g npm@version
For example, we want to install npm 5.8.0 then the command will be:
npm i -g [email protected]
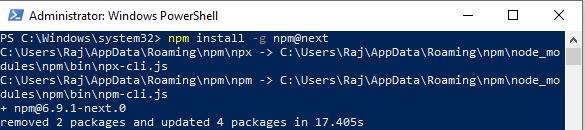
Step 10: Command to upgrade npm & Node on windows
It is recommended not to upgrade unless and until the stable version Node has not been released. However, here are the commands to upgrade NPM and Nodee.js to the latest version on Windows.
First, update or upgrade the NPM to the latest version:
npm install -g npm@next
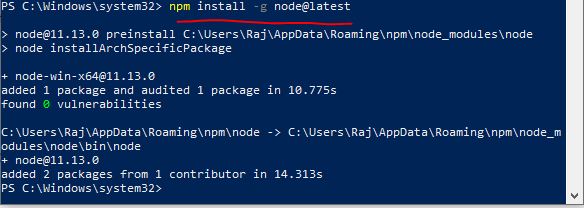
Then upgrade node to the latest available version, As you can see we got the latest beta version 11 in the following screenshot.
npm install -g node@latest
Other tutorials:
Related Posts
How to Install 7-Zip on Windows 11 or 10 with Single Command
Install Google Earth on Windows 11 or 10 Using a Single Command
How to install Gaming Services on Windows 11
How to Install Telnet Client on Windows 11 Using PowerShell
How to Install ASK CLI on Windows 11 or 10
How do you install FlutterFire CLI on Windows 11 or 10?