Homebrew is a package management software to install various software on macOS, however, we can also use this open-source Brew on Windows WSL and Linux operating systems such as Debian, Ubuntu, Linux Mint, Fedora, CentOS, RedHat and more… Homebrew is the best package management tool on macOS. When used on Linux, Homebrew is known as Linuxbrew.
HomeBrew installation on Linux or WSL
It installs the package into a separate directory and soft links its files to /usr/local. To make it simple, just like we have apt and yum for Linux to install different packages; in the same way, Homebrew will install and manage software packages in a unified way along with the dependencies needed by the packages, without worrying about the storage location and so on.
Note: To use it on the Windows subsystem for Linux first set it up using this Ubuntu WSL tutorial.
Step 1: Open Terminal and run system update command:
According to your Linux distro on Desktop or server run the system update command, here we will let you know for the most common ones.
Ubuntu & Debian based systems:
sudo apt update
RedHat or CentOS based:
sudo yum update
Step 2: Install Brew Dependencies
To set up Brew we need to have the following things on our system- GCC, Glibc, and 64-bit x86_64 CPU. I am sure you already on 64-bit CPU which is common nowadays, for the rest of things use the below commands as per your system.
For Debian, Linux Mint, Ubuntu or other similar OS
sudo apt-get install build-essential curl file git
For RedHat, Fedora, CentOS or other same kinds of Linux OS
sudo yum groupinstall 'Development Tools'
sudo yum install curl file git
sudo yum install libxcrypt-compat
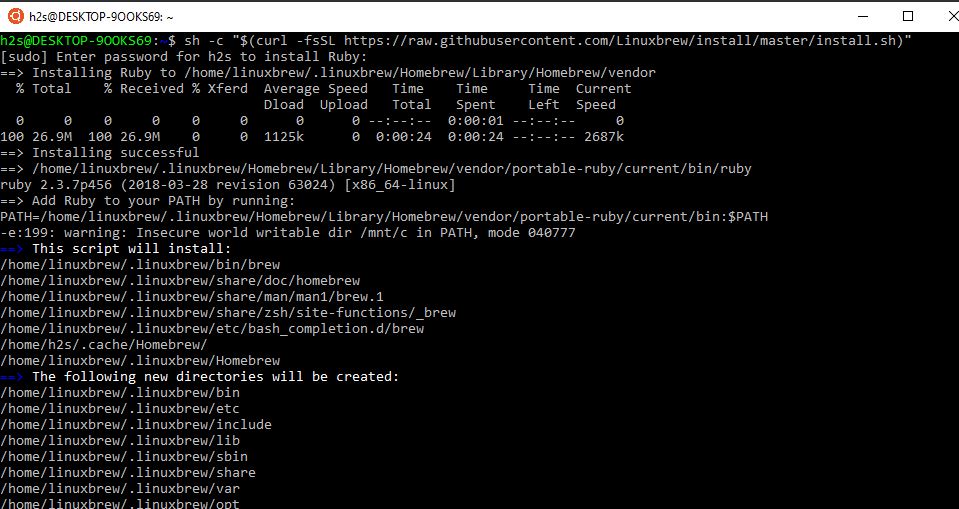
Step 3: Command to download and install HomeBrew
Now, simply copy & paste the command given below which will download the master script file needed to set up brew on Linux or WSL.
sh -c "$(curl -fsSL https://raw.githubusercontent.com/Linuxbrew/install/master/install.sh)"
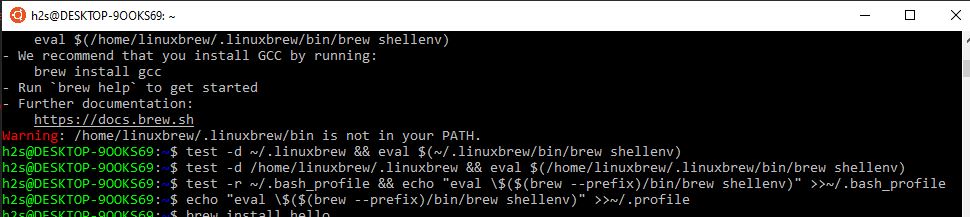
Step 4: Add Homebrew to your system PATH
To run brew command of this package manager from anywhere in the terminal regardless of the directory in which we are, we have to tell our system about it by adding it to the bin. Run the following command on your Linux system one by one.
test -d ~/.linuxbrew && eval $(~/.linuxbrew/bin/brew shellenv)
test -d /home/linuxbrew/.linuxbrew && eval $(/home/linuxbrew/.linuxbrew/bin/brew shellenv)
test -r ~/.bash_profile && echo "eval \$($(brew --prefix)/bin/brew shellenv)" >>~/.bash_profile
echo "eval \$($(brew --prefix)/bin/brew shellenv)" >>~/.profile
Example to use Brew command on Linux or Windows subsystem for Linux
So, now the package manager is on our system, let’s try to install some packages, for example, git or python.
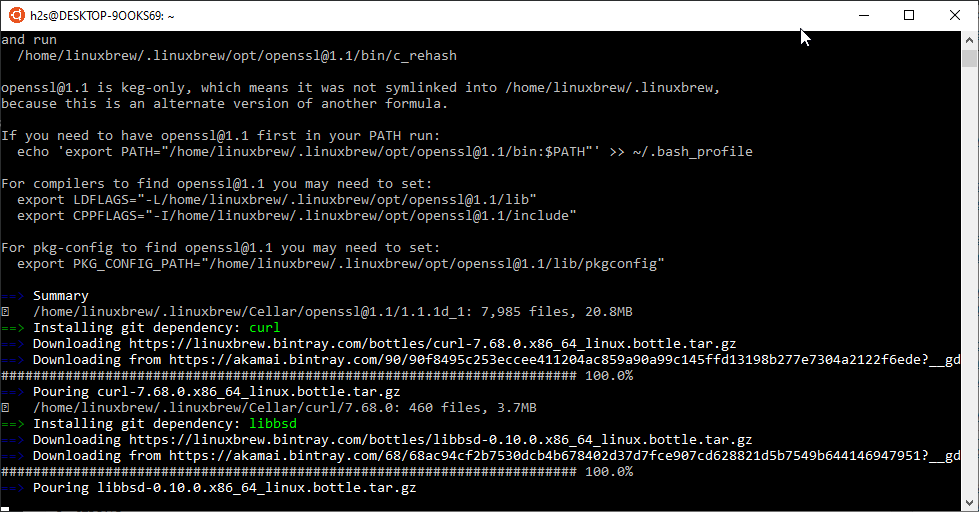
To install git using brew, the command will be like this:
brew install git
For Python:
brew install python
The output for the above git command:
h2s@DESKTOP-9OOKS69:~$ brew install git
Updating Homebrew...
==> Auto-updated Homebrew!
Updated 1 tap (homebrew/cask).
No changes to formulae.

==> Installing dependencies for git: ncurses, gettext, bzip2, zlib, pcre2, [email protected], curl, libbsd and expat
==> Installing git dependency: ncurses
==> Downloading https://linuxbrew.bintray.com/bottles/ncurses-6.1_1.x86_64_linux.bottle.tar.gz
Already downloaded: /home/h2s/.cache/Homebrew/downloads/d4ea71074c7ccba18fb75489ae89e777e360d9621d19447f0336e1a02908c632--ncurses-6.1_1.x86_64_linux.bottle.tar.gz
==> Pouring ncurses-6.1_1.x86_64_linux.bottle.tar.gz
🍺 /home/linuxbrew/.linuxbrew/Cellar/ncurses/6.1_1: 3,860 files, 9.0MB
==> Installing git dependency: gettext
==> Downloading https://linuxbrew.bintray.com/bottles/gettext-0.20.1_1.x86_64_linux.bottle.tar.gz
==> Downloading from https://akamai.bintray.com/72/724879481408d819c1b49787e14f95657fb1c6607b51c0a943773b773298e349?__gd
######################################################################## 100.0%
==> Pouring gettext-0.20.1_1.x86_64_linux.bottle.tar.gz
🍺 /home/linuxbrew/.linuxbrew/Cellar/gettext/0.20.1_1: 1,892 files, 20.2MB
==> Installing git dependency: bzip2
==> Downloading https://linuxbrew.bintray.com/bottles/bzip2-1.0.8.x86_64_linux.bottle.tar.gz
==> Downloading from https://akamai.bintray.com/e5/e5fce257b9fee119d28d0e7f7dac9332bd26b248fe35d983ba85104243e4bc2e?__gd
######################################################################## 100.0%
==> Pouring bzip2-1.0.8.x86_64_linux.bottle.tar.gz
🍺 /home/linuxbrew/.linuxbrew/Cellar/bzip2/1.0.8: 30 files, 521.3KB
==> Installing git dependency: zlib
==> Downloading https://linuxbrew.bintray.com/bottles/zlib-1.2.11.x86_64_linux.bottle.tar.gz
######################################################################## 100.0%
==> Pouring zlib-1.2.11.x86_64_linux.bottle.tar.gz
🍺 /home/linuxbrew/.linuxbrew/Cellar/zlib/1.2.11: 12 files, 396KB
==> Installing git dependency: pcre2
==> Downloading https://linuxbrew.bintray.com/bottles/pcre2-10.34.x86_64_linux.bottle.tar.gz
==> Downloading from https://akamai.bintray.com/49/497ae0c6e7f7e8bb9dd7555cf8a6aec0dd6a84b052751741fe8fb55ec70799db?__gd
######################################################################## 100.0%
==> Pouring pcre2-10.34.x86_64_linux.bottle.tar.gz
🍺 /home/linuxbrew/.linuxbrew/Cellar/pcre2/10.34: 235 files, 6.6MB
==> Installing git dependency: [email protected]
==> Downloading https://linuxbrew.bintray.com/bottles/[email protected]_1.x86_64_linux.bottle.tar.gz
==> Downloading from https://akamai.bintray.com/01/010a4e5257eb685ac700f495208bed1e05155663f8083ab6ab2e4a91ef69c1cd?__gd
######################################################################## 100.0%
==> Pouring [email protected]_1.x86_64_linux.bottle.tar.gz
==> Downloading https://curl.haxx.se/ca/cacert-2019-10-16.pem
######################################################################## 100.0%
==> Caveats
A CA file has been bootstrapped using certificates from the system
keychain. To add additional certificates, place .pem files in
/home/linuxbrew/.linuxbrew/etc/[email protected]/certs

and run
/home/linuxbrew/.linuxbrew/opt/[email protected]/bin/c_rehash

[email protected] is keg-only, which means it was not symlinked into /home/linuxbrew/.linuxbrew,
because this is an alternate version of another formula.

If you need to have [email protected] first in your PATH run:
echo 'export PATH="/home/linuxbrew/.linuxbrew/opt/[email protected]/bin:$PATH"' >> ~/.bash_profile

For compilers to find [email protected] you may need to set:
export LDFLAGS="-L/home/linuxbrew/.linuxbrew/opt/[email protected]/lib"
export CPPFLAGS="-I/home/linuxbrew/.linuxbrew/opt/[email protected]/include"

For pkg-config to find [email protected] you may need to set:
export PKG_CONFIG_PATH="/home/linuxbrew/.linuxbrew/opt/[email protected]/lib/pkgconfig"

==> Summary
🍺 /home/linuxbrew/.linuxbrew/Cellar/[email protected]/1.1.1d_1: 7,985 files, 20.8MB
==> Installing git dependency: curl
==> Downloading https://linuxbrew.bintray.com/bottles/curl-7.68.0.x86_64_linux.bottle.tar.gz
==> Downloading from https://akamai.bintray.com/90/90f8495c253eccee411204ac859a90a99c145ffd13198b277e7304a2122f6ede?__gd
######################################################################## 100.0%
==> Pouring curl-7.68.0.x86_64_linux.bottle.tar.gz
🍺 /home/linuxbrew/.linuxbrew/Cellar/curl/7.68.0: 460 files, 3.7MB
==> Installing git dependency: libbsd
==> Downloading https://linuxbrew.bintray.com/bottles/libbsd-0.10.0.x86_64_linux.bottle.tar.gz
==> Downloading from https://akamai.bintray.com/68/68ac94cf2b7530dcb4b678402d37d7fce907cd628821d5b7549b644146947951?__gd
######################################################################## 100.0%
==> Pouring libbsd-0.10.0.x86_64_linux.bottle.tar.gz
🍺 /home/linuxbrew/.linuxbrew/Cellar/libbsd/0.10.0: 261 files, 897.2KB
==> Installing git dependency: expat
==> Downloading https://linuxbrew.bintray.com/bottles/expat-2.2.9.x86_64_linux.bottle.tar.gz
==> Downloading from https://akamai.bintray.com/5d/5d0281695b1febb80cb2dc3c64d61e586ebe1870202d4f763650ab127d2b9f01?__gd
######################################################################## 100.0%
==> Pouring expat-2.2.9.x86_64_linux.bottle.tar.gz
🍺 /home/linuxbrew/.linuxbrew/Cellar/expat/2.2.9: 18 files, 711.8KB
==> Installing git
==> Downloading https://linuxbrew.bintray.com/bottles/git-2.25.0_1.x86_64_linux.bottle.tar.gz
==> Downloading from https://akamai.bintray.com/bf/bf6ec84bf7db2334df764e74dd146e5a4b3ac8b0d7271723989f1ddc3d2b7b2b?__gd
######################################################################## 100.0%
==> Pouring git-2.25.0_1.x86_64_linux.bottle.tar.gz
==> Caveats
The Tcl/Tk GUIs (e.g. gitk, git-gui) are now in the `git-gui` formula.
<--more--->
Now to use git simply type Git along with the files you want to clone or update.
View software information
To know the information of installed packages using homebrew, simply use this one:
brew info <package name>
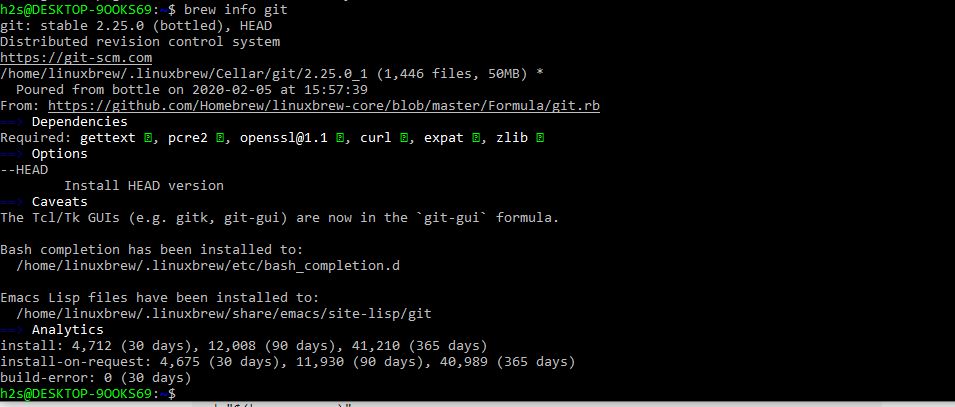
For the example above we have installed git & python, thus to know about its version and other information, we will use:
brew info git
The output will be like this:
h2s@DESKTOP-9OOKS69:~$ brew info git
git: stable 2.25.0 (bottled), HEAD
Distributed revision control system
https://git-scm.com
/home/linuxbrew/.linuxbrew/Cellar/git/2.25.0_1 (1,446 files, 50MB) *
Poured from bottle on 2020-02-05 at 15:57:39
From: https://github.com/Homebrew/linuxbrew-core/blob/master/Formula/git.rb
==> Dependencies
Required: gettext ✔, pcre2 ✔, [email protected] ✔, curl ✔, expat ✔, zlib ✔
==> Options
--HEAD
Install HEAD version
==> Caveats
The Tcl/Tk GUIs (e.g. gitk, git-gui) are now in the `git-gui` formula.

Bash completion has been installed to:
/home/linuxbrew/.linuxbrew/etc/bash_completion.d

Emacs Lisp files have been installed to:
/home/linuxbrew/.linuxbrew/share/emacs/site-lisp/git
==> Analytics
install: 4,712 (30 days), 12,008 (90 days), 41,210 (365 days)
install-on-request: 4,675 (30 days), 11,930 (90 days), 40,989 (365 days)
build-error: 0 (30 days)
View installed software
If at any point of time someone wants to know which are the software or packages have been installed on the system using this package manager use the command:
brew list

Uninstall software
To remove any installed packages use this one:
brew uninstall <package_name>
For example, above we have set up git, thus to remove the same, the command will be
brew uninstall git
It is not limited to Git only, you can install Nginx and so many others. All binary packages of Homebrew known as bottles are built on GitHub Actions and hosted by Bintray.
How to uninstall Homebrew from system
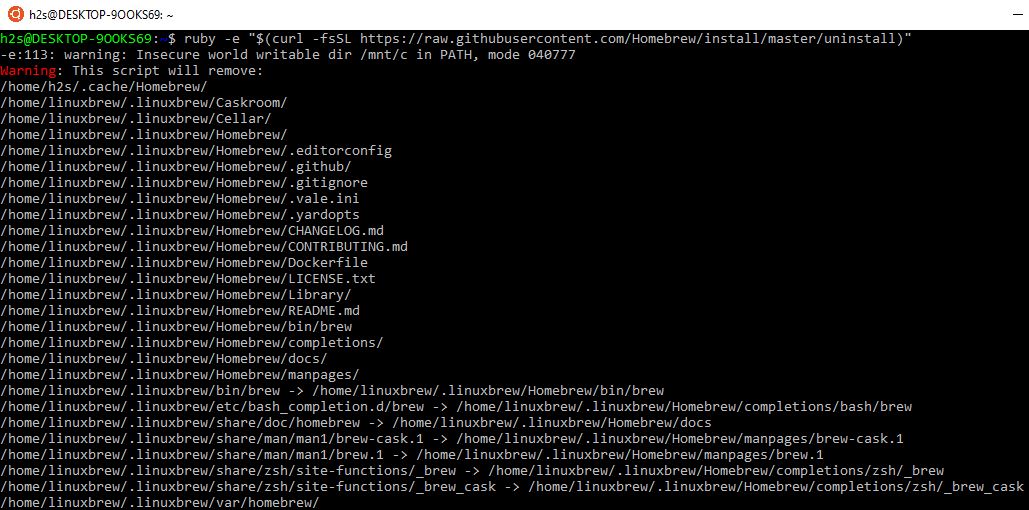
If of any reason you want to remove the homebrew from your system then run the below syntax:
First, install ruby for Ubuntu or Debian systems
sudo apt install ruby
On RedHat or CentOS
sudo yum install ruby
Run uninstallation script
ruby -e "$(curl -fsSL https://raw.githubusercontent.com/Homebrew/install/master/uninstall)"
To know more about the command usage of Brew, please refer to the official document: “Homebrew Documentation”
Homebrew also has an extension known as ” Homebrew Cask ” to speed up the installation of GUI applications on macOS, however, it is available to support only MAC, thus here only for knowledge, if anyone is interested can visit ” Homebrew Cask ” to learn about it. To enable it just type brew cask.
Other Articles:


It says brew is moving to Homebrew