The Windows Subsystem for Linux (WSL) is an efficient way to get the benefits of different Linux operating systems on Windows 10 PC and laptops. WSL allows running of Linux apps directly on Windows 10 system without using any virtualization software like VirtualBox or VMware. The WSL is available for Windows 10 and Windows server 2019.
Windows Subsystem for Linux (WSL) basically a compatibility layer developed by Microsoft for running Linux binaries. It doesn’t contain any kind of Linux kernel code rather it uses a Linux compatible kernel interface. The disadvantage of the WSL it is not capable of running all Linux software especially those requires the Linux kernel services.
We can run Linux apps in graphical mode by installing the opensource X11 server on the Windows 10 (hosts), however, the performance would be poor due to lack of audio or hardware acceleration.
There are lots of advantages of WSL too, such as the user don’t need to install any Virtual machine to test out Linux application; one can install and create Apache (LAMP stack), Nginx kind of web server natively on Windows 10; different types of Linux distributions systems available as apps such as Debian, Ubuntu, Kali Linux and OpenSuse; Consume low resources as compared to Virtual machines; navigate around the file system; use of command line Linux apps via Bash and more… Now let’s see how to install Windows subsystem for Linux on Windows 10 or Windows server 2019. The WSL is not available for older versions of Windows.
Enable Windows Subsystem for Linux (WSL) on Windows 10
- Open Control Panel
- Click on Programs option
- Select the Turn Windows features Turn on or off
- Scroll down and find Windows SubSystem for Linux
- When it appears to select its checkbox and click on the OK button.
- In a few minutes, the Windows Subsystem for Linux (ASL) will automatically get installed on the system.
- After installation, click the Restart Now button.
- Now open Microsoft Windows store and search for Linux
- Install any of the available open-source Linux apps on Windows 10
Step by step installation with screenshots
Step 1: Click on the Start menu of Windows and navigate to open the control panel.
Step 2: From the Control Panel, first click on the “Turn Windows features on or off” option. One can also search directly for it from the Search box of Windows.
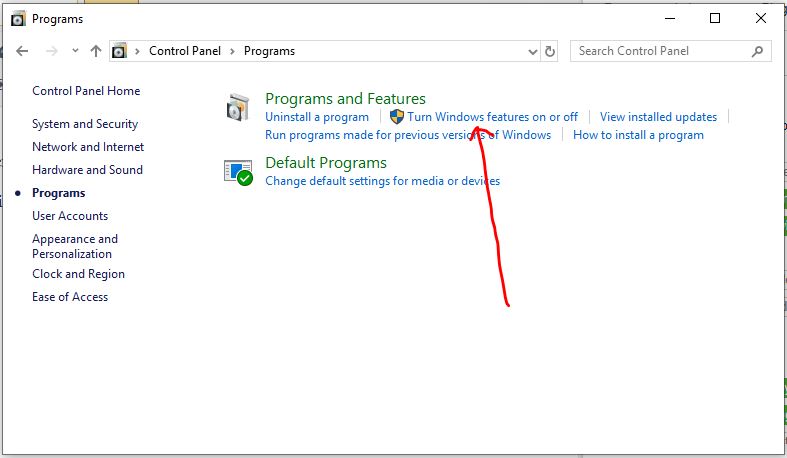
Step 3: Scroll down and you will find an option Windows Subsystem for Linux. A box is given in front of that click on that to check and then the OK button to install the WSL on Windows 10.

Step 4: When it asks to restart the system do that.
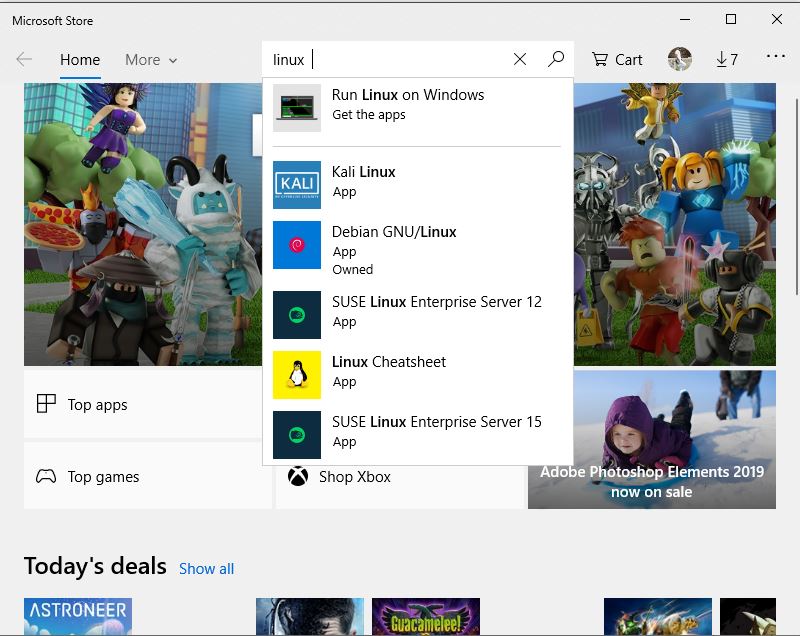
Step 5: After the installation, go to the Microsoft store and download the Linux app to play with.
Step 6: When you search for the term Linux: Run Linux of Windows, Debian, Ubuntu, OpenSuse enterprise server, Kali Linux environments will appear. Choose the one you want to work with to download and install. Here we are installing Ubuntu 18.04.
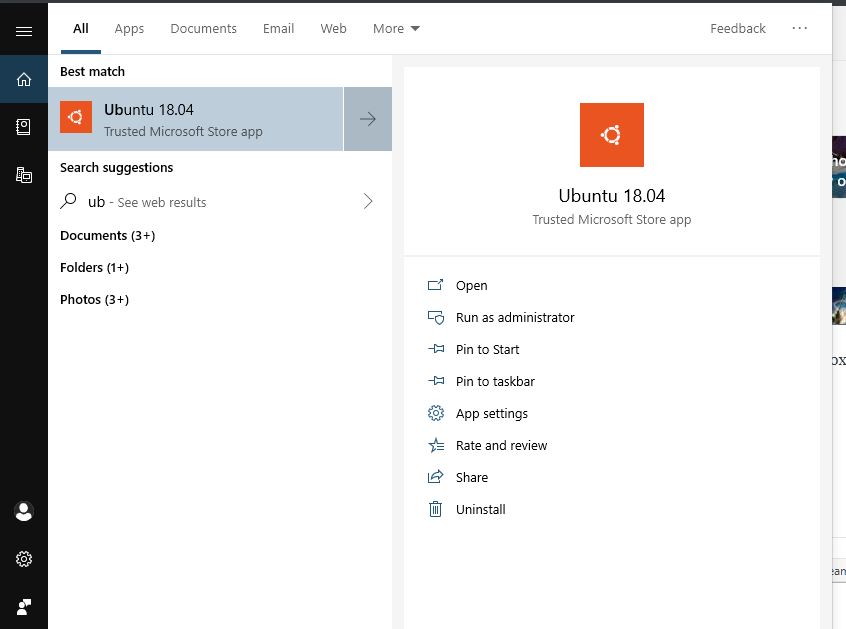
Step 7: Once we installed Ubuntu or other Linux apps on Windows then just go to search box and type its name. For example, we have installed Ubuntu, so we typed Ubuntu.
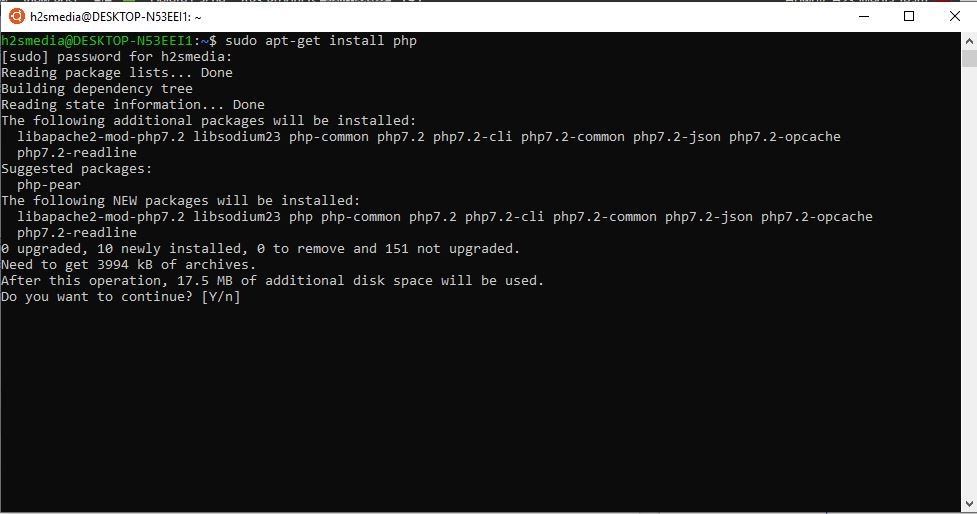
Step 8: As soon as you open the bash of Ubuntu on Windows you can run the native Linux commands directly on Windows 10 systems. You can now setup Apache (LAMP) web server without the need of WAMP or XAMPP like servers. All the files of the Linux apps will save on your C Drive without any contradiction with Windows files.
We tried to set up Apache and PHP on Ubuntu on Windows 10 subsystem for Linux and it worked perfectly. It was smooth and performed better than installing a virtual machine using VirtualBox or other Virtualization software.
So, in this way, anyone can enable the subsystem for Linux on Windows to test different Linux commands without compromising much on hardware resources.
Other Useful Resources:
- How to run Linux GUI apps on Windows 10 with native Bash
- Record Screen and Audio on Windows 7/10/8? Using Free tool
- How to find out the user who is using your Wi-Fi network
- How to install and use Bash on Windows 10 to run Ubuntu or any other command line from Windows
- Tutorial to create desktop shortcuts for the Windows Store apps on Windows 10
Related Posts
How to Install 7-Zip on Windows 11 or 10 with Single Command
Install Google Earth on Windows 11 or 10 Using a Single Command
How to install Gaming Services on Windows 11
How to Install Telnet Client on Windows 11 Using PowerShell
How to Install ASK CLI on Windows 11 or 10
How do you install FlutterFire CLI on Windows 11 or 10?