Well! this tutorial is not something new there are hundred of out there on Mysql database installation on CentOS. The only difference is, here we are performing it on the latest server edition of this project i.e CentOS 8 Linux or Stream. Mysql which was available in the default repository of CentOS 7 was 5.5 but now it is MySQL 8.8, which is same for RHEL 8 too.
Those are new to Oracle MySQL, it is an open-source database software available for Linux as well as for Windows. Apart from the community edition, the paid enterprise edition is also available. However, most of the time MySQL database uses and install on the Linux operating system because of integrity and performance. It used popularly with other web software such as Apache webserver + PhpMyAdmin (LAMP) or Nginx + phpMyAdmin (LEMP). L stands for Linux OS and P stands for phpMyAdmin that is Graphical user interface to control MySQL databases. Well! we talked a lot, let’s come to the point which is the process of MySQL 8.7 installation on CentOS 8 Linux.
Steps to Install MySQL on CentOS 8 Linux
Note: Login to your CetnOS 8 Linux server with a user that has sudo or root privileges. The steps given here to install are the same for RHEL 8 and CentOS Stream along with other same code based Linux distros.
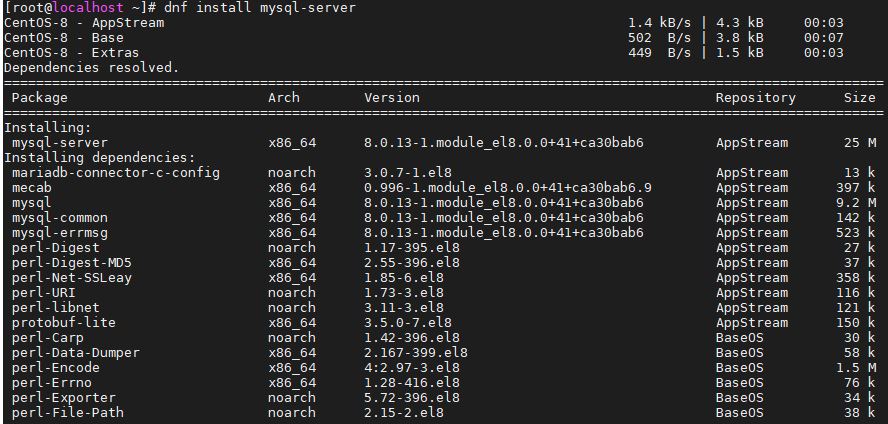
Step 1. Command to Install MySQL server
Now users can use both YUM or DNF package manager along with an installation command that available to install MySQL or MariaDB. Here we will show how you can install the community version of MySQL 8.0 using both. Here are the commands:
sudo dnf install mysql-server
or
sudo yum install mysql-server
The above command will install all the database server packages need for MySQL.
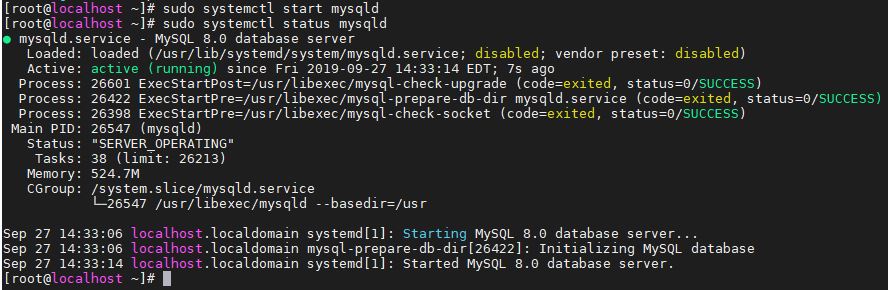
Step 2. Enable MySQL server service on CentOS 8
After installing the Oracle MySQL, its time to enable and start its daemon so that it can run automatically after crash or system reboot.
sudo systemctl start mysqld
Now check the status of the Mysql service is running or not.
sudo systemctl status mysqld
Step 3. Securing MySQL by setting a strong password
By default, MySQL databases server uses the system root password or any user with sudo access can access it. So, our motive here is to create a very strong password, so that or database server become less vulnerable. Here is the command to secure MySQL installation on CentOS 8 Linux.
sudo mysql_secure_installation
The output for the above command:
[root@localhost ~]# sudo mysql_secure_installation
Securing the MySQL server deployment.
Connecting to MySQL using a blank password.
VALIDATE PASSWORD COMPONENT can be used to test passwords
and improve security. It checks the strength of password
and allows the users to set only those passwords which are
secure enough. Would you like to setup VALIDATE PASSWORD component?
Press y|Y for Yes, any other key for No:
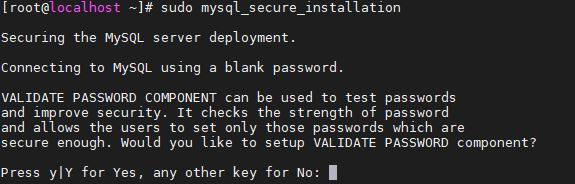
When it will ask to set up a Validate, you can say NO. If you don’t want to system to check whether your set password is up to the security mark or not. or you can select Y. In both scenarios, the setup will continue and you can set a new password.
Enter the password two times.
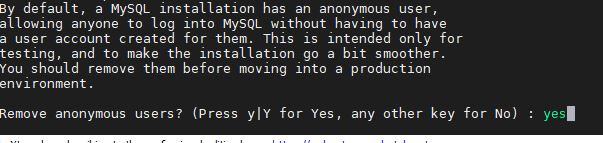
1: Remove MySQL Anonymus user.
By default, a MySQL installation has an anonymous user which allow any user of the system to login MySQL-server. So, when the system will ask you, do you want to remove anonymous users? Type Yes and press the Enter button.
2. Disable root login remotely
If you don’t want to log in and access your database server remotely via root privileges just disallow that to enhance the security. This means one can only log in to MySQL server as root using localhost or machine.
Press Y to enable this option and No to allow it.

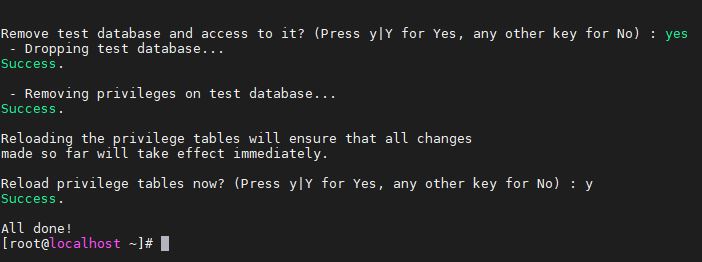
3. Remove Test Database
Press the Y button and delete the Test Database from the database server and after that Reload database privileges by typing Y and pressing the Enter button.
Step 4: Check the installed MySQL version
So, everything is for MySQL server on CentOS 8 Linux is set up, now its time to log in it with the latest set root password. Before that let’s check its version for that we are connecting mysqladmin tool with root user access and password to get the version value.
mysqladmin -u root -p version
In the below screen you can see, first I used my local system root password which has rejected by the server and then used the password which I created while securing MySQL installation.
![Login to MySQL server on CentOS 8 and stream]](https://www.how2shout.com/wp-content/uploads/2019/09/Login-to-MySQL-server-on-CentOS-8-and-stream.jpg)
The output of the above command:
[root@localhost ~]# mysqladmin -u root -p version
Enter password:
mysqladmin Ver 8.0.13 for Linux on x86_64 (Source distribution)
Copyright (c) 2000, 2018, Oracle and/or its affiliates. All rights reserved.

Oracle is a registered trademark of Oracle Corporation and/or its
affiliates. Other names may be trademarks of their respective
owners.

Server version 8.0.13
Protocol version 10
Connection Localhost via UNIX socket
UNIX socket /var/lib/mysql/mysql.sock
Uptime: 26 min 57 sec

Threads: 2 Questions: 11 Slow queries: 0 Opens: 126 Flush tables: 2 Open tables: 102 Queries per second avg: 0.006
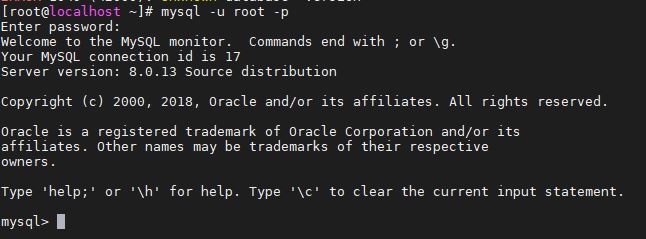
Step 5: Login Mysql Server to test it
To log in and create databases use the below command:
mysql -u -root -p
CentOS 8 MySQL installation tutorial end
So, in this way, we can perform the database server installation on our server. See more articles on MYSQL .
Other articles to read:
- Top Mongodb GUI tools to manage databases graphically
- How to install and use Node.js http-server via NPM
- Install Nginx + php + MySQL on WSL Windows 10
- MySQL GUI Tools for Windows and Linux
Related Posts
How to create email groups in Gmail? Send one email to multiple recipients in a matter of seconds.
Getting the right dashcam for your needs. All that you need to know
How to Install 7-Zip on Windows 11 or 10 with Single Command
How to Install ASK CLI on Windows 11 or 10
How do you install FlutterFire CLI on Windows 11 or 10?
How to create QR codes on Google Sheets for URLs or any other text elements