Windows Subsystem for Linux version 2 – WSL2 is the updated version of WSL1 on Windows 11 or 10 that uses the Virtual Machine Platform feature to give a native Linux experience by allowing the running of GUI apps.
If you have just installed Windows 11 then here is the tutorial to enable WSL2 and install Ubuntu 20.04 LTS Linux app.
Steps to enable WSL2 and install Ubuntu 20.04 LTS Linux App
1. Enable WSL 2 and Virtual Machine Platform
Those who yet have never used the Windows subsystem for Linux, need to first enable the same. Whereas WSL1 can be used without the Virtual machine Platform feature but WSL2 cannot.
#Command Line Method:
If you don’t want to use the GUI method then simply right-click on your Windows 11 Start menu icon and select “Windows Terminal (Admin)“. And type:
wsl --install
#GUI Method:
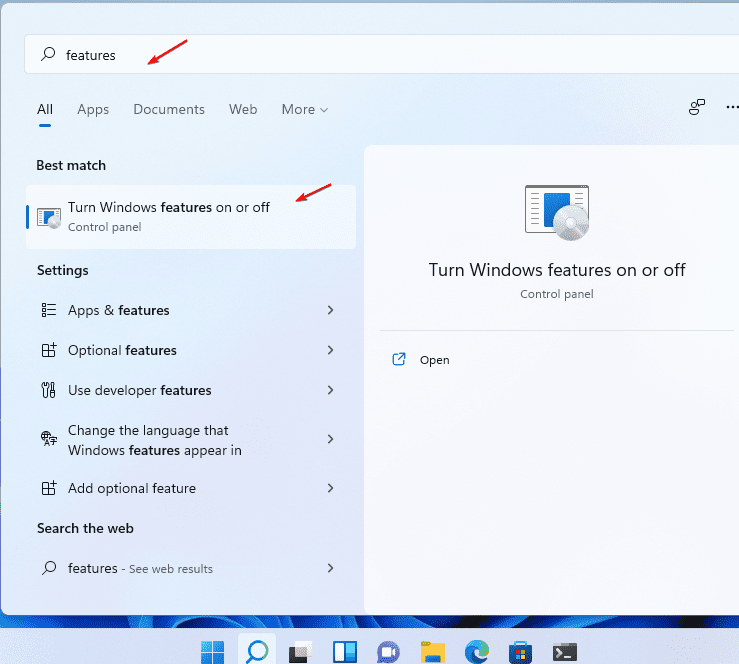
• Click on the Windows Search icon or press the Start button on Keyboard.
• Now, type- features, when the “Turn Windows Features On or Off” option appears select to open it.
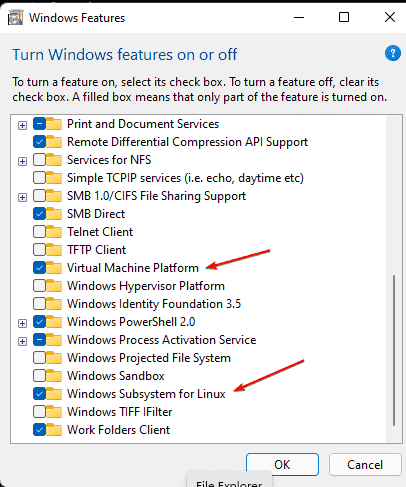
• On Windows Features, check the box given for “Virtual Machine Platform” and “Windows Subsystem for Linux“; hit the OK button.
Reboot system
Once the features are installed, reboot your Windows to make sure integration happened successfully.
2. Install Ubuntu 20.04 on Windows 11 or 10 WSL 2
Now, we have the basic platforms we required to run Windows Subsystem for Linux version 2, it’s time to install the Ubuntu 20.04 LTS Linux app either using the Microsoft store or Powershell.
There are two ways- CLI and GUI; Select the one which you feel comfortable with.
#Command-line method:
If you would like to use the command line, then right-click on your Windows 11 Start menu icon and select Windows Terminal (Admin).
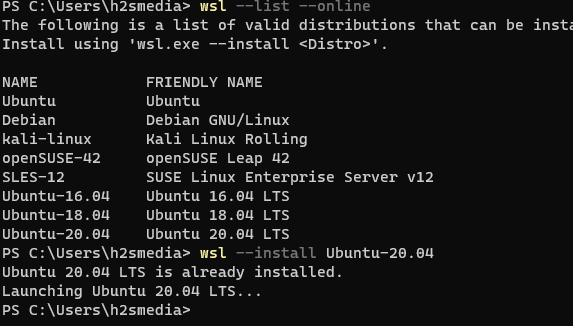
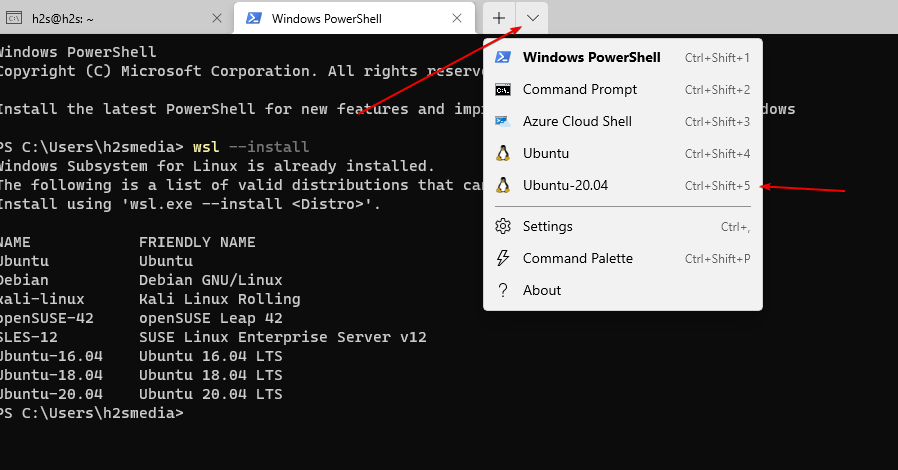
To check available Linux distros, the command is:
wsl --list --online
To install any of the listed distros, use its name using the below command:
wsl --install Ubuntu-20.04
GUI Method:
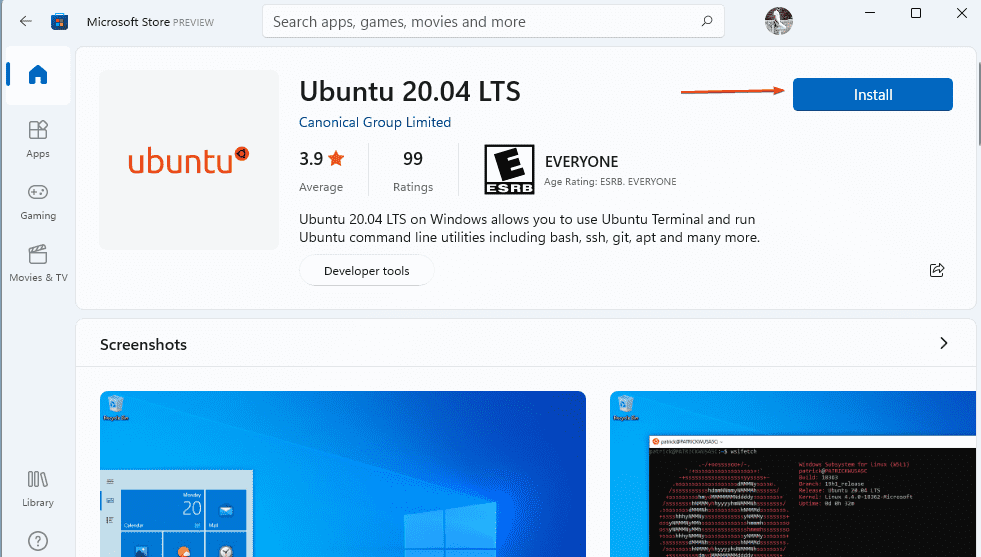
If you want it via Microsoft Store, then click on its icon given in the Taskbar or search the same in the Programs. After that search for Ubuntu 20.04 LTS.
3. Run Ubuntu 20.04 LTS Linux App
Now, either click on the Windows 11 search button then type- Ubuntu to run the installed Linux distro or just open Windows Terminal-> click on the arrow icon and select Ubuntu 20.04 LTS.
4. Run Update
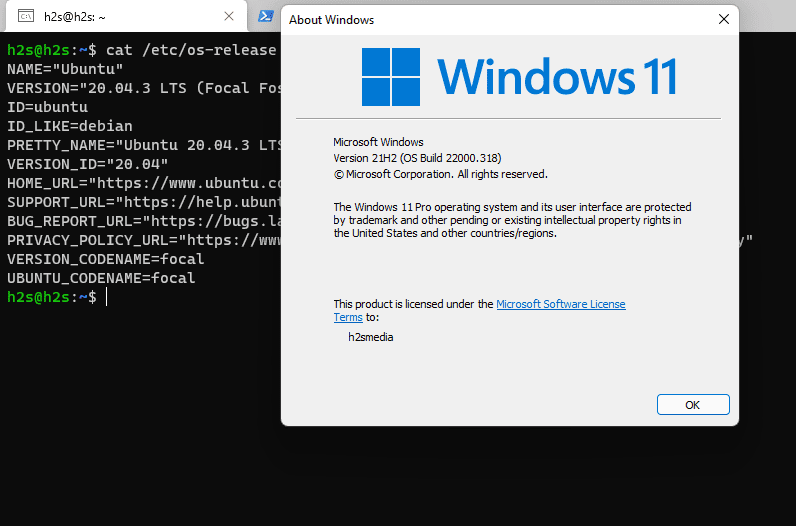
Finally, you have the Linux running on WSL2 on your Windows 11. Start using the same.
Other Articles:
• How to run Linux distro app as WSL 2 running on WSL 1
• How to install CentOS 8 on WSL 1 or 2 of Windows 10
• Install Docker on Windows 10 using PowerShell with WSL 2
Related Posts
How to Install 7-Zip on Windows 11 or 10 with Single Command
Install Google Earth on Windows 11 or 10 Using a Single Command
How to install Gaming Services on Windows 11
How to Install Telnet Client on Windows 11 Using PowerShell
How to Install ASK CLI on Windows 11 or 10
How do you install FlutterFire CLI on Windows 11 or 10?