Learn the simple commands to use on Powershell for installing Docker on Windows 10 with WSL 2 support for creating an optimized and fast container environment to run various Virtual machine images.
Well, when it comes to installing Docker on Windows 10, most of us struggle with the problem of enabling Hyper-V because it won’t work properly without that. However, if we don’t want to use Hyper-V for Docker installation then using WSL 2 support would be a good idea.
WSL which is already available in the Windows 10 operating system and now comes with the ability to run full-fledged Linux kernel using WSL 2, makes it very easy to operate Docker without Hyper-V or VirtualBox.
Read More: Tutorial to install Docker on Windows 7 without Hyper-V.
Pre-requisites:
- Windows 10 OS
- Admin access
- Powershell
- WSL- Windows Subsystem for Linux
- Internet connection
Install Docker using Powershell on Windows 10 with a single command
Most of us download and use the executable file available on the official website of this containerized platform to set it up, however, you don’t have to do all that. Just use the command line, follow the below steps, and you are done.
Note: Make sure the WSL- Windows subsystem for Linux is already enabled on your system before performing the below-given steps.
Open PowerShell as Admin
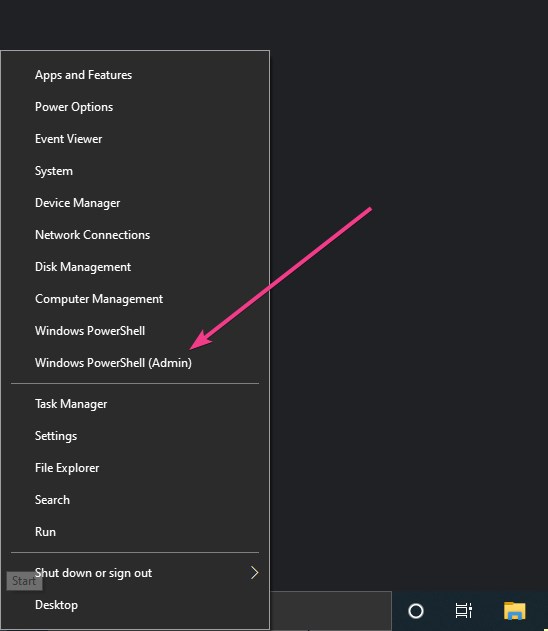
We need to have the Administrator access of PowerShell to run the installation command for Docker, thus, right-click on the Windows 10 Start button and select the “Windows PowerShell (Admin)” option.
Install Chocolatey
Just like Linux packages managers, for example, DNF of CentOS and APT available in Ubuntu, one is also available for Windows operating systems called Chocolatey. The command tool used by this Windows package manager is choco.
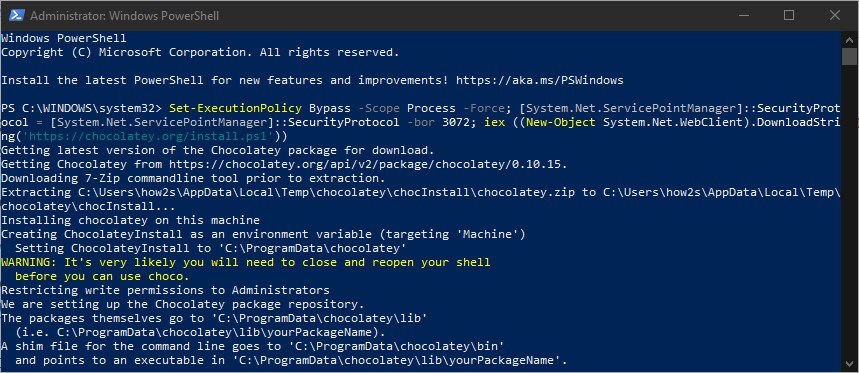
Run the below command to enable it in Powershell
Set-ExecutionPolicy Bypass -Scope Process -Force; [System.Net.ServicePointManager]::SecurityProtocol = [System.Net.ServicePointManager]::SecurityProtocol -bor 3072; iex ((New-Object System.Net.WebClient).DownloadString(‘https://chocolatey.org/install.ps1’))
Note: Once the Chocolatey is on your system, close the Powershell and reopen it as Admin.
Command to install Docker Desktop using PowerShell on Windows
Now, everything is ready on Powershell and we can use the Choco command to install Docker on Windows 10 Desktop or Windows Server OS.
choco install docker-desktop --pre
When the above command asks for your permission to install the packages, allow it by typing A and hitting the Enter key.
Run Docker Desktop
You will see the icon on your desktop to run this open source containerized platform, double click on that. And start it.
Configure WSL 2 Distro
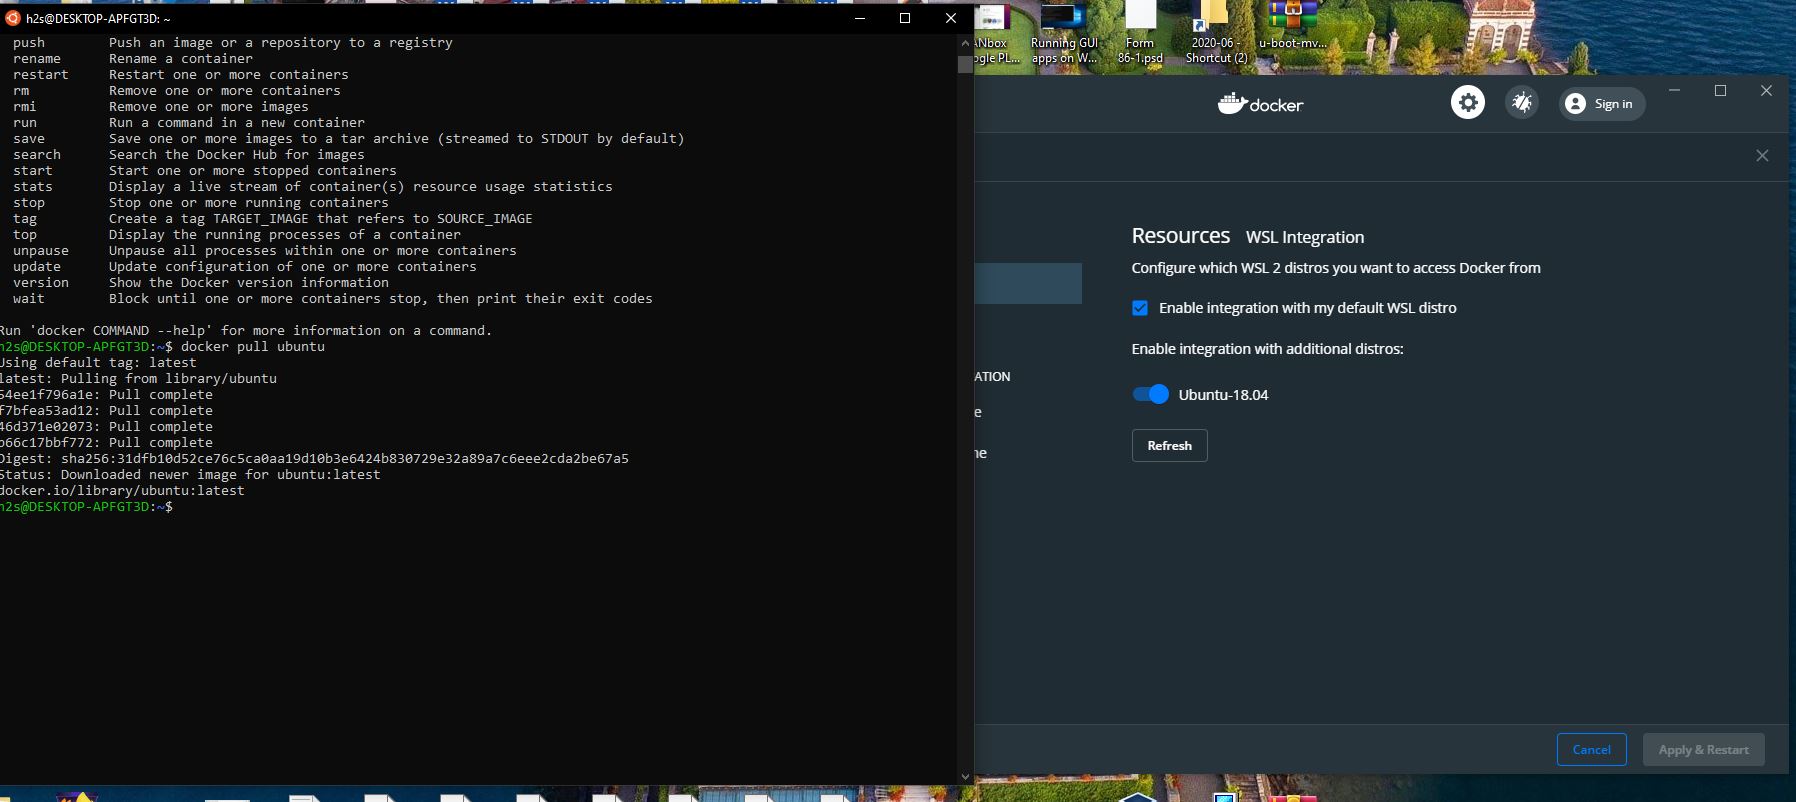
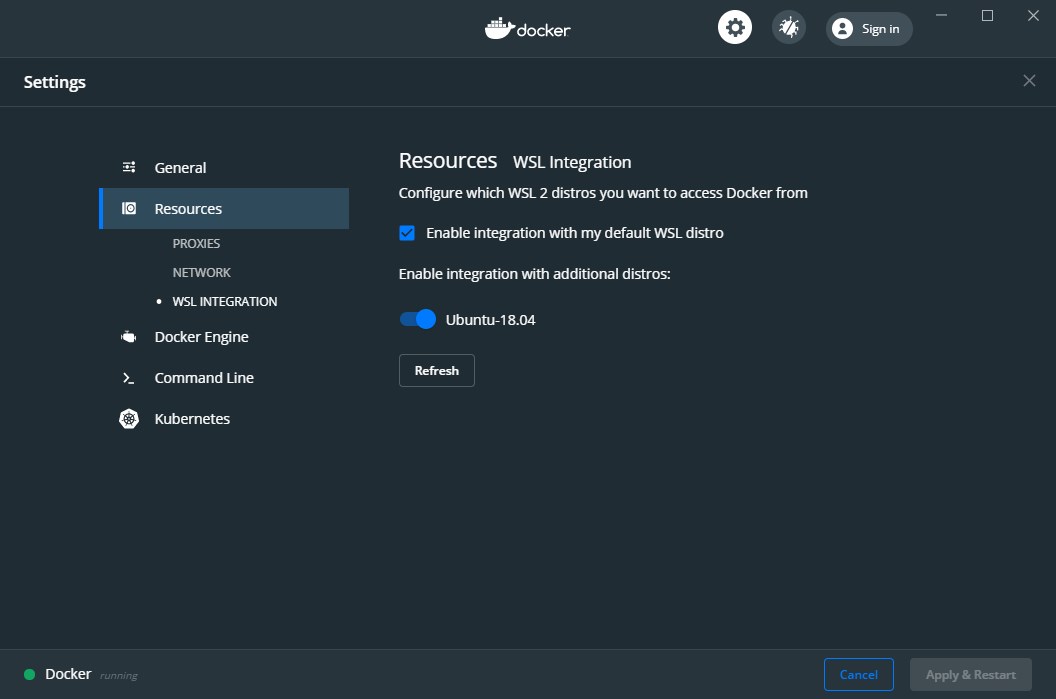
Although after installing the Docker, it will automatically install its own WSL 2 Linux distro on your system as the default one. Thus, you can easily start using it from PowerShell. In case you want to enable the docker support to other available WSL Linux distros then simply go to the Docker Desktop app, select the Resources option given on the left side, and select WSL integration. You will find all installed and available WSL distros there, use the toggle button given in the front of the distro to enable the support. After that, the particular WSL Linux distro for which you have enabled its support can directly run all the Docker commands without actually installing on that distro.
Extra Tip: Convert WSL 1 distro to WSl 2
In case your WSL distro is still on WSl 1 then you have to first enable the WSL 2 support. For that run your Powershell as Admin and use this command:
dism.exe /online /enable-feature /featurename:VirtualMachinePlatform /all /norestart
Now, go to the Microsoft page to download the WSL 2 kernel update setup, use this link to directly download and upgrade the kernel.
Once all this done, simply restart the system.
Now, open Powershell again as admin and type:
wsl -l
The above command will show all the installed WSL distro on your system. Find out the name of one which you want to convert. For example, we have Ubuntu-18.04 WSL distro and to convert it from WSL 1 to WSL 2, we will run the command:
wsl --set-version distro-name 2
So, as per the example, the command will be like this:
wsl --set-version ubuntu-18.04 2
I hope this article somehow helped you, if you have any query please feel free to comment.

Related Posts
How to install Redhat Podman on Windows 10 or 11 via CMD
Install Docker Desktop on Windows 11 or 10 via PowerShell
How to install BetterCap on Windows 11 or 10
How to find WSL home directory using Windows GUI?
How to install Git LFS on WSL2 – Windows 11 or 10?
How to install Anaconda on WSL Windows 10/11 using Ubuntu Linux App