MX Linux is nowadays my new working operating system and it really impressed me because of speed and lightweight. Moreover, so many packages of different programs are available to install using the default repository of the MX Linux, let’s take an example of VirtualBox. Yes, this Virtual Machine creation software or Type 2 Hypervisor is available to install without using any external repository. The usage of Oracle VirtualBox on this Linux distro will be the same others such as Windows, Ubuntu etc., however, its installation here is quite easy, one command that’s all you have to do.
Here in this tutorial, we will show how to install VirtualBox on MX Linux using just a single command:
- Clearly, first, boot in your MX Linux OS to install Virtual Box on it.
- Click on the Start button depicted with its logo given on the taskbar to access application menu.
- Search for command terminal and open it.
- Run system update command:
sudo apt update
- Now, type a single line command to install VirtualBox on MX Linux. The following command not only installs the main VBOX software but also its guest addition ISO, thus no need to take any further steps to complete its installation after running the below command.
sudo apt install virtualbox
- Output for the above command:
$ sudo apt install virtualbox
[sudo] password for h2s:
Reading package lists... Done
Building dependency tree
Reading state information... Done
The following additional packages will be installed:
libgsoap-2.8.75 libvncserver1 virtualbox-dkms virtualbox-guest-additions-iso virtualbox-qt
Suggested packages:
vde2
Recommended packages:
virtualbox-ext-pack
The following NEW packages will be installed:
libgsoap-2.8.75 libvncserver1 virtualbox virtualbox-dkms virtualbox-guest-additions-iso
virtualbox-qt
0 upgraded, 6 newly installed, 0 to remove and 0 not upgraded.
Need to get 107 MB of archives.
After this operation, 244 MB of additional disk space will be used.
Do you want to continue? [Y/n]
- After the installation, go to Applications and search for this Virtualization platform, as its icon appears, click on it to start using and creating Virtual Machine over it on MX Linux. Or simply run the following command:
sudo virtualbox
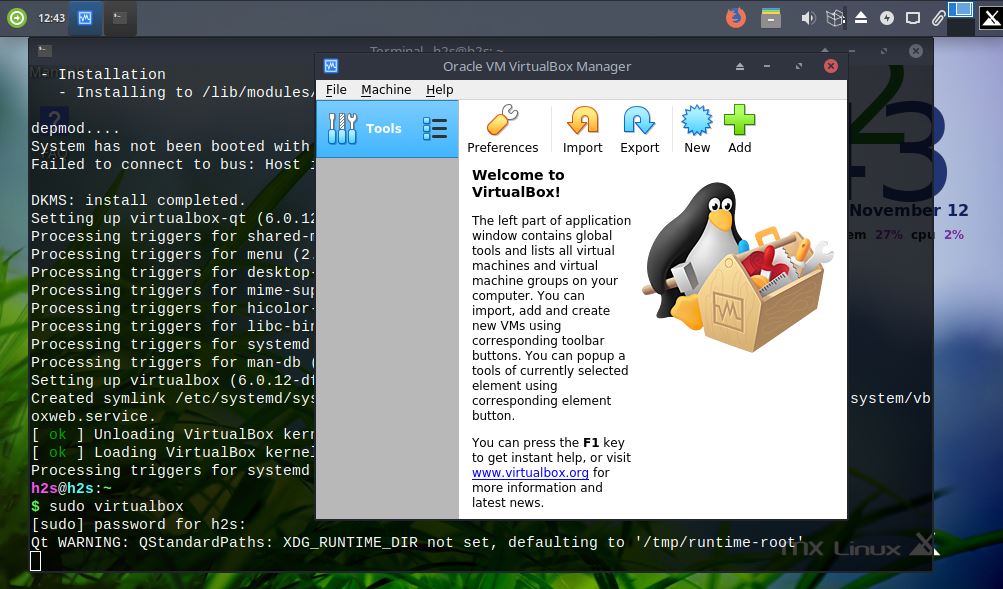
To create Virtulmachines, click on New button and follow the wizard.
That’s all. So easy and straight forward…
If you are on a remote server then you can see this article, where we have shown a simple way to remotely access the VirtualBox installed virtual machines using RemoteBox. It is a lightweight tool which provides client software that has an exactly similar interface like VBox and also operates in the same way but for remote installation on this virtualization platform.


When Executing “sudo apt install virtualbox” , I get this error (I’m new to Linux) :
—————————————-
$ sudo apt install virtualbox
Reading package lists… Done
Building dependency tree
Reading state information… Done
Package virtualbox is not available, but is referred to by another package.
This may mean that the package is missing, has been obsoleted, or
is only available from another source
E: Package ‘virtualbox’ has no installation candidate
Stan@MXLinux:~/Desktop
$
———————————-
Looks like I got some stuff hanging around from previous unsuccessful attempt
Not sure what to do next. Thx