Get the step-by-step guide to install and use the WAMP server on Windows 11 for testing web applications such as WordPress locally.
WAMP stands for “Windows Apache MySQL PHP”. It means you will have a LAMP web server environment but without Linux on Windows. This is more for a local test environment or intranet.
Well, what if you already have IIS on your Windows? Installing WAMP is not going to create any conflict with IIS, however, when it comes to testing various web applications using Apache, PHP, and MySQL locally on Windows then WAMP is the best option. Because it is not easy to use but allows users to quickly deploy many well-known web applications run on this combination. e.g. WordPress, Typo3, Joomla, MediaWiki, and many others. Of course, you could try to use a combination of Windows, IIS, PHP, and MySQL. However, it could be complicated for new users.
The other question rises: If Apache, PHP, and MySQL, why on Windows and not on Linux?
The key reason behind this is the user’s main system preference and familiarity with the command line. Many users either are not familiar with Linux commands or are using Windows as their main system and don’t want to switch to Linux just to test some web applications. Moreover, WAMP offers control to APACHE, PHP, and MySQL with the help of a mouse. Depending on the purpose, environment, and know-how, it can make sense to operate a WAMP environment.
Step By Step Guide to Install WAMP Server on Windows 11
Step 1: Download the Wamp server
Download the WampServer’s 64-bit version either from its official website or using this SourceForge link. Because Windows 11 is available to support 64-bit CPU architecture.
Step 2: Install the WAMP server on Windows 11
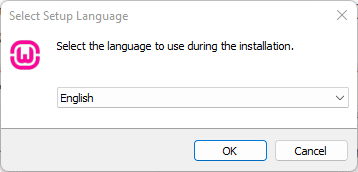
Run the setup and select the language in which you want to install the Wamp server for Windows 11.
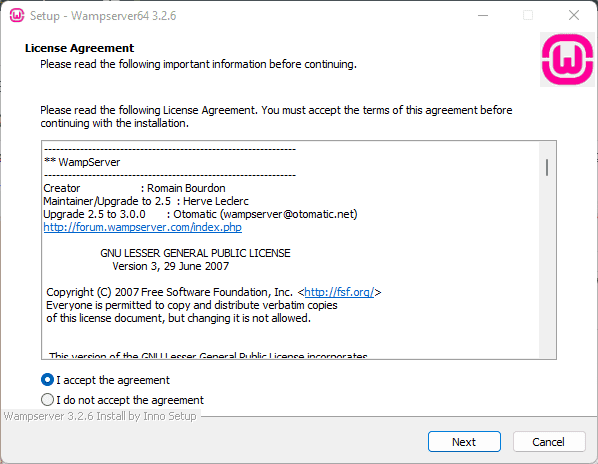
Select “I accept the agreement”.
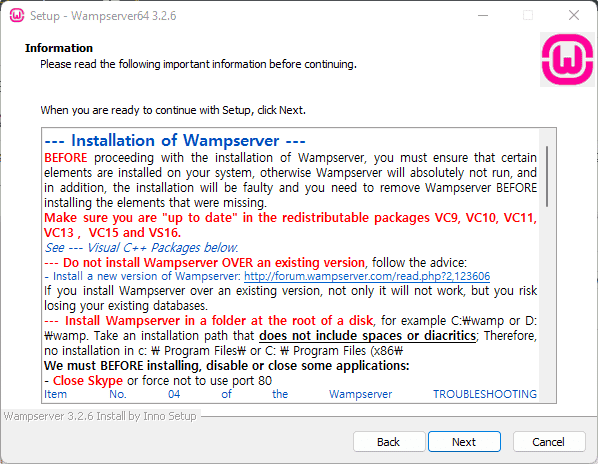
Your system will automatically find the installed up-to-date redistributable packages of VC9, VC10, VC13, VC14, and Vc15. In case, the program is not able to find the packages, it will warn you and then you can install them from the below-given links:
- Visual C++ Redistributable for Visual Studio 2015
- Visual C++ Redistributable Packages for Visual Studio 2013
- Visual C++ Redistributable for Visual Studio 2012 Update 4
- Microsoft Visual C++ 2010 Redistributable Package (x64)
- Microsoft Visual C++ 2010 Redistributable Package (x86)
- Microsoft Visual C++ 2010 SP1 Redistributable Package (x86)
- Microsoft Visual C++ 2010 SP1 Redistributable Package (x64)
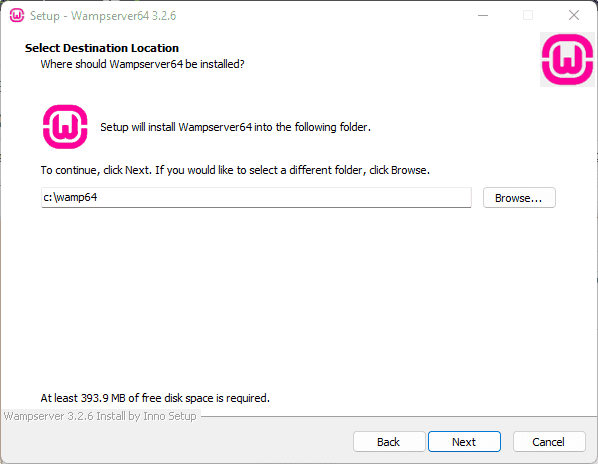
Step 3: Choose the Installation directory or location Wamp server
Now, choose where you want to install WampServer on Windows 11. By default, like any other application, it will also get installed in the C drive of your system. If you want to install the Wamp server in some other drive or folder then click on the browse button and choose the location. And then click on NEXT.
Step 4: Select Apache, PHP, and MySQL versions
If you think some old or new versions of WAMP server components are Apache, PHP, and MySQL you want then can select the same here in this step. For example, by default MySQL version 5 would be selected, and those who want 8. x they can select it instead of v5.
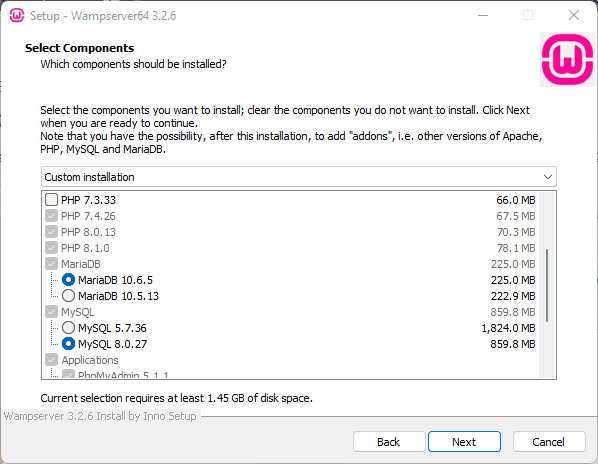
After that let the default settings as it is in each step and install the WAMP server on your Windows 11.
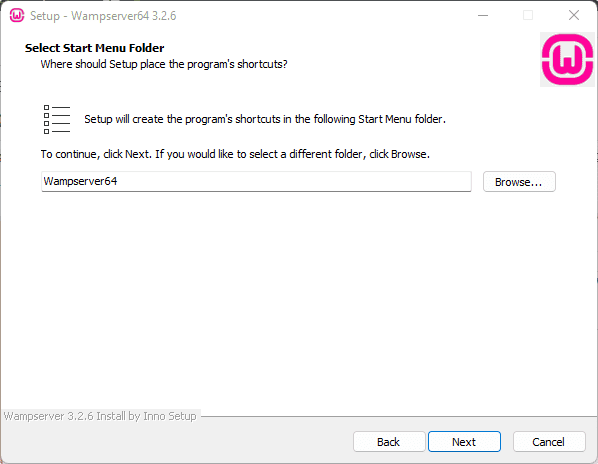
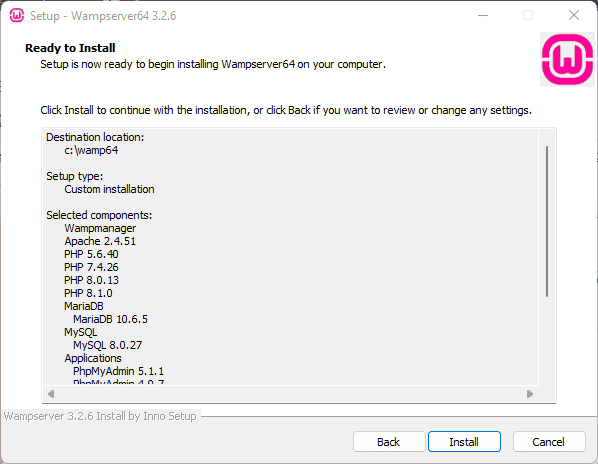
Step 4: Change the Internet Explorer Browser and a Text editor of the WAMP server on Windows 11
While installing the setup of WampServer, it will ask which browser you want as default in the WAMP server. By default, it uses the iexplore.exe (Internet Explorer) to change it to Google Chrome or Mozilla Firefox click on YES otherwise NO.
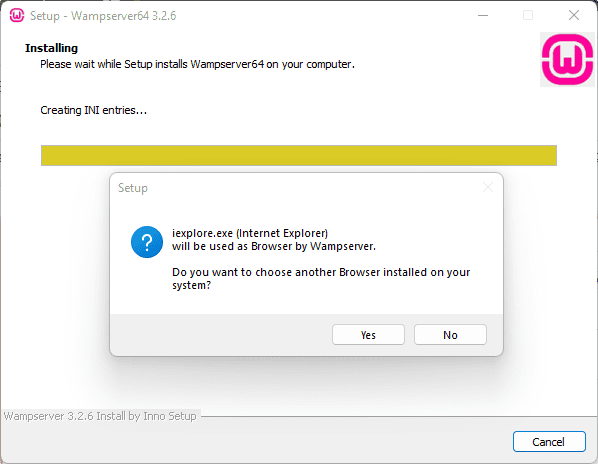
When you click on YES, the Windows Explorer will open, now if you want to select Chrome then go to C:\Program Files (x86)\Google\Chrome\Application and select Chrome.exe and click on Open.
After selecting the default browser, the Wamp Server will also ask us to select the default Text editor which we need in case we want to edit Apache or PHP config files such as HTTP.config or php.ini.
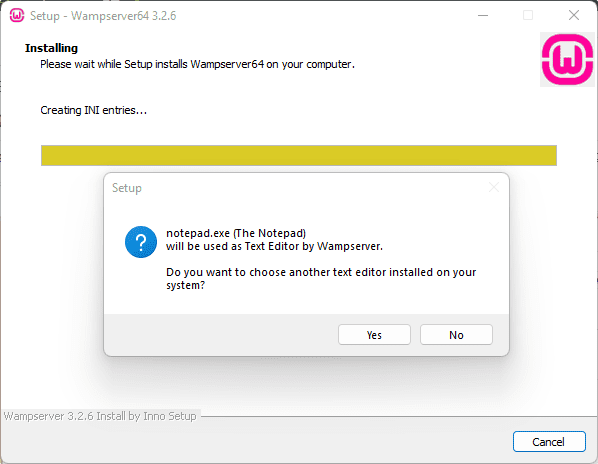
By default, it uses the notepad of Windows, I think it doesn’t need to be changed, so that’s why just click on NO. However, if you want to change the Text editor then click on YES and locate your third-party installed text editor as we do above for selecting Google Chrome.
While completing the installation the setup also provides you login information for your phpMyAdmin; “After Installing Wampserver the default username is “root” without quotes and there is no password, which means you must leave the Password box empty to login into the phpMyAdmin.
Step 5: Check the Wamp Server Apache
After successful installation, click on the system tray and then on the WAMP Server icon. As you click you will find shortcuts to check and use the Apache, MySQL, PHPMyAdmin, MariaDB, Stop all services, Start all services, and Reset all services.
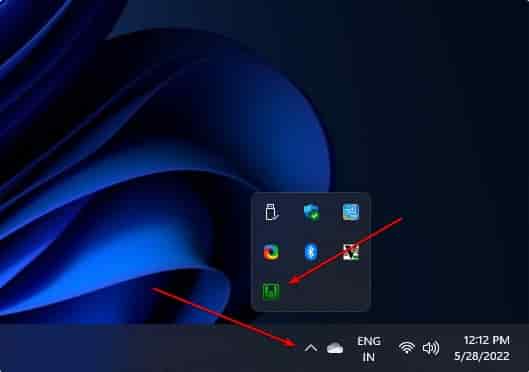
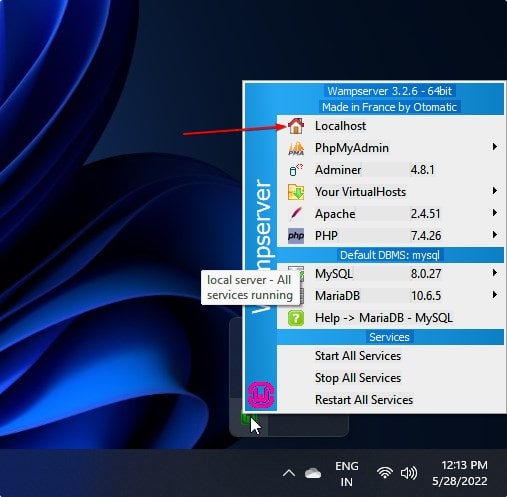
To ensure that our Apache web server is up and running on our Windows 11 click on Localhost.
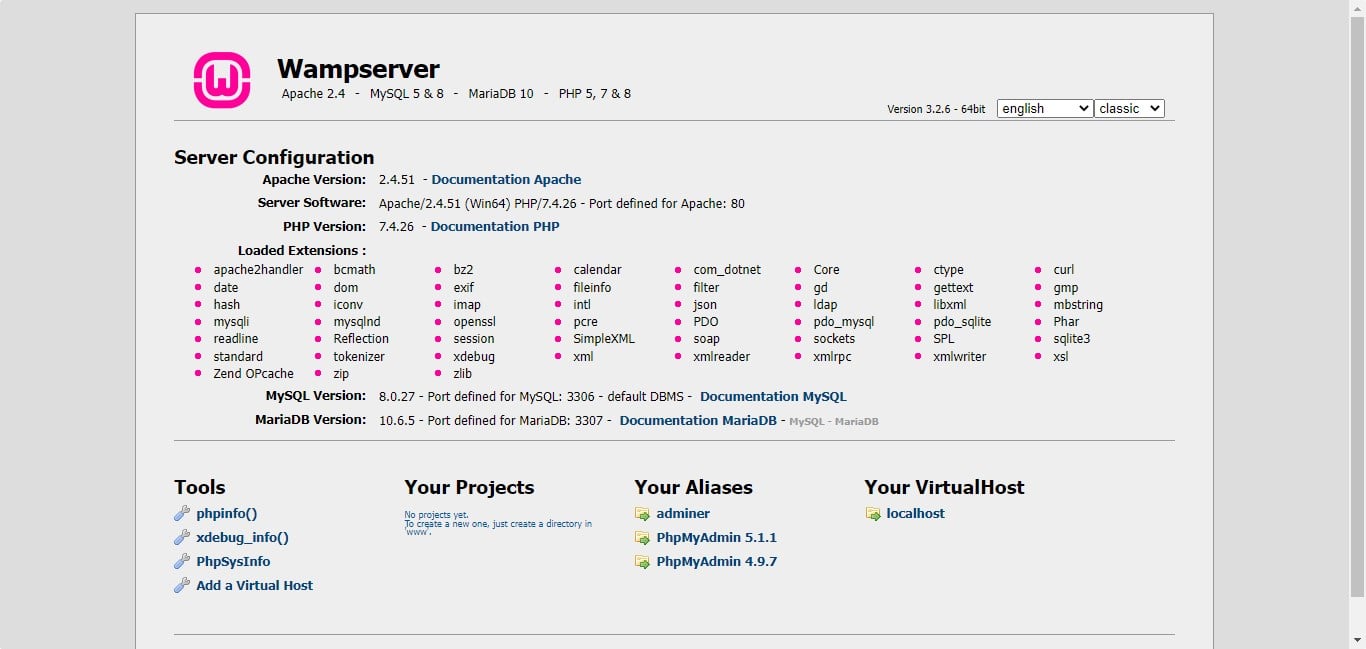
When you click on Localhost a tab will open with a page showing all server configurations in your browser. For reference see the screenshot.
Step 6: Other important Wamp server tools and settings
If you right-click on the same WAMP server icon that resides in your system tray, it will open several other options such as About, Refresh, Help, language, WAMP settings, Tool, and Exit. In case you want to change the software language you can choose your local language from the language option.
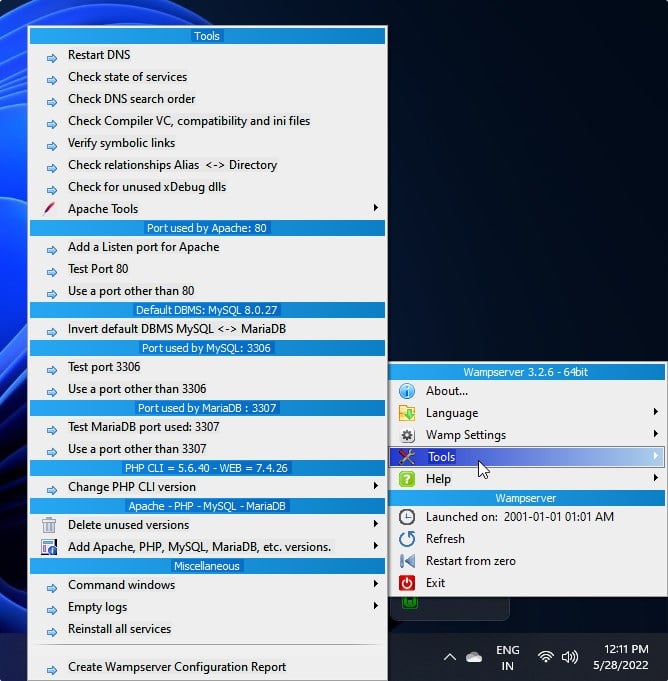
If you want to know which port is using which service of the WAMP server or some other information, you just need to go tools:
Restart DNS
Check HTTP.conf syntax
Check stats of services
Check the DNS search order
Check compiler VC, compatibility, and ini files
Show VirtualHost examined by Apache
Show Apache loaded Modules
Delete Unused PHP versions
And more…
Other Articles:
How to Install WordPress on Windows Computer Using WAMP
How to Sideload Any Android App on Windows 11
Command to Display saved WiFi password in Windows 11
Create Windows 11 bootable USB drive
Related Posts
How to Install 7-Zip on Windows 11 or 10 with Single Command
Install Google Earth on Windows 11 or 10 Using a Single Command
How to install Gaming Services on Windows 11
How to Install Telnet Client on Windows 11 Using PowerShell
How to Install ASK CLI on Windows 11 or 10
How do you install FlutterFire CLI on Windows 11 or 10?