One of the nice features of Navicat is its ability to send notification emails along with attachments such as exported files. So, here in this tutorial, we will show you how to send personalized emails along with attachments while scheduling the Export job.
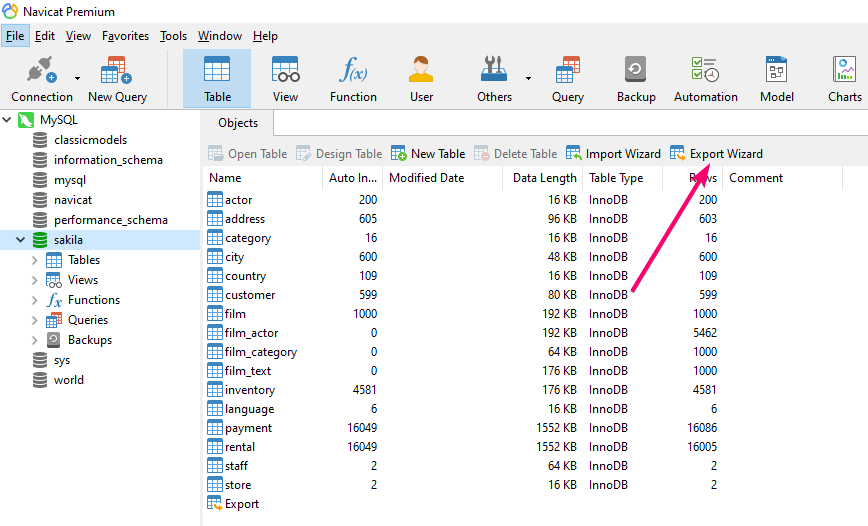
Step 1: Before starting the tutorial, I am assuming that you already have created an export profile for your Database table. If not then select the Database and then Export Wizard. Follow it to create an Export profile.
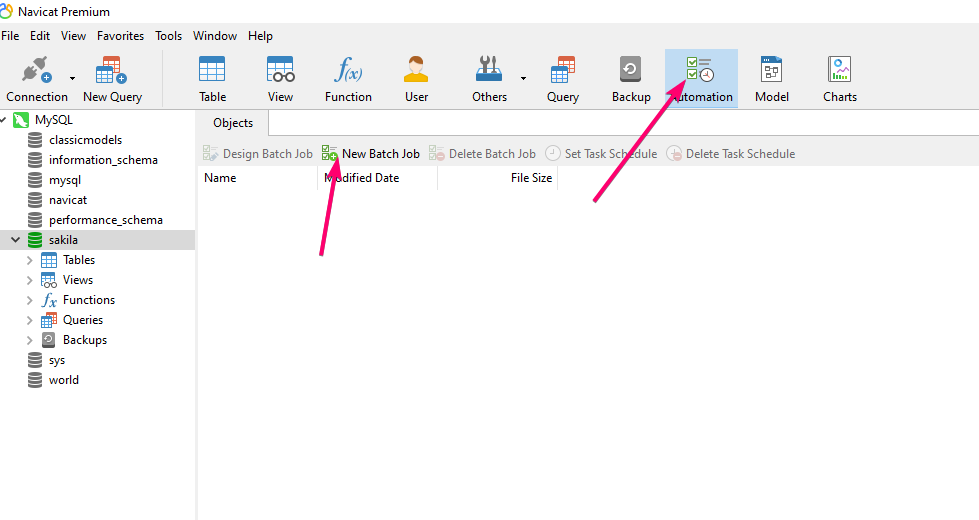
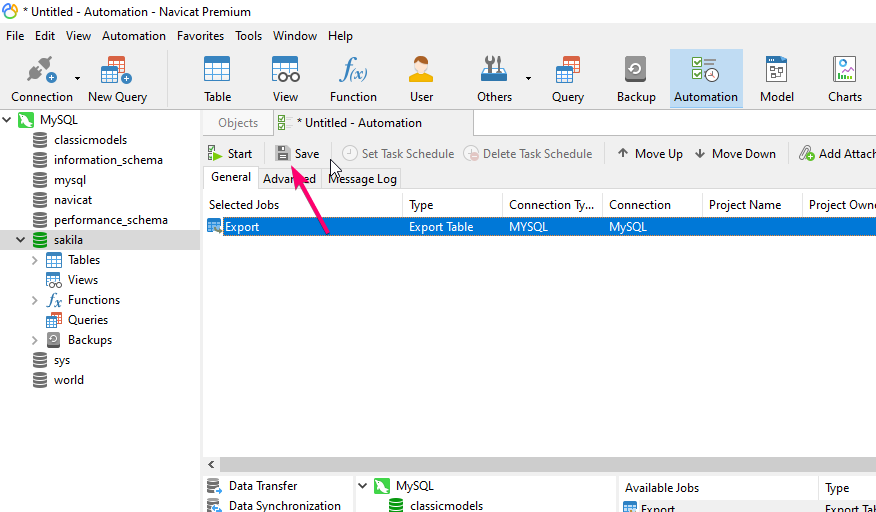
Step 2: Now, click on Automation and select New Batch Job button.
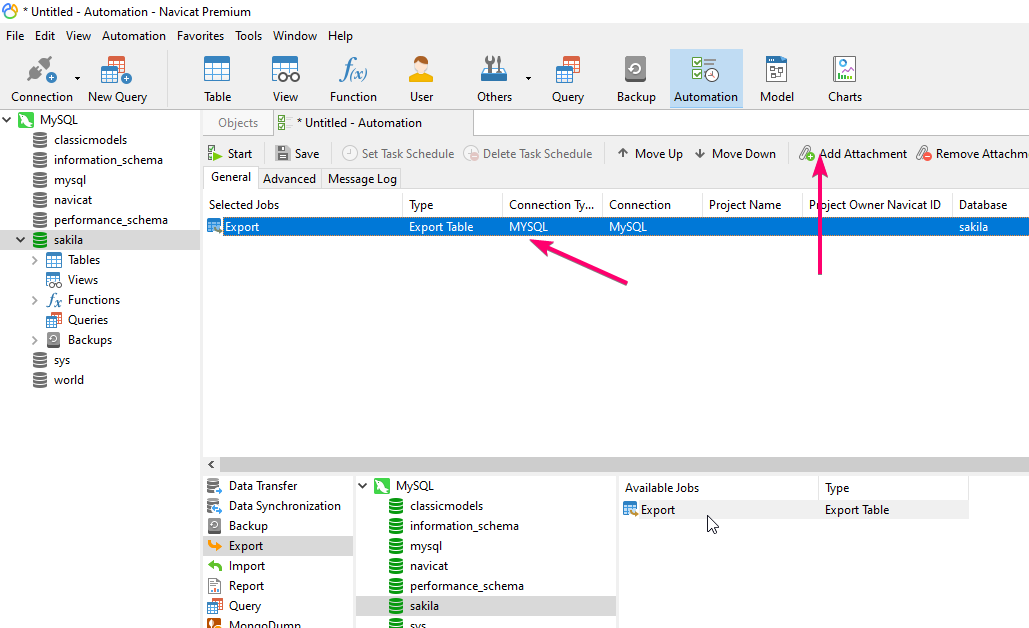
Step 3: After that, select the Export from the Job area, the Database and then double click on the available job to add it to the General area.

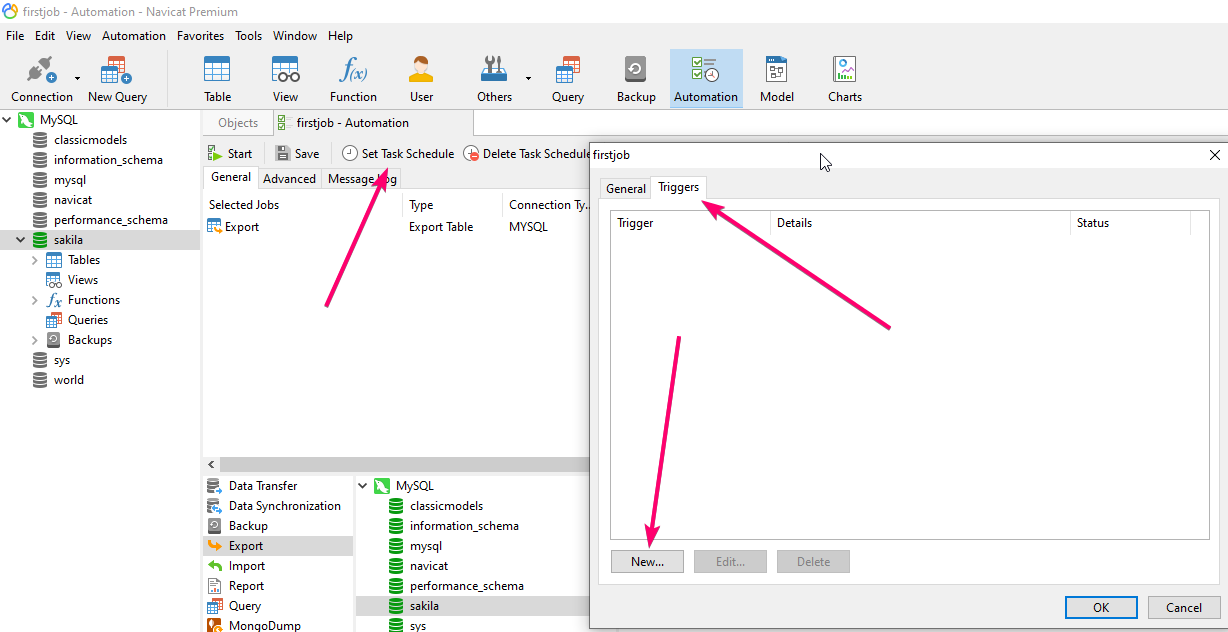
Step 4: You will see the job in the General area, select to highlight and click on the Add Attachment button.
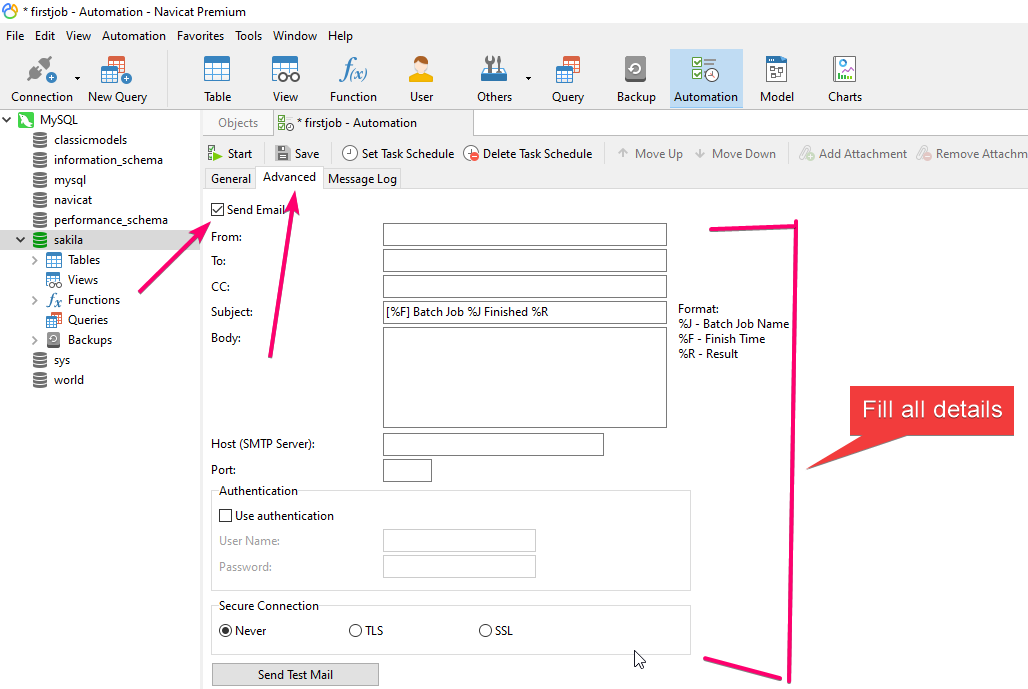
Step 6: To set the email recipient, select the Advanced tab and check the Send Email box. Enter all the mail server details along with the recipient, if you want to send a notification along with the attachment to multiple people, simply enter their email addresses separated by a semicolon.
If authentication is needed, check it and furnish the credentials.
Step 7: Now, save the Batch Job.
Step 8: You can immediately execute the created job by clicking on the Start button, however, for Scheduling click the Set Schedule Task button and select the Trigger Tab followed by New button.
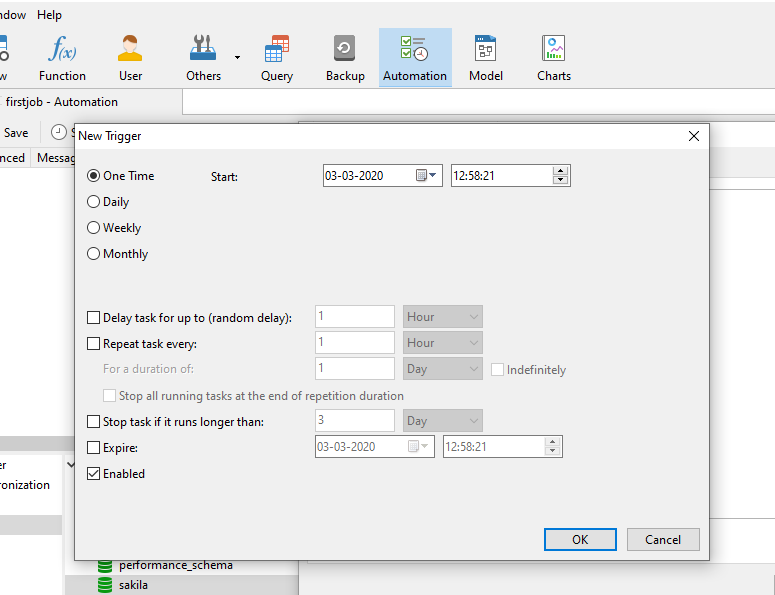
Step 9: Set the frequency of repeating the batch job along with the date and time. Click the Ok button to save the task.
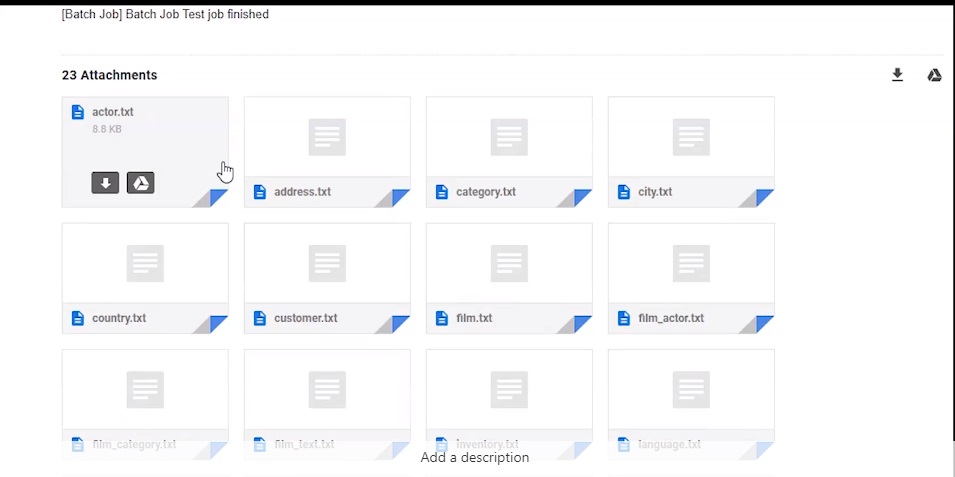
Step 10: Everything is set now, as per your schedule time, the Navicat will automatically execute the task, however, for the tutorial, here we are executing it manually to show you the message log.
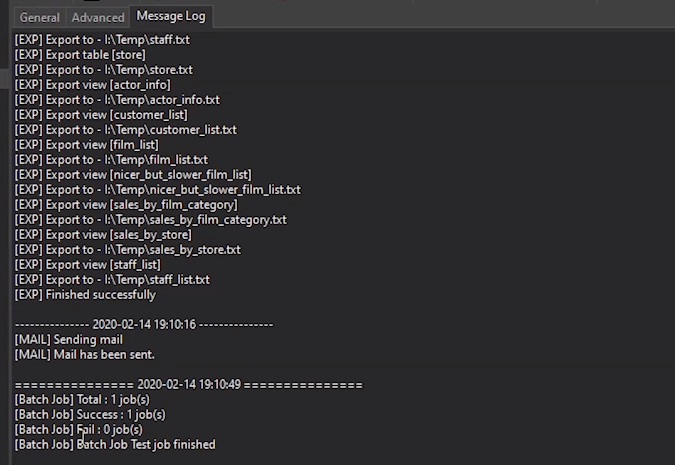
You can see Navicat has successfully sent a notification mail along with attachments. Let’s see how the received email looks like. Here is the email which one of our set recipients got along with attachments.
Related Posts
How to create email groups in Gmail? Send one email to multiple recipients in a matter of seconds.
Getting the right dashcam for your needs. All that you need to know
How to Install 7-Zip on Windows 11 or 10 with Single Command
How to Install ASK CLI on Windows 11 or 10
How do you install FlutterFire CLI on Windows 11 or 10?
How to create QR codes on Google Sheets for URLs or any other text elements