Microsoft has enabled the Linux on Windows 10 operating system with help of WSL (Windows Linux subsystem) which not only allow users to run Linux distro apps but also almost work like a native Linux CLI server operating system. Currently, OpenSuse, Ubuntu, Kali Linux, Alpine WSL and Debian are few Linux Distro apps are available on Microsoft Store on Windows 10 to download and install. However, the latest version for the popular Ubuntu Linux OS is 8.04 LTS which makes sense too, nevertheless, aforementioned the Linux apps on WSL behave like a full-fledged command line server, thus we can upgrade them to their latest version. And the same we are going to show you here.
In this tutorial, we will upgrade Ubuntu 18.04 to 19.04 and then to Ubuntu 19.10. The below steps are not limited only to WSL rather you can use them to upgrade the regular full-fledged Ubutn Linux systems.
Note: After upgrading all the extra added repository will get disabled and neet to enable them again either using Software properties or Software package manage available on GUI systems. Furthermore, the default repo of the bionic will also change to disco” and then “eoan” in apt list. Time need to upgrade depends upon your internet connection. It could be from a few minutes to hours.
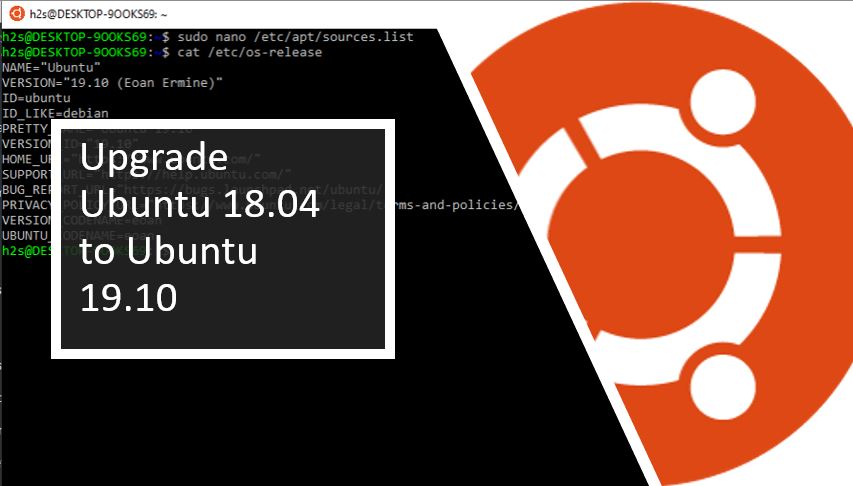
Upgrade Ubuntu 18.04 LTS to 19.10 Non-LTS
- First of all, you should have a Ubuntu 18.04 LTS installed on your Windows 10 WSL, if not then see the tutorial, where we have manifested, how to download and install Ubuntu on WSL.
- After that go to the Search box of the windows 10 and type Ubuntu as soon as its icon appears, click on it to run.
- Now, first, run the system update command.
sudo apt update
- After updating, run upgrade command to get the latest version and packages available for Ubuntu 18.04 LTS.
sudo apt upgrade
- Now, check the Ubuntu OS version, here is the command to do that
cat /etc/os-release
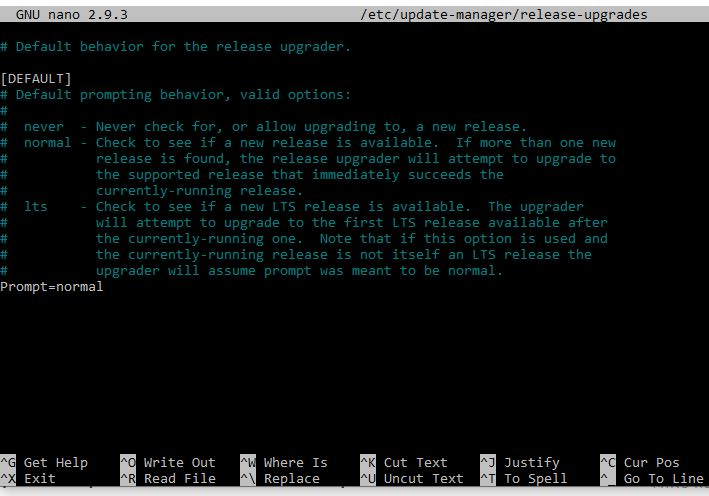
- You will see the 18.04 LTS, however, we can’t upgrade it without any modification because by default Ubuntu doesn’t allow to upgrade the LTS releases to non-LTS one. Thus, we need to change this default rule to a standard one. For that type:
sudo nano /etc/update-manager/release-upgrades
- Here you will see a line Prompt=LTS change that to Prompt=normal and press Ctrl+X and type Y and press the Enter button to save the changes.

- Again run the system update command:
sudo apt update
- Now check the available version to upgrade:
sudo do-release-upgrade -c

- So, in the above image you can see that the latest version available to upgrade Ubuntu 18.04 is 19.04, thus first jump it to this one, run:
sudo do-release-upgrade
- Once the above upgrade happens successfully, again confirm the available system version for WSL Ubuntu.
cat /etc/os-release
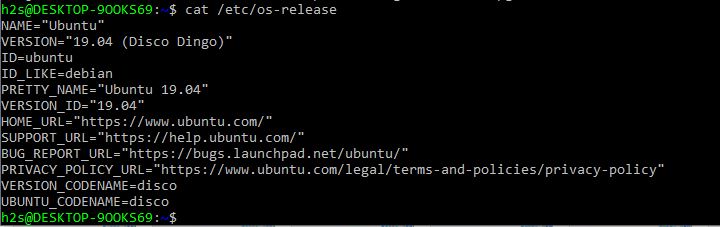
This time you will theUbuntu 19.04 “Disco Dingo”, on your system. So, now let’s move further to upgrade to Ubuntu 19.10
- If you are on normal Linux system, then you will not find any problem and you can further run the same upgrade command to get the latest updated version. However, sometimes, on Windows WSL, the upgrade couldn’t update the latest repo available for the upgraded system. And the same happened to us, if after upgradation upon checking the system will say there is no upgrade then manually add the Ubuntu 19.10 “Eoan Ermine” official repo in our existing Disco Dingo.
sudo nano /etc/apt/sources.list
Add the following line anywhere:
deb http://archive.ubuntu.com/ubuntu/ eoan main
And press Ctrl+X, confirm by typing Y and then press the Enter button.
- Now update the system.
sudo apt update
- After the update, again check the system release and this time you will be on Ubuntu 19.10 Eoan Ermine.
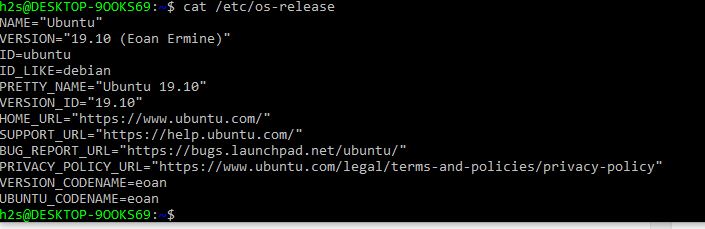
In this way, we can upgrade Ubuntu 18.04 to latest Ubuntu 19.10.


Thank you for this article. I tried several times to upgrade from 19.04 to 19.10 but was
unable to do so. Your instructions were clear and worked perfectly. Now I am happy
to have the latest version of Ubuntu.
Excellent rundown for anyone confused about any aspect of the upgrade. The article contains no fluff. It’s tight and succinct with noting you don’t need and exactly what you do need.
Bravo. Well Done!