There are different ways we can access our important files remotely with different ways available to us today. One of the oldest and most reliable protocols to access remote files is the FTP protocol. An FTP server makes it easy to access remote files from both a computer as well as from a smartphone or other devices both within a local area, as well as over the internet if configured properly. While it is a piece of pie to host an FTP server on a local network from an Android device to enable seamless file transfer, hosting an FTP server on a Windows computer might not be so easy for everyone.
If configured properly, you will be able to access files on your Windows computer from your office, coffee shop or anywhere else, as long as you have an internet connection. If you are cynical about accessing your personal files on your computer through the internet, you can even limit your FTP server to provide access to the files on your computer only on your local network, maybe only on your home Wi-Fi network or so. But your first task will be to set up the FTP server on your Windows computer.
So let’s get started with how you can set up an FTP server on your Windows 10 computer. The process isn’t going to differ a lot on Windows 7 or other Windows versions, as well.
Setting up FTP server locally on Windows 10/8/7
Step 1: Open ‘Control Panel’ on your computer, and click on ‘Programs and Features’.
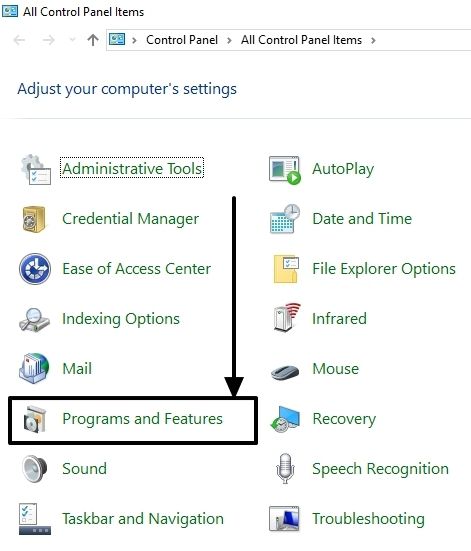
Step 2: In the ‘Programs and Features’ window click on ‘Turn Windows features on or off’ on the left side of the Control Panel window.

Step 3: Now wait for some time and scroll down to find out ‘Internet Information Services’. Just expand it, and turn on everything under ‘FTP Server’, ‘Web Management Tools’, and ‘World Wide Web Services’, the same way as the screenshot below. Once you are done ticking all the services, click on ‘OK’.
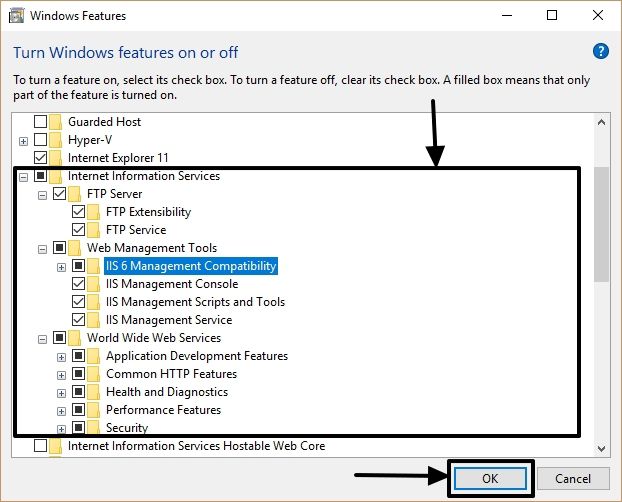
Step 4: It will take some time to apply the changes, and once it is done, click on ‘Restart Now’ to restart your computer and apply the changes made.

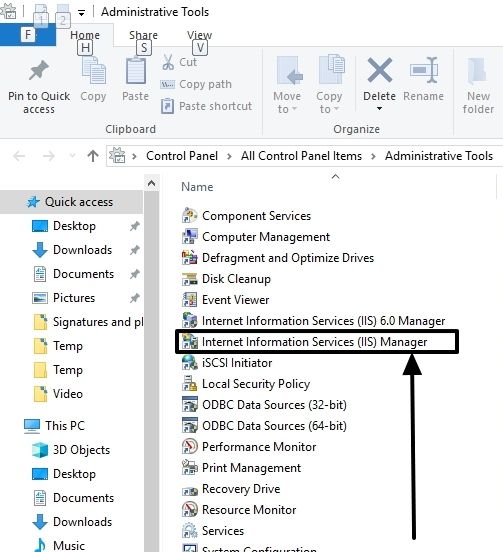
Step 5: After you restart your computer, open ‘Control Panel’ again, and click on ‘Administrative Tools’ to open it.

Step 6: In the ‘Administrative Tools’ window, double-click on ‘Internet Information Services (IIS) Manager’ to open it.
Step 7: On the left side of the IIS Manager window, expand the name of your computer on the left side of the window, unless you find ‘Sites’. Just right-click on ‘Sites’ and click on ‘Add FTP Site…’.

Step 8: Here give a name to the FTP site. I am giving ‘sampleftp’ to the FTP site name. Now click on the ‘…’ button to locate the folder or driver that you want to access over your FTP server. I am choosing ‘C:\FTP_Path’ for this tutorial. After you are done doing all that, click on ‘Next’.

Step 9: In the next window, click on the drop-down menu corresponding to ‘IP Address:’, and choose your computer’s IP address on your local network.
Leave the port number to ‘21’, as it is by default.
Step 10: Choose ‘No SSL’ and enable ‘Start FTP site automatically’, and then click on ‘Next’.
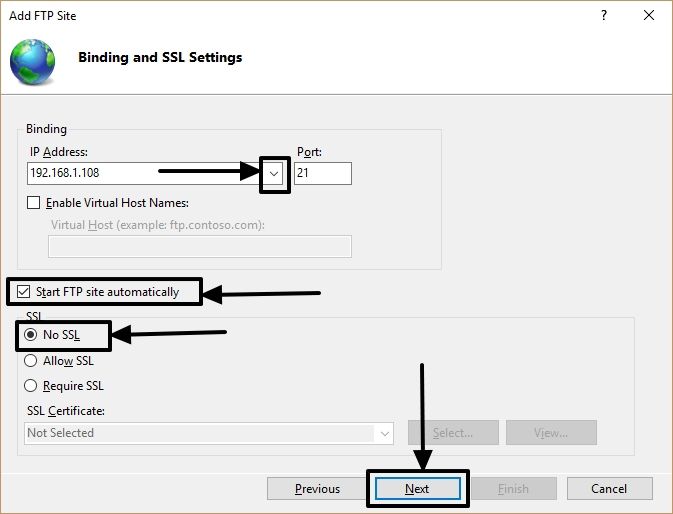
*As this is a tutorial, I didn’t allow SSL. But, I will recommend you to use SSL if you want to access sensitive data over the FTP server.
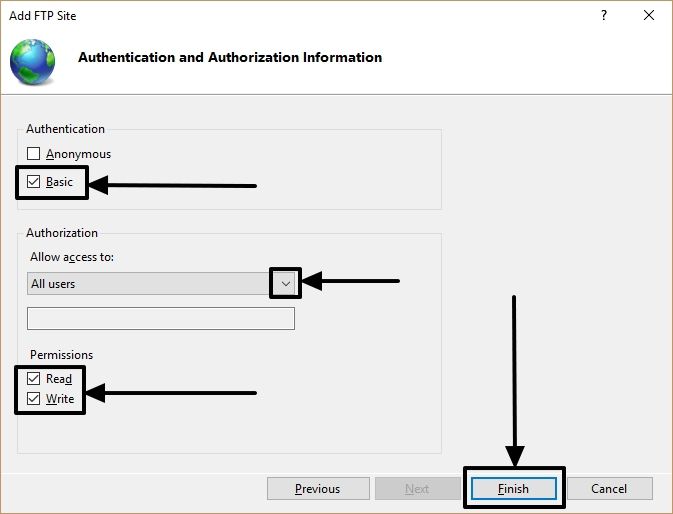
Step 11: Now choose the authentication method to ‘Basic’, and provide the ‘Authorization’ to ‘All users’. The users will have to enter your Windows username and password to get access to the files on the FTP server, with this authentication method.
Now depending upon how you want to set up the FTP server, set the permissions to both ‘Read’ and ‘Write’ or only ‘Read’. After that click on ‘Finish’ to finalize the site setup and start the FTP server on your Windows computer.
Configuring the Firewall
Your FTP server is ready and is running. But you need to configure the Windows Firewall to allow transaction of FTP traffic to and from your computer.
Step 12: Open ‘Control Panel’ and click on ‘Windows Defender Firewall’ on Windows 10 or simply ‘Windows Firewall’ on Windows 7.
Step 13: Click on ‘Allow an app or feature through Windows Defender Firewall’ on the left side of the window.

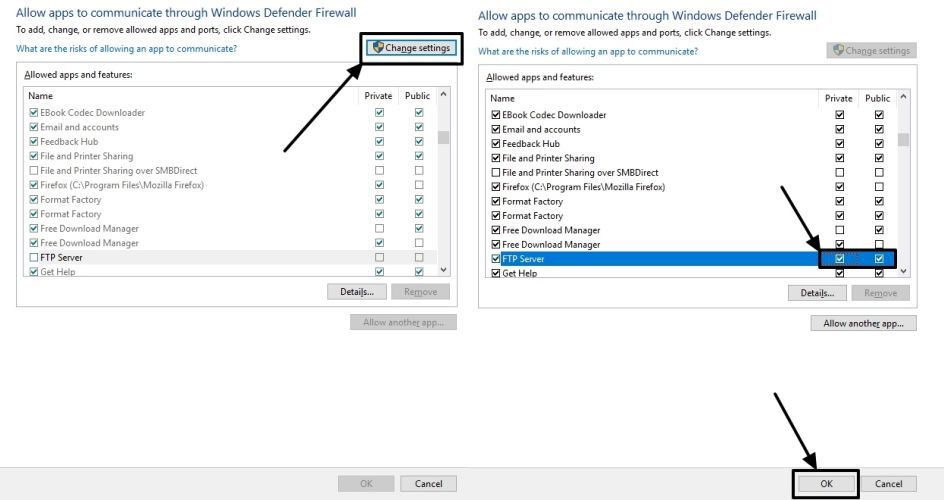
Step 14: In the new window, click on ‘Change settings’ and mark the tick boxes corresponding to both ‘Public’ and ‘Private’ for ‘FTP Server’ and click on ‘OK’.
Now you can access the FTP server easily from any other computer or mobile device within your local network with an appropriate app, or simply from the browser.
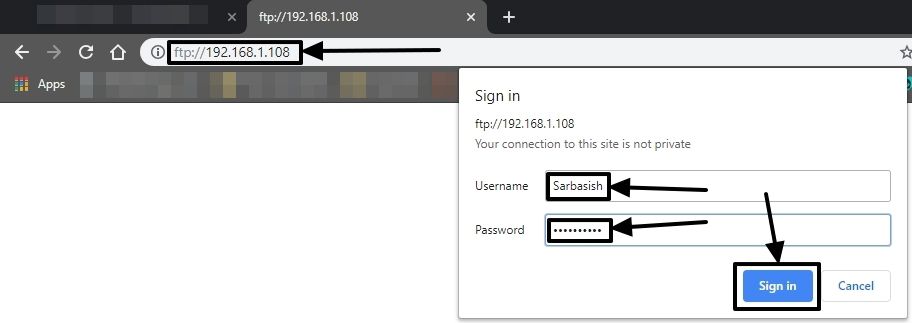
Step 15: Just type ‘ftp://’ followed by the IP address of your computer and the port number, which is 21. For this tutorial, the IP address of my computer is 192.168.1.108.
So the complete address will be ‘ftp://192.168.1.108:21’.
Step 16: If the entered address was correct, you will be asked to enter the username and password of your Windows computer. Finally, click on ‘OK’ or ‘Sign in’, whichever applies to you.
If the authentication was successful, you will be able to see the contents within the folder or drive you have shared over the FTP server.
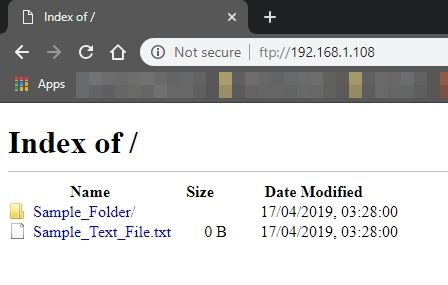
That way you will be able to access the files on your Windows computer on a local network.
Accessing a local FTP server over the internet
Accessing your local or home FTP server over the internet requires configuring some settings on the router. Thus the process might vary depending upon the company and model of the router you are using. Still, I am giving a basic idea here on how you can configure the router to access your FTP server through the internet.
Before proceeding, note down your external IP address that is given to you by your Internet service provider from the following link.
Open your router configuration page, which should be 192.168.1.1, 192.168.0.1, or so. You can find the address of your router configuration page in the configuration manual.
For me, it is 192.168.1.1. Just open the configuration page, and sign in with the username and the password.
Then go to ‘Advanced Setup’, and choose ‘NAT’ under it.
Step 17: Choose ‘PVC2’ in ‘Virtual Circuit’, and then click on ‘Virtual Server’. Set the ‘Number of IPs’ to ‘Single’, which should be the default one.
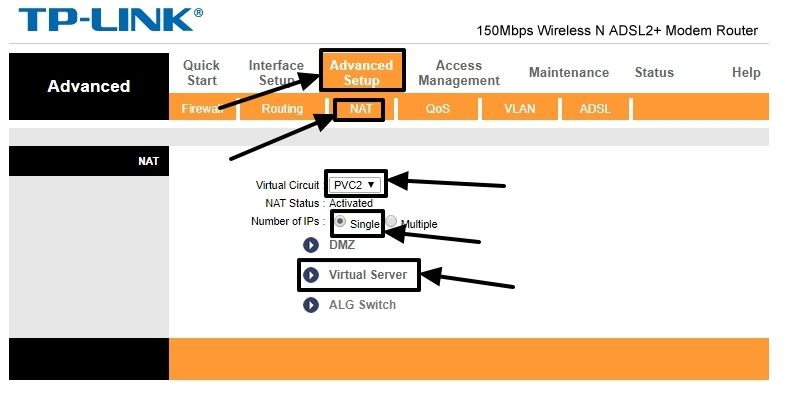
Step 18: Now click on the drop-down menu corresponding to ‘Application’ and choose ‘FTP’ from the menu. The other configuration will be automatically applied thereafter. You will even notice the port number for FTP application is also assigned to ‘21’.
Now set the local IP address, which is 192.168.1.108, for me.
Step 19: Once you are done, click on ‘Save’.

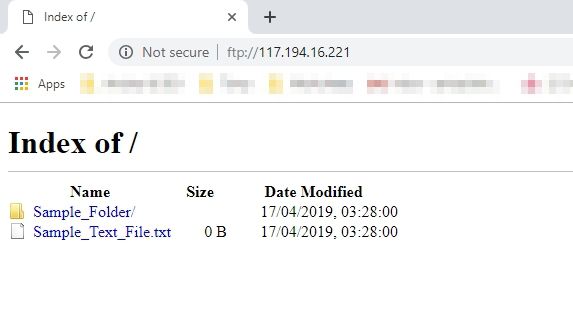
Step 20: Everything is ready. Now type in ‘ftp://’ followed by the external IP address that you have noted earlier, and the port number i.e. 21 after a colon.
So the address will be ‘ftp://117.194.16.221:21’ for me. If your ISP assigns a dynamic IP address to you, the external IP address though will change each time you restart your router.
The process of switching on port 21 on your router to make your FTP server accessible through the internet might be completely different for your router. You better read the user manual for some assistance, or you can even contact the customer care of your router manufacturer.
Hope the information was helpful for you. Do you have any questions in your mind? Feel free to comment the same down below.
Other Useful Resources:


Thank you Sarbasish Basu. Finally a real guide on how to setup an FTP server. Everything works. Thanks again.