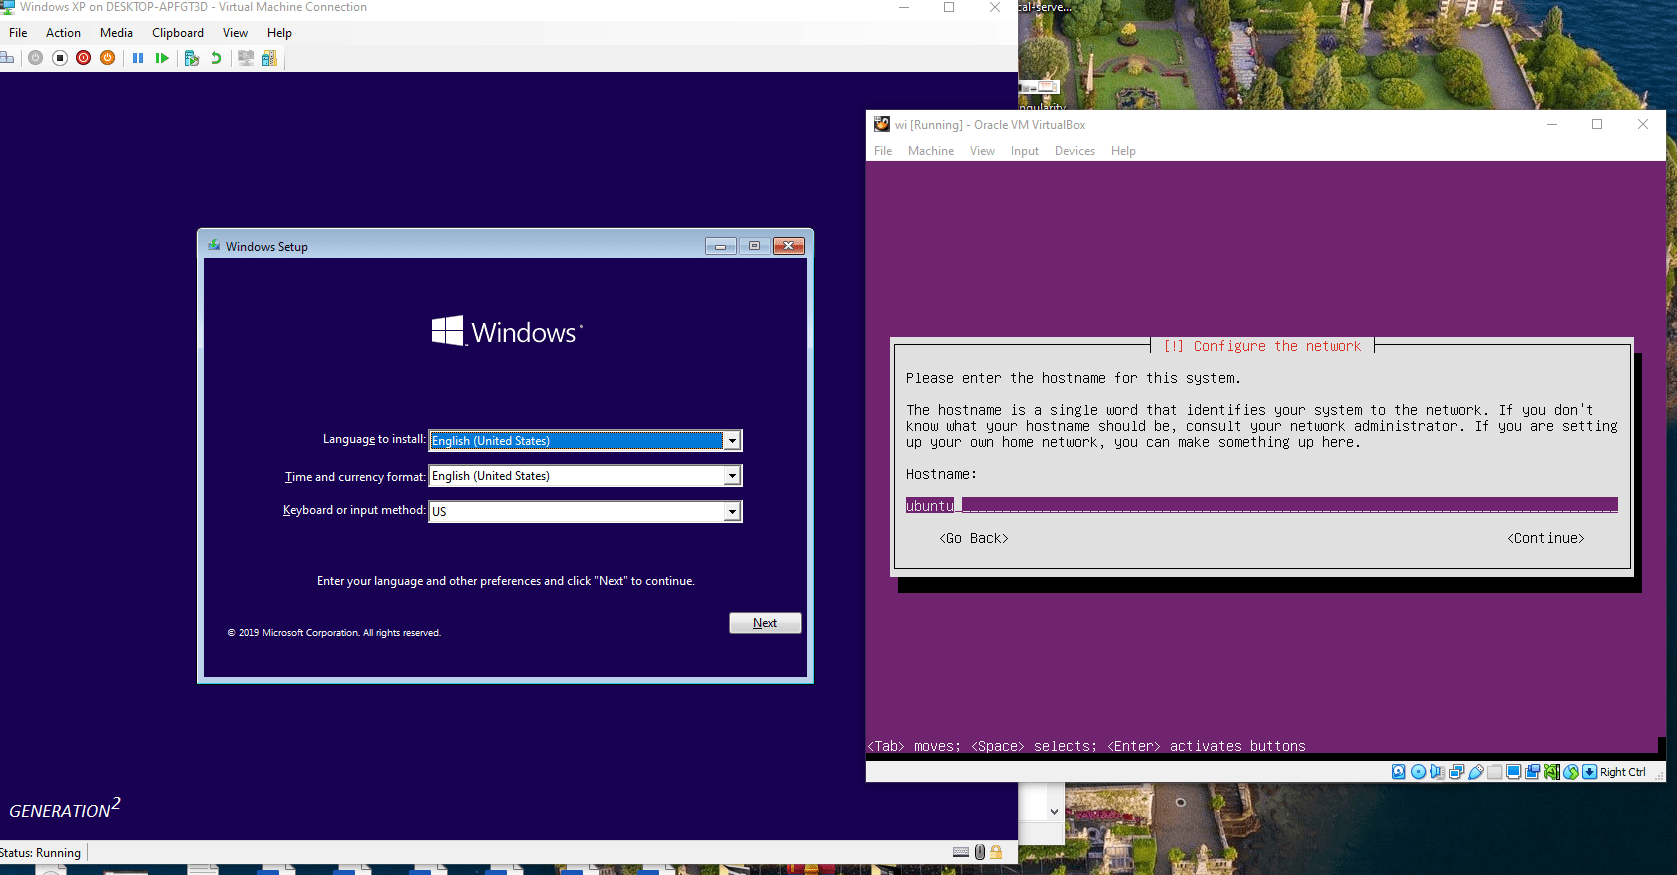
Do you want to simultaneously run VirtualBox with enabled Hyper-V Manager services on a single Windows 10 machine? Then it is possible, without disabling any of them, to look at the steps in this tutorial…
Earlier, there was a big problem when we wanted to use Hyper-V on a Windows machine, and we couldn’t use Vmware, Virtual Box, or any other platform where we wanted Virtualization access. The existing Hyper-V service on the Machine already occupied Intel virtualization technology (VT-x) and the kernel access. However, that has been changed after Windows v1803 update. Now, we can run VirtualBox or VMWare workstation side by side with the inbuilt Hypervisor Manager of Windows 10 using its API.
Note: If you cannot yet use VirtualBox without disabling the Hyper-V on Windows 10, here is the solution… However, a few operating systems would not work and give output in freezing VMs on boot.
Enable Hyper-V and VirtualBox together at the same time on Windows 10
1: Open Turn Windows features ON & OFF
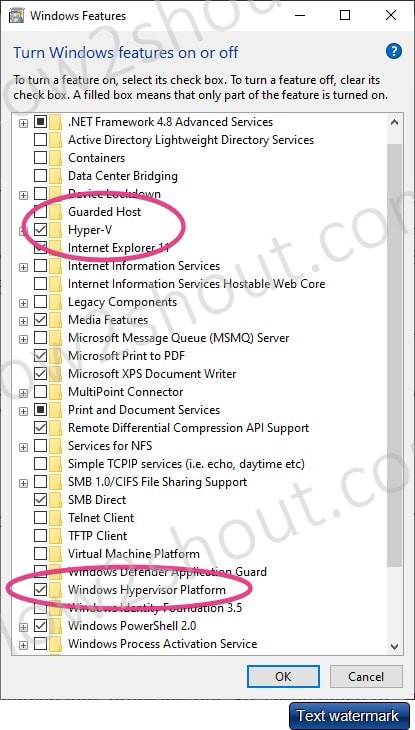
The first thing is to access the extra service which we want to be on Windows 10. Go to Search Box and type “Turn Windows Features On & Off.”
2: Enable Hyper-V and Windows hypervisor platforms
Now, you will see various services; some are already enabled, and others are not. So, scroll down to “Hyper-V” and then further down to check the “Windows Hypervisor Platforms” box. And then click on the OK button. It will start installing these two services on your Windows 10 machine.
Note: if you don’t turn on the “Windows Hypervisor Platforms” services, then while running the VirtualBox, you will get an error”
WHvCapabilityCodeHypervisorPresent is FALSE! Make sure you have enabled the 'Windows Hypervisor Platform' feature.
(VERR_NEM_NOT_AVAILABLE).

VT-x is not available (VERR_VMX_NO_VMX).

Result Code : E_FAIL (0x80004005)
Composant : ConsoleWrap
3. Restart your Windows 10 system
Once all the above services are installed on your computer, restart it to put the update into effect.
4. Download Oracle VirtualBox
Although you might already have open-source Oracle VirtualBox on your Windows 10 system, if you don’t, go to the official website and download one. Run it to install. Also, those running older versions should update their VBox software to the latest version.
5. Configure Paravirtualization Interface
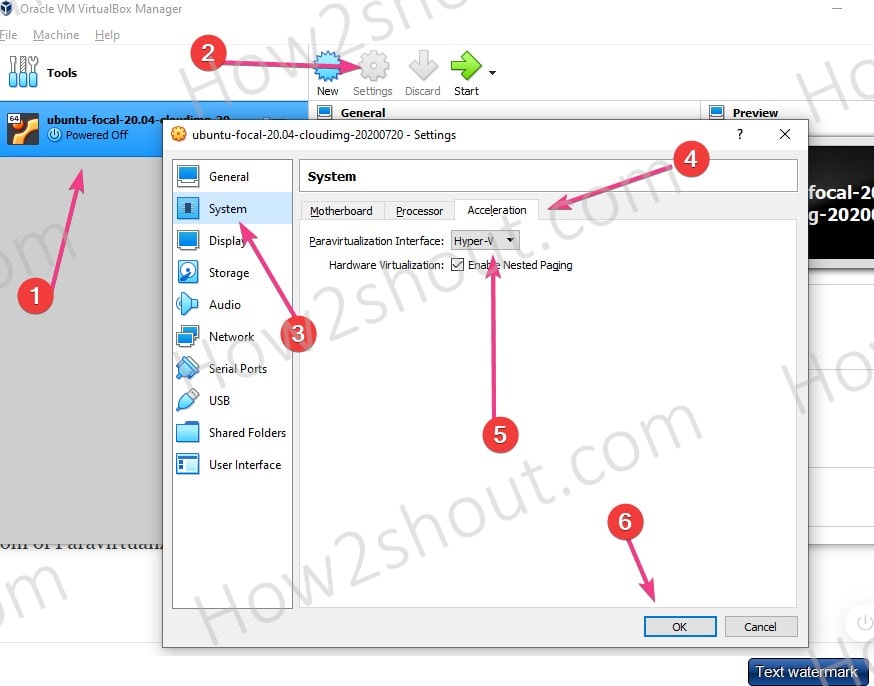
This step is essential to make VirtualBox compatible with Hyper-V on Windows 10. What we have to do is, run the VirtualBox on your system and select the created Machine that you want to run.
- For example, I have an Ubuntu 20.04 VM server edition and will select that.
- Click on the Settings option given in the Menu.
- Select System⇒Acceleration Tab.
- Click the dropbox from the Paravirtualization Interface and select Hyper-V.
However, by default, VirtualBox will access Hyper-V API; if not, then setting the paravirtualization interface will do that.
6. Run the Guest Virtual Machine
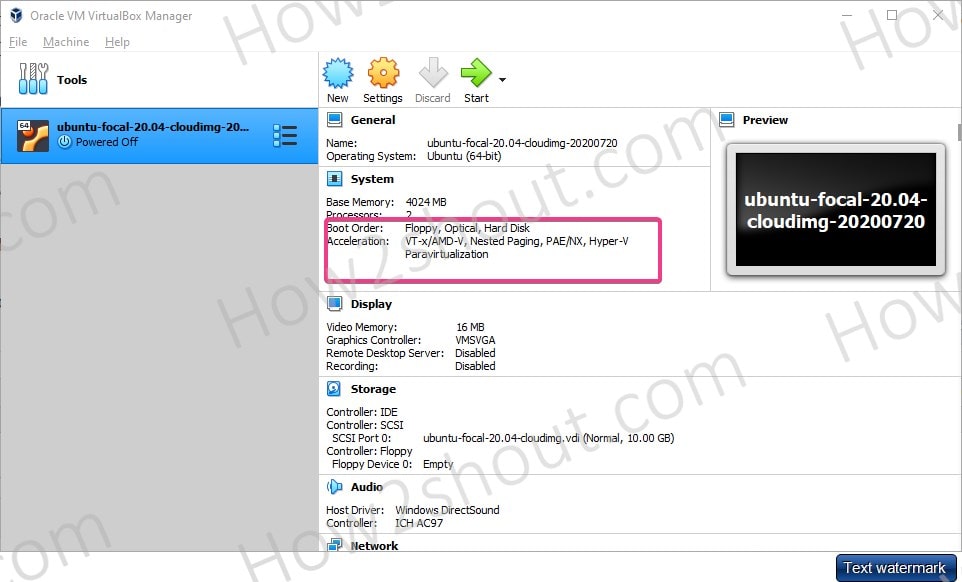
Now, on the area corresponding to the select Virtual Machine, you will see:
Acceleration= VT-X/AMD-V, Nested Paging, PAE/NX, Hyper-V Paravirtualization.
This means that your VirtualBox uses the Hypervisor as a virtualization platform to create and run virtual machines of different OS such as Linux, Windows, NAS, etc.
To see if everything is working fine, click on the start, and you will see the virtual machine running, maybe without any error.
7. Run VM on Hypervisor
Test Hyper-V and make sure its machines are also working fine without my error. Open the Hyper-V Manager and start your Virtual Guest created on it.


Thanks a lot! This worked for me.
Thanks from Mexico, it works!, I was waiting for a lot of time 😀
Thanks with much love from Sri Lanka !! You saved me bro. !!
Noticed a typo in section 1 that would stop it working,
Go to Search Box and type “Tune Windows features On & Off“.
“turn” instead of tune methinks.
“5. Configure Paravirtualization Interface”
I think you misunderstood this option. It’s not how Virtualbox talks to the host OS, but how Virtualbox exposes its interface to the guest OS, Linux in your example.
From https://www.virtualbox.org/manual/ch10.html#gimproviders :
“Oracle VM VirtualBox enables the exposure of a paravirtualization interface, to facilitate accurate and efficient execution of software within a virtual machine.
….
Exposing a paravirtualization provider to the guest operating system does not rely on the choice of host platforms. ”
Virtualbox can naturally run on a Hyper-V enabled Windows host, though with some caveats.
From https://www.virtualbox.org/manual/ch09.html#hyperv-support :
“Oracle VM VirtualBox can be used on a Windows host where Hyper-V is running. This is an experimental feature.
No configuration is required. Oracle VM VirtualBox detects Hyper-V automatically and uses Hyper-V as the virtualization engine for the host system.
Note: When using this feature, some host systems might experience significant Oracle VM VirtualBox performance degradation.
“
Wow, that worked, quick and easy.
I tried running Win10 in a VirtualBox but it was slow with Hyper-V enabled.