Do you want to run VirtualBox on Windows 10 or 7 using the command line? But getting error – Vboxmanage command not found or vboxmanage.exe is not recognized as an internal or external command. Then here is the solution, which is, add the VirtualBox folder to your Windows user/system environment PATH.
We can use the VirtualBox command-line tool called vboxmanage on Windows 10 to create, start, stop, delete Virtual machines including other managing tasks. However, by default Vboxmanage.exe which is inside the Virtualbox folder will not be in our system path, thus as we run it in command prompt or PowerShell, we get command is not recognized error. Therefore, to run it we can either navigate directly to the Virtualbox folder and start CMD or Powershell there or declare it as a PATH environment variable.
The path variable omits the need of typing the whole path of some application in command to run it. You can say it is a kind of shortcut that we create globally for the whole system by defining the location. After setting the PATH of some folder, the system will automatically recognize all the files present inside that.
How to run vboxmanage.exe on Windows 10 or 7 using command
1. Open command prompt or PowerShell
First of all, either run command prompt or PowerShell on your Windows 10 or 7 operating system. For that, you can simply search for them in the search box. No need to run as an administrator, it can be opened under your standard system user.
2. Add Virtualbox folder to system PATH environment variable
As I mentioned at the beginning of this tutorial, if we don’t add the VirtualBox folder to the system PATH variable, the command tool Vboxmanage will through an error in CMD or Powershell, unless you are not inside the directory of Virtualbox where this tool resides. So, to remove the problem of switching to the Virtualbox directory, we add it directly to our system PATH variable. After that, we will be able to run vboxmanage from anywhere using the command line regardless of which directory we are in.
Those are using a Command prompt, use this command…
SET PATH=%PATH%;C:\Program Files\Oracle\VirtualBox
If you want to use PowerShell then run this one…
$env:PATH = $env:PATH + ";C:\Program Files\Oracle\VirtualBox"
3. Check VboxManage Command
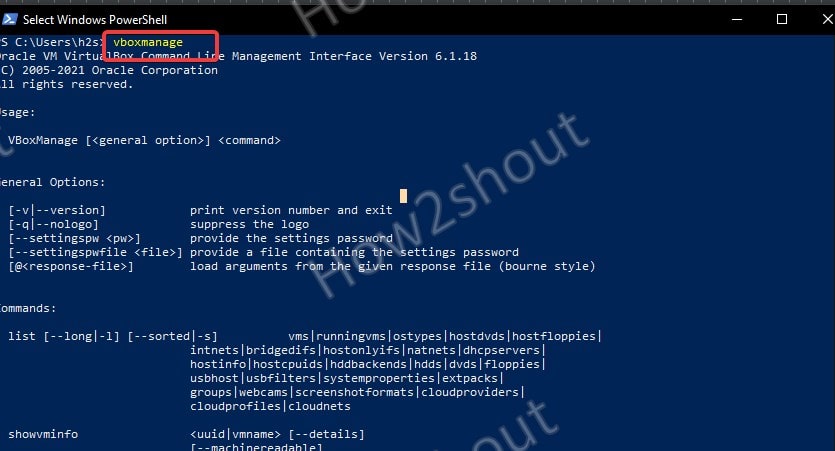
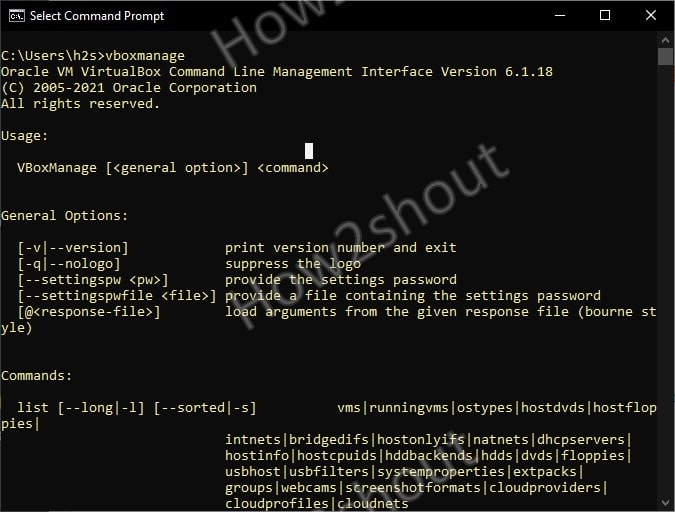
Now, let’s check whether the command vboxmanage will work on the command prompt and PowerShell without throwing any error or not. Run:
vboxmanage
Output:
Oracle VM VirtualBox Command Line Management Interface Version 6.1.18
(C) 2005-2021 Oracle Corporation
All rights reserved.

Usage:
VBoxManage [<general option>] <command>
General Options:
[-v|--version] print version number and exit
[-q|--nologo] suppress the logo
[--settingspw <pw>] provide the settings password
[--settingspwfile <file>] provide a file containing the settings password
[@<response-file>] load arguments from the given response file (bourne style)
----more----
4. Create a Virtual Machine using vboxmanage
This VirtualBox command tool is working perfectly and now we can use it to create virtual machines directly using the command line.
- Create new VM
Replace the demovm in each command with whatever name you want to give your Virtual machine.
VBoxManage createvm --name demovm --register
- To Set type Linux and version 64-bit
VBoxManage modifyvm demovm --ostype Linux_64
- Set RAM
VBoxManage modifyvm demovm --memory 1024 --vram 16
- Assign the Number of CPU cores
VBoxManage modifyvm demovm --cpus 2
- Create Virtual storage and set size for it
VBoxManage createhd --filename demovm.vdi --size 32768
- Add Storage controller and attach hard disk + ISO Image to boot.
VBoxManage storagectl demovm --name "SATA Controller" --add sata --controller IntelAHCI

VBoxManage storageattach demovm --storagectl "SATA Controller" --port 0 --device 0 --type hdd --medium H2SVM.vdi

VBoxManage storageattach demovm --storagectl "SATA Controller" --port 1 --device 0 --type dvddrive --medium "/home/how2shout/tails-amd64-4.16.iso"
Note: Change the ISO file path in the above command
- Set Boot order
VBoxManage modifyvm demovm --boot1 dvd --boot2 disk --boot3 none --boot4 none
- Set Network NAT
VBoxManage modifyvm demovm --nic1 nat --nictype1 82540EM
For Bridge Network, use-
VBoxManage modifyvm demovm --nic1 bridged --nictype1 82540EM --bridgeadapter1 wlx000b819609d3
- Turn on Physical Address Extension
VBoxManage modifyvm demovm --pae on
5. Start VM headless using vboxmanage
After creating a VM using the above commands, it’s time to start it. Here we have two options one is headless, which will start the VM in the background and the second one is the normal one which will open the VirtualBox graphical display window to let us know what is currently running.
vboxmanage startvm VM-name
Replace the VM-name with the one you have just created or any other existing one to start it.
In case you want to go headless, add that as a flag at the end of the above command:
VBoxManage startvm VM-name --type headless
6. List all VMs
Well, in case you want to know what are the virtual machines created so far using the command line, run the command
vboxmanage list vms
7. Display all running VMs list
Instead of showing all VMs, we can only get the ones that are currently running and active on VirtualBox,
vboxmanage list runningvms
8. vboxmanage command to Stop VM
After some time, when you don’t need any active VM, we can shut it down using a command, that is-
vboxmanage controlvm VM-name poweroff
Note– replace VM-name with your running Virtual machine that you want to stop.
9. Delete VM
Well, at some point in time we need to delete the created VMs to free up space or due to any other reason. Therefore, to do that we can also use the command-
VBoxManage unregistervm VM-name --delete
FAQ
[sc_fs_multi_faq headline-0=”h3″ question-0=”What is Vboxmanage?” answer-0=”VBoxManage is an Oracle VM VirtualBox command-line tool to manage and control virtual machines directly using the command terminal, prompt, or PowerShell in Windows, Linux, FreeBSD, and macOS host operating systems.” image-0=”” headline-1=”h3″ question-1=”How to open and run Vboxmanage?” answer-1=”Vboxmanage is available inside C:\Program Files>Oracle>VirtualBox on Windows 10/8/7, thus you can either navigate to the directory using command prompt or Powershell or add it as a system PATH variable. On Linux, simply type vboxmanage in the command terminal.” image-1=”” headline-2=”h3″ question-2=”How to find VirtualBox VMs UUID?” answer-2=”To find the UUID of virtual machines running on VirtualBox, we can use commands- one is vboxmanage list vms and the other is vboxmanage showhdinfo filename.vdi replace filename.vdi with the path of your virtual disk created for VM. ” image-2=”58226″ headline-3=”h3″ question-3=”How to change the UUID of a VDI file?” answer-3=”To change the UUID of VDI files, open the command terminal or prompt in Windows, macOS, or Linux. Then run VBoxManage internalcommands sethduuid ‘VDI file path’ Replace the VDI file path with the actual path of the Virtual Disk Image that UUID you want to change.” image-3=”” count=”4″ html=”true” css_class=”]


Thank you so much for the tip, it helped me a lot!!!!