Share your Ethernet internet over Wifi Hotspot in Ubuntu 20.04 LTS to connect other devices such as Android & iOS smartphones, Smart TVs, Laptops, PCs etc.
Believe it or not but when it comes to handling networking nothing is like Linux and of course, Ubuntu is the part of that. Indeed, the enabling of a hotspot in Windows 10 is super easy just one click and Ubuntu is not behind as well, here you also just need to go through few steps, to get and activate a hotspot connection.
requirements
- Ubuntu 20.04 LTS or older versions such as Ubuntu 19.04/18.04/16.04…
- Wifi supported hardware interface
- If you want to share the internet than an Ethernet connection with active internet.
Enable Wifi Hotspot in Ubuntu 20.04
There are two ways to create a Hotspot, one is through the general settings and the other one is by directly accessing the Gnome connection editor.
Method 1#: Using the General Settings.
Turn on Wifi Adapter
Click on the top right side arrow symbol given on Ubuntu 20.04 to reveal quick settings and then Turn ON the Wifi Adapter. Once you have done that click on the “Wifi Settings” option.

Turn on Ubuntu 20.04 Wi-Fi Hotspot
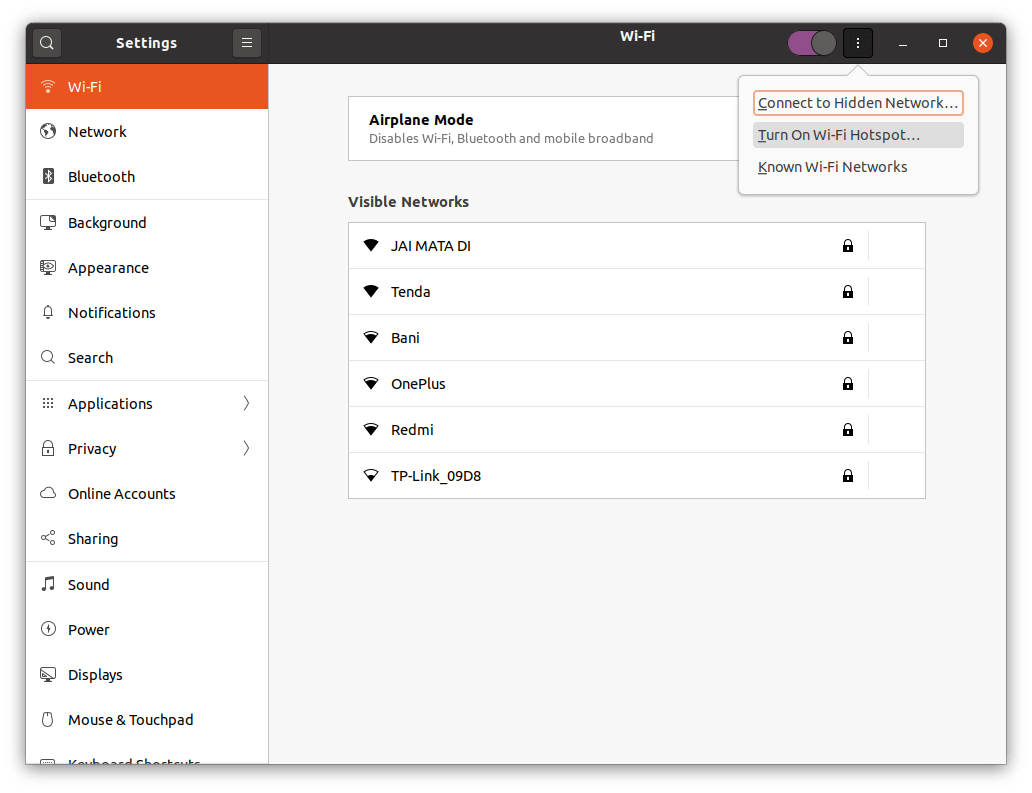
Under the Settings of Ubuntu 20.04 LTS, select the WiFi from the left side panel. After that click on the three dots given near the minimize icon in the top bar. This will pop-up further settings related to Wi-Fi. Here select the “Turn On Wi-Fi Settings“.
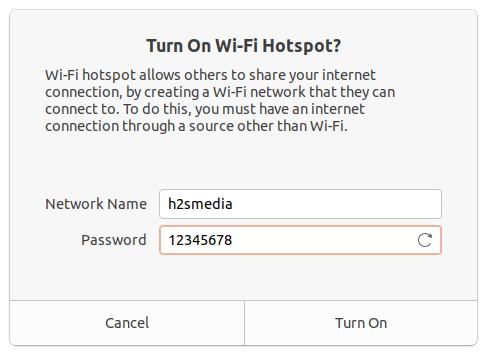
Create a new hotspot connection
You will see a new window. Here you have to give some name to your Ubuntu hotspot connection which acts as SSID along with the password you want to use for the same. Finally, click on the Turn On option to start it.
Visible networks
Under the WiFi settings, you will find the created WiFi hotspot along with all details of this new connection and a toggle button, that we can use to Switch on or off the same.

Method 2nd: Using the GNOME NM Connection editor
Open NM Connection Editor in Ubuntu 20.04
Go to the Command Terminal of Ubuntu 20.04 and type the below command:
nm-connection-editor
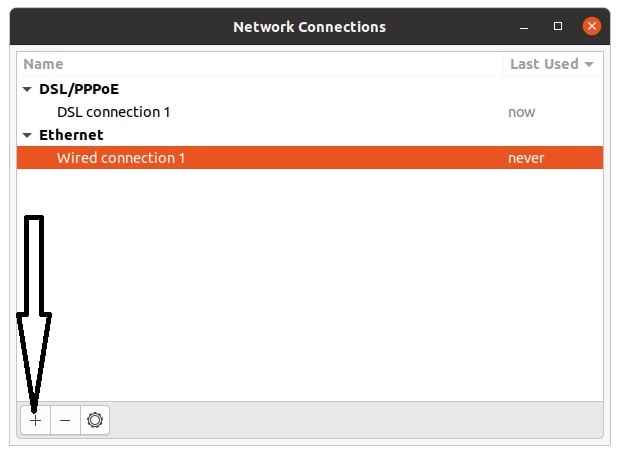
The above command will open the GNOME Network Connections manager. There click on the + icon given at the bottom to create a new connection.
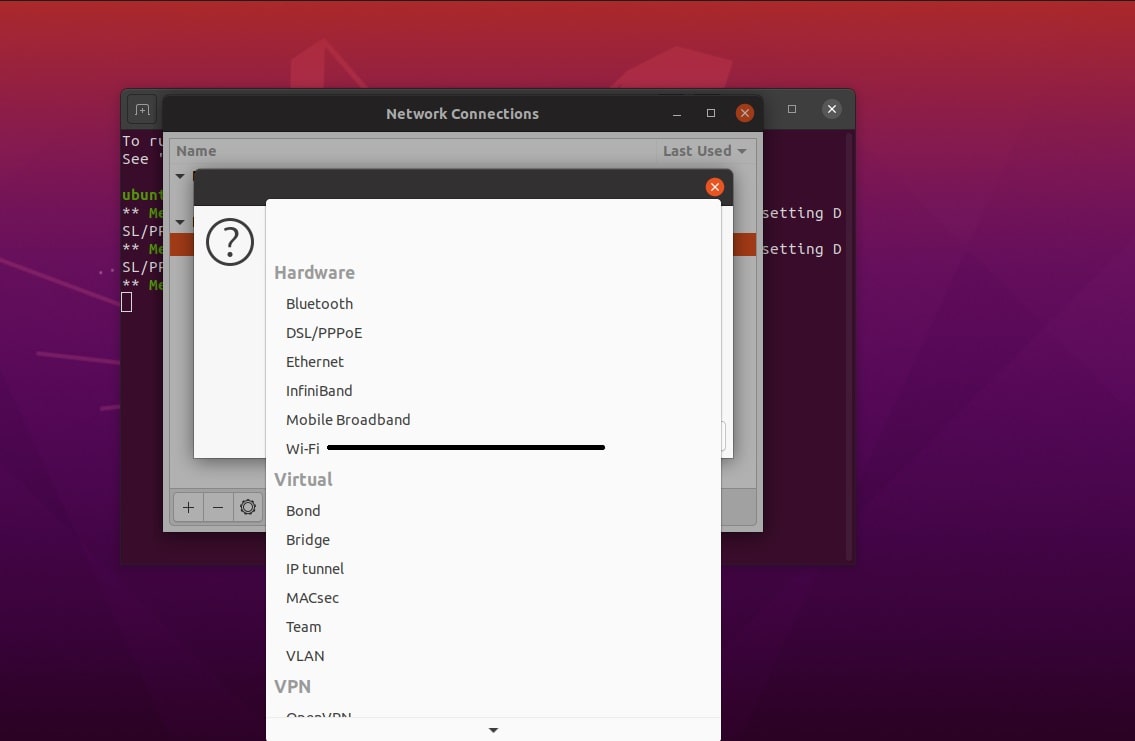
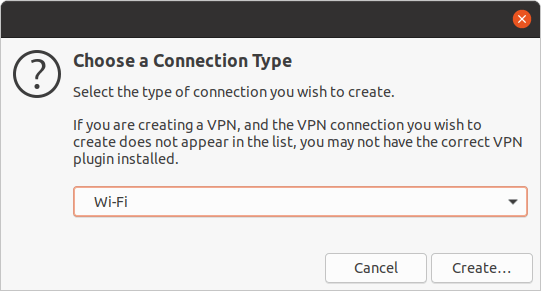
Select the type of connection you want to create
From connection type, click on the drop-down box and select the WiFi connection as we want to create a hotspot.
Create SSID and select connection Mode
Here, we have to give some name to our Wi-Fi connection which works as SSID, we have given “h2smedia”, you can type whatever you would like to have. The next important thing is the MODE, here select the Hotspot from the dropdown box, otherwise, it will not create a Wi-Fi hotspot at all.
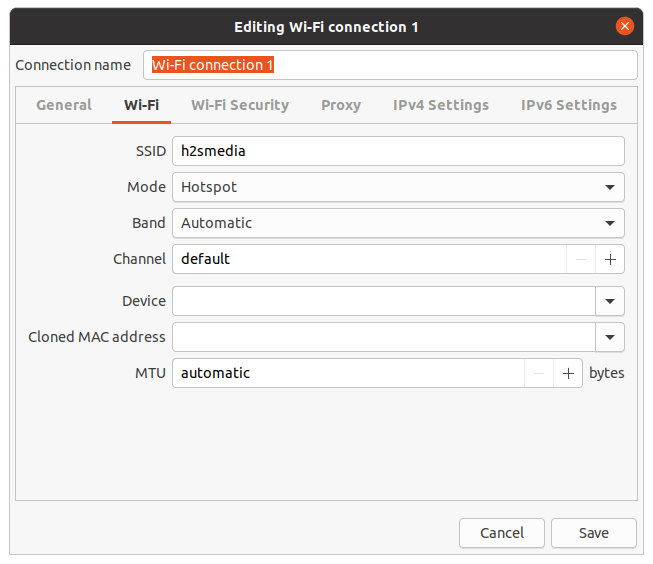
Set Wi-Fi hotspot security in Ubuntu 20.04
Now, click on the Wi-Fi Security tab, select WPS & WPS2 Personal security type and then in the next column enter the password which you want to use with the created hotspot. Save it.

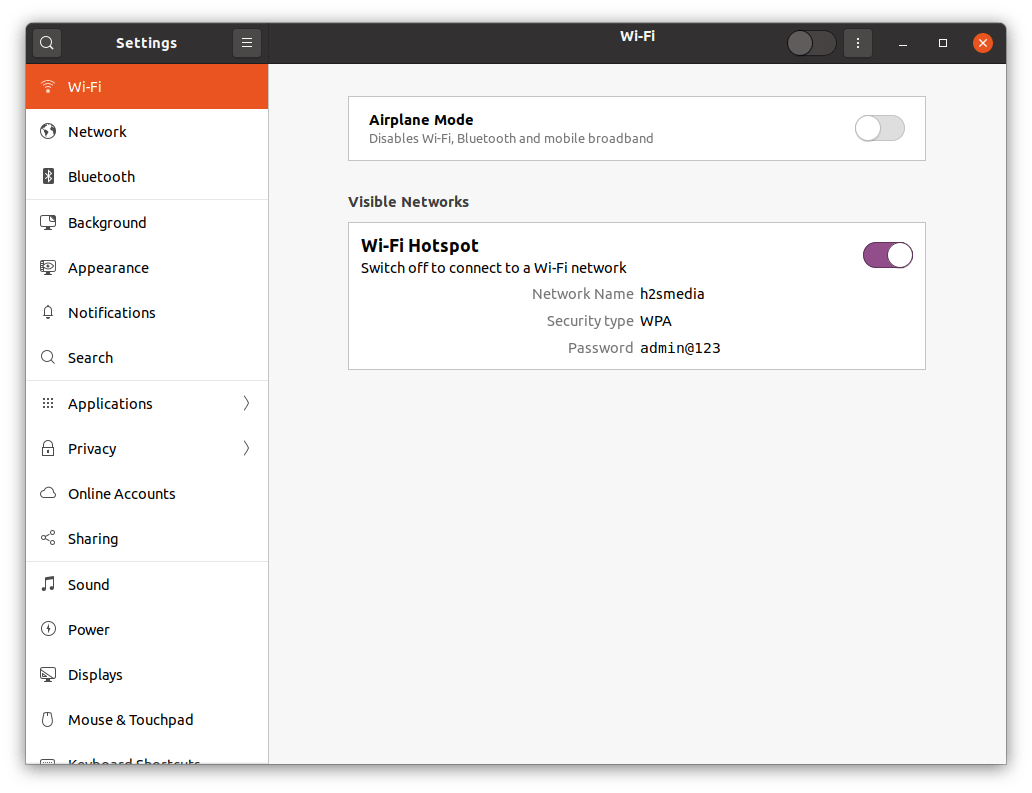
Turn off or On Wi-Fi hotspot on Ubuntu 20.04
Finally, under the Wi-Fi settings, you will find your created connection with all detail required to connect it with other devices such as your Android smartphone or laptop. Toggle button can be used to switch it ON or OFF, in case you want to connect to some Wi-Fi network.
So, this was the quick tutorial on creating a Wi-Fi hotspot in Ubuntu Linux.
Other Articles:


But in my case “Turn on Wi-Fi hotspot” is disabled and I want my ethernet to use for the hotspot.
Switch to any other tab (e.g. Network, Bluetooth, etc) and then switch back to Wi-Fi, the option will be enabled.
What is the maximum number of users who can connect to the hotspot
Ubuntu sets no limits for the number of clients to connect, however, your network card would have. Generally, it would be around 12 to 20 users who can share the connection without any problem, however above that depends on the speed of your internet connection.
Or you can set the security to other than ‘WPA & WPA2 Personal’. I used WEP Open System and it worked. WEP is better especially when you want to play online on your Nintendo DS.