
Is Windows Sandbox not available on your Windows 11 or 10 Home Editon PC and laptops? Then here are the steps to install it.
There are a couple of useful features that are only available on Windows 11 or 10 pro, enterprise and education editions but not for Windows Home editions users such as Hyper-V and Sandbox. However, although out of the box such professional features are not available for Home edition users, it doesn’t mean they cannot have them. In this article, we learn about a script that will install the Windows Sandbox feature for Home Edition users.
Prerequisites:
You must ensure that the following requirements are met by your system before moving further:
- The PC or Laptop must have either Windows 11 or Windows 10 Home Edition version 1903 or later.
- The CPU of the system must support virtualization technology (Intel VT-x or AMD-V).
- There must be 4GB of RAM and 1GB of free disk space for installing the new required files by the system.
Steps to enable Sandbox on Windows Home Edition:
Follow these steps to install and enable Windows Sandbox on Windows 11 or 10 Home editions:
1. Check Virtualization Support is enabled:
The first step you should start with is confirming whether the support for virtualization is enabled on your system or not. Because without it the Sandbox feature will not work. If you don’t know how to check it, see our tutorial – Confirm whether the virtualization is enabled on Windows 11 / 10 or not
2. Create a Script file
Well, as we know the Sandbox feature is not available to enable on Windows 10 and 11 Home Editions without upgrading the OS, therefore, here we create a script file that will automatically download and install the required files for the installation of Sandbox.
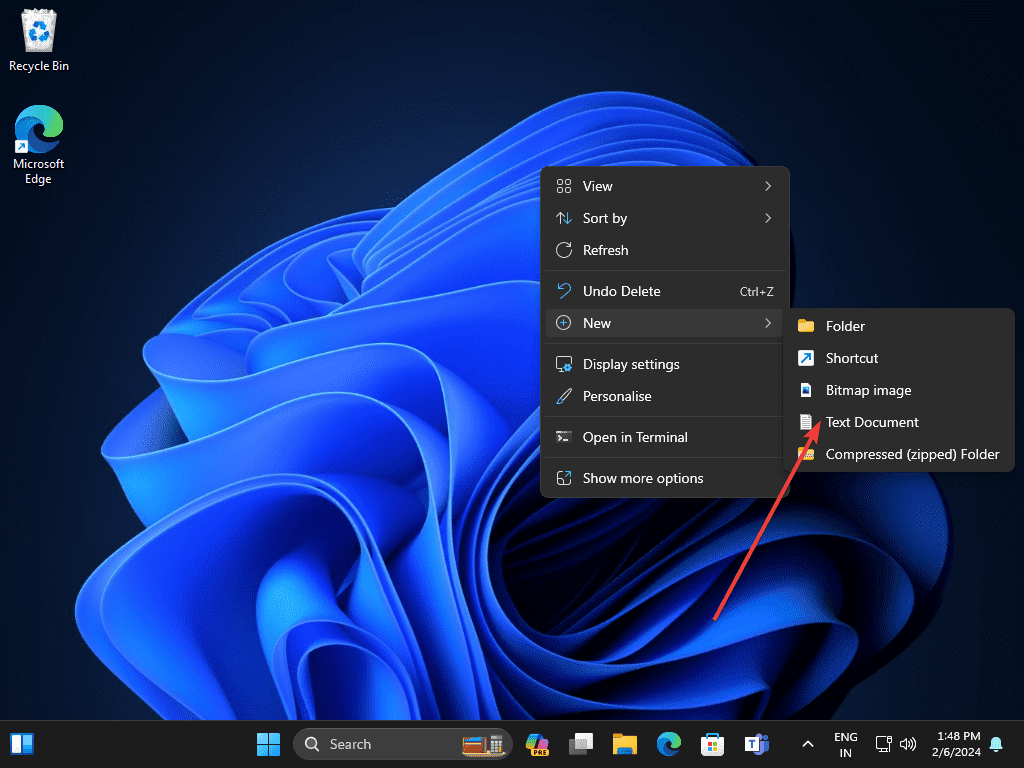
- Right-click anywhere on the blank space of Windows Desktop
- Select New and then the “Text Document” option.
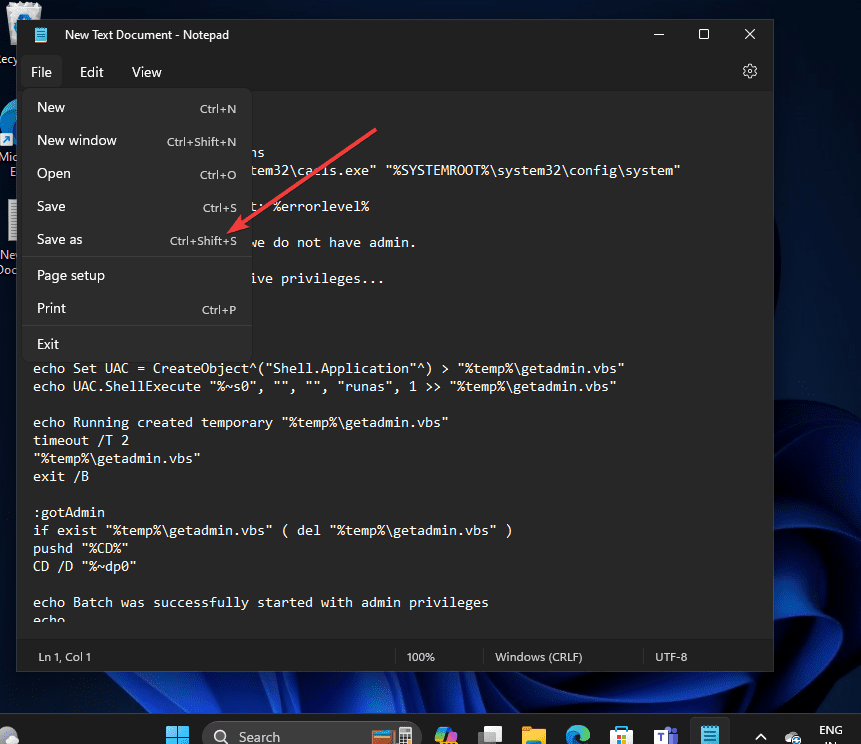
- In the file, copy-paste the given code lines that will help our system to install the Sandbox feature.
@echo off

echo Checking for permissions
>nul 2>&1 "%SYSTEMROOT%\system32\cacls.exe" "%SYSTEMROOT%\system32\config\system"

echo Permission check result: %errorlevel%

REM --> If error flag set, we do not have admin.
if '%errorlevel%' NEQ '0' (
echo Requesting administrative privileges...
goto UACPrompt
) else ( goto gotAdmin )

:UACPrompt
echo Set UAC = CreateObject^("Shell.Application"^) > "%temp%\getadmin.vbs"
echo UAC.ShellExecute "%~s0", "", "", "runas", 1 >> "%temp%\getadmin.vbs"

echo Running created temporary "%temp%\getadmin.vbs"
timeout /T 2
"%temp%\getadmin.vbs"
exit /B

:gotAdmin
if exist "%temp%\getadmin.vbs" ( del "%temp%\getadmin.vbs" )
pushd "%CD%"
CD /D "%~dp0"

echo Batch was successfully started with admin privileges
echo .
cls
Title Sandbox Installer

pushd "%~dp0"

dir /b %SystemRoot%\servicing\Packages\*Containers*.mum >sandbox.txt

for /f %%i in ('findstr /i . sandbox.txt 2^>nul') do dism /online /norestart /add-package:"%SystemRoot%\servicing\Packages\%%i"

del sandbox.txt

Dism /online /enable-feature /featurename:Containers-DisposableClientVM /LimitAccess /ALL

pause
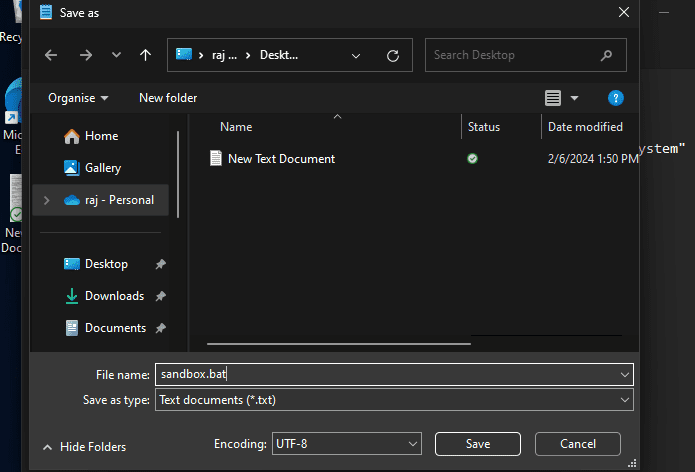
After copy-pasting, press Ctrl+Shift+S to save the file with the “.bat” extension. For example, here we are using the “sandbox.bat” name to save the file, you can use the same.
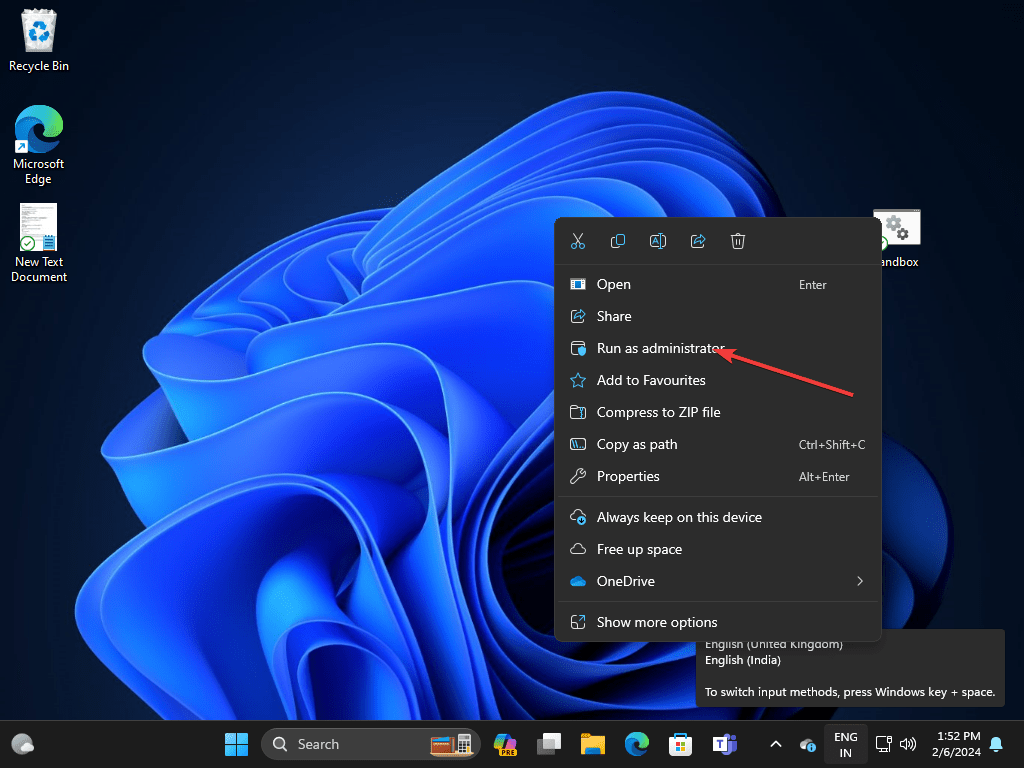
3. Start installing Sandbox on Windows 10 or 11 Home
After creating the Script file, right-click on it and select “Run as Administrator” to execute the code of the file with Admin rights. Wait for a few minutes and let the script complete the installation process for the Sandbox feature on Windows 10 or 11 Home Edition.
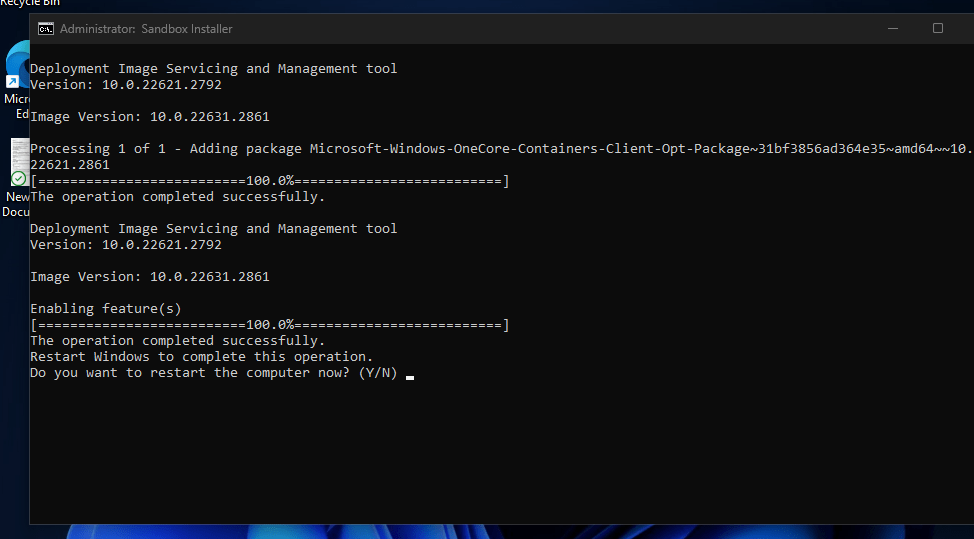
4. Restart Your PC or Laptop
Once the process of “Deployment Image Servicing and Management tool” is done, you will see the message to restart the system for proper integration of the Sandbox, just type “Y” and hit the Enter key.
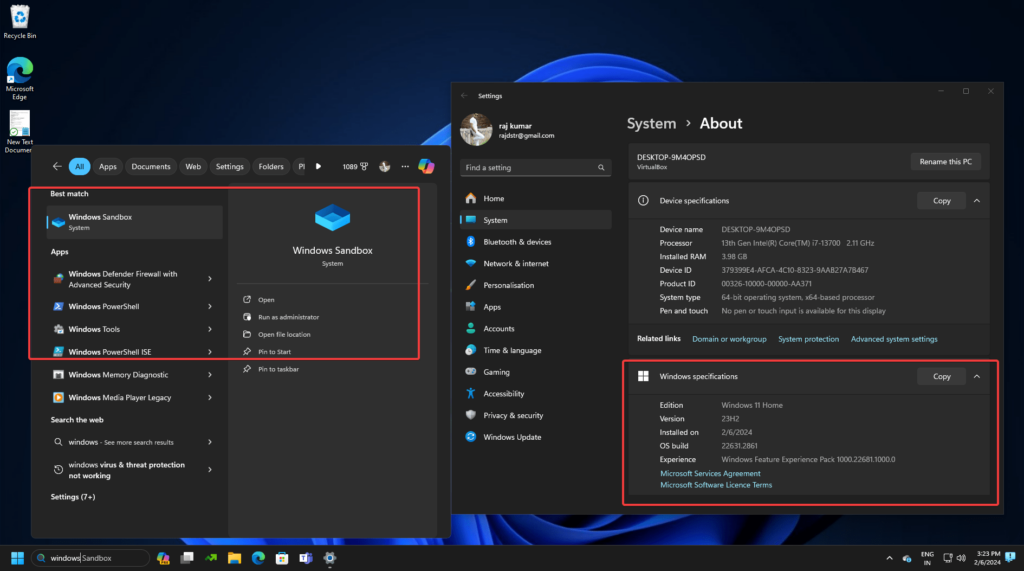
5. Launch Windows Sandbox
Now, that we have successfully installed the Windows Sandbox on the Home edition of Windows 11 or 10, it’s time to run it. Go to the Start menu and search for “Windows Sandbox” as its icon appears, click the same to launch it.
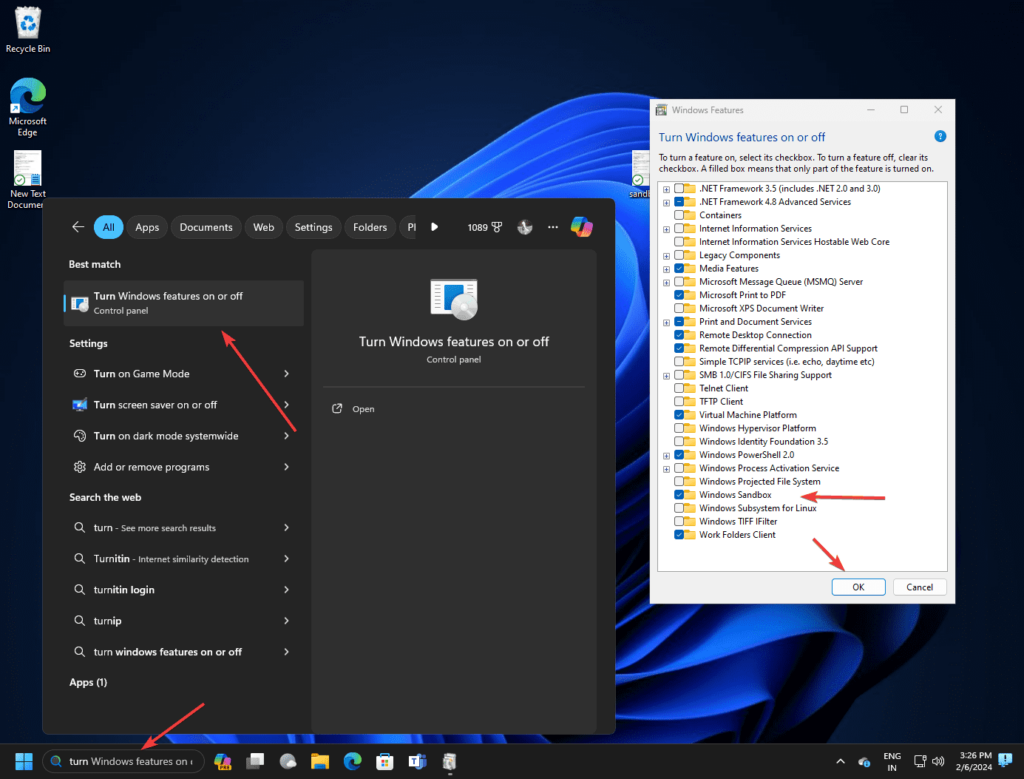
6. Disable or Uninstall Windows Sandbox (optional)
In case you don’t require the Windows Sandbox feature enabled on your Windows 11 or 10 Home OS, then we can disable it by turning off this feature. For that follow the given steps.
- Go to the Windows start menu and search for “Turn Windows Feature On or OFF.” As in the search results it appears, click the same to open.
- After that, scroll down to find “Windows Sandbox”. You will see the box in front of it “Checked”.
- So, to disable the Windows Sandbox simply uncheck it and press the OK button.
- Restart your system once the process of Sandbox removal is completed.
In this way, we can remove the Windows Sandbox feature from both Windows 10 and 11. However, it doesn’t mean in the future to get it again you need to run the script. Instead, just like we disable it from the “Turn Windows Feature On or OFF” check the Sandbox option to enable it.
Other Articles:
- How to install and open Windows 11 sandbox using CMD?
- Windows XP ISO installation on Windows 11 using VirtualBox
- 8 Best Virtual Linux terminals Online to Practice Linux commands
- How to check what GPU you have in Windows 11? Get graphic card details – 4 ways
- How to Show Seconds in Taskbar Clock on Windows 11
Related Posts
How to create email groups in Gmail? Send one email to multiple recipients in a matter of seconds.
Getting the right dashcam for your needs. All that you need to know
How to Install 7-Zip on Windows 11 or 10 with Single Command
Install Google Earth on Windows 11 or 10 Using a Single Command
How to install Gaming Services on Windows 11
How to Install Telnet Client on Windows 11 Using PowerShell