The default system language comes in Windows 10 system is English but you don’t need to compel your self to use your personal Windows 10 system in English you can change that. The Windows 10 offers a wide range of language options according to regions. Using Windows 10 settings you can change the language, not for a single account but for your whole system, all accounts, login screen and everywhere on the PC. So, if you don’t know how to change the system language in the Windows 10 PC then here we have created a step by step tutorial to give a way to properly change the default language across on your entire computer.
Steps to Change Windows 10 PC language globally
Step 1: Windows Settings
Go to the search box and type settings. When it appears select that.

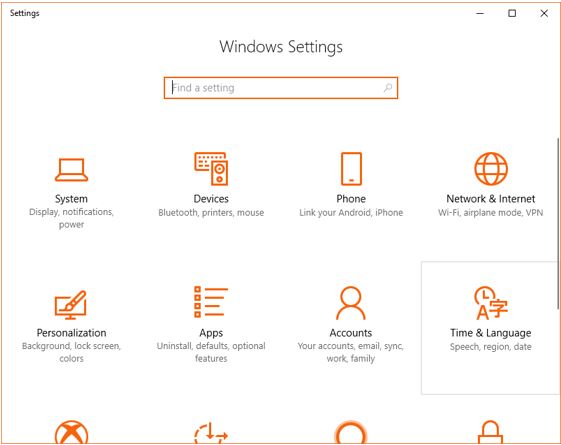
Step 2: Windows 10 Time & Language
From Windows, settings select the option Time & Language option shown in the screenshot.
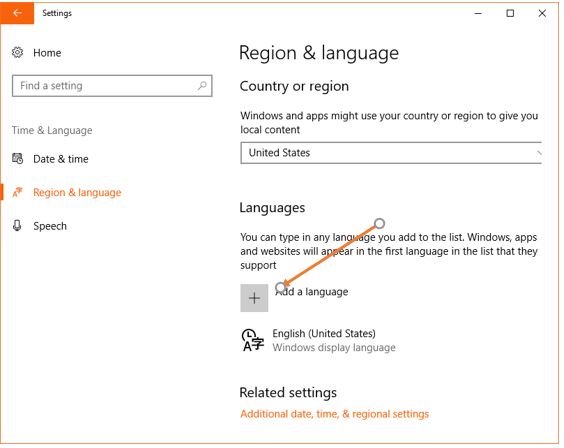
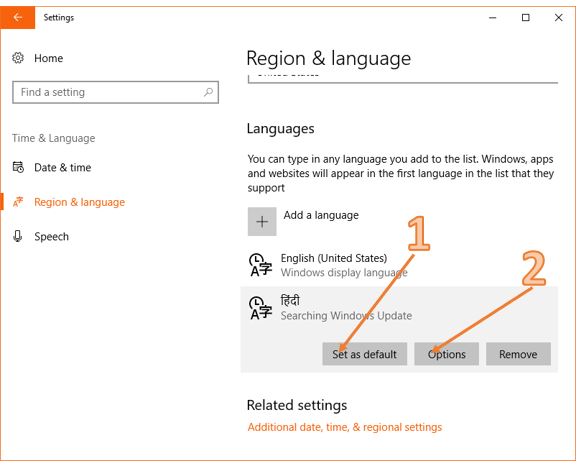
Step 3: Now from Time & Language option select the Region & Language settings. Under that, you will see a Language section from where you need to click on Add language option to add your regional or mother tongue language to your Windows 10 system.
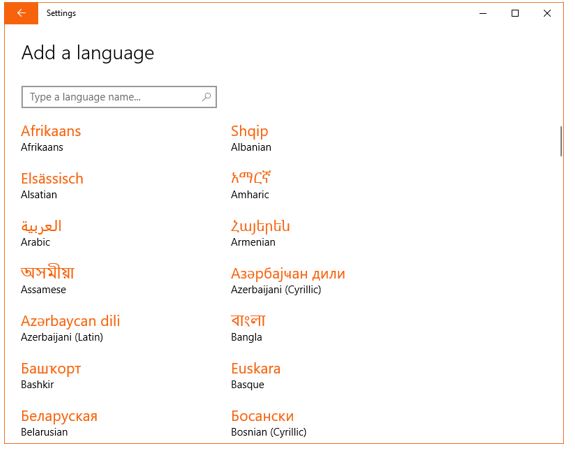
Step 4: Add a Language
From Add language, you see Windows language pack section that lists all most every language of every country. Now in the search box type the language name that you want on your system such as Russian, German, Hindi, Chinese, Arabic, Spanish, Dutch and more…
For performing the tutorial, we are choosing the Hindi language.
Step 5: Download new language packages
Once you select your region language, it will appear in the language section as you can see we have selected the Hindi language and it shows there in the screenshot. After that, the first thing you need to do is click on the Set as Default button to make the new Windows 10 language as your system default and then click on the Options button.
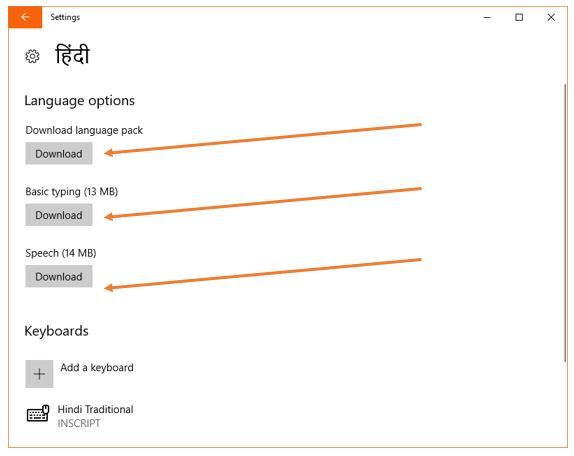
When you click on the Options button it takes you to the language options settings form where you need to download the language pack for your selected language. For reference, you can see in the below-given screenshot.
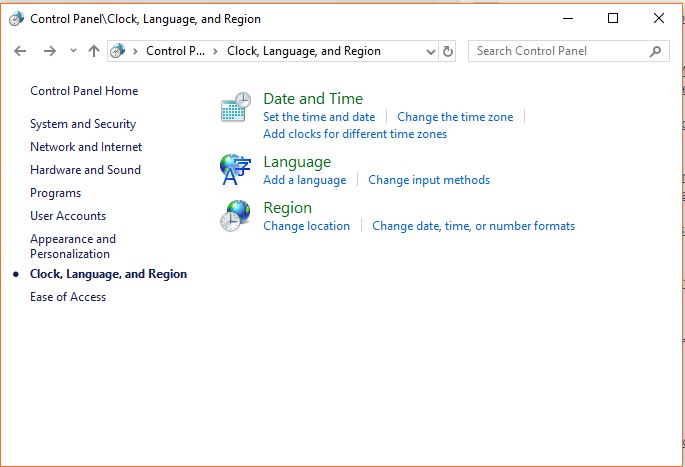
Step 6: Clock, Language, and Region
Now go to Control Panel and select the Clock, Language, and Region option. Under which select the Language option give on the right side,
Step 7: Change the language preferences of Windows 10
Click on the Advanced settings.

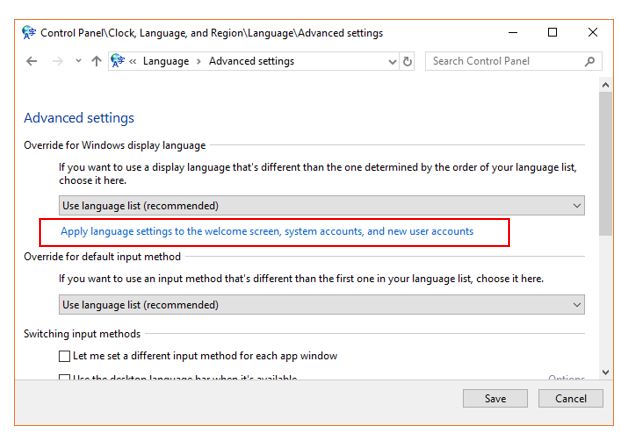
Step 8: Language Advanced settings
Click on the Link: “Apply Language settings to the welcome screen, system accounts, and new user accounts“.
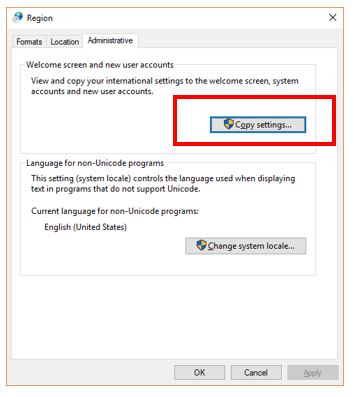
Step 9: Region Administrative Copy settings
When you click on the Apply Language settings, it will open the Region settings window from where click on the Copy settings as shown in the screenshot.
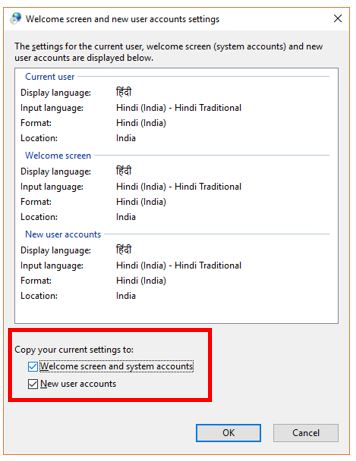
Step 10: Welcome screen and new user accounts settings
From the Copy your current settings, tick the Welcome screen and system accounts and New user accounts check box.
Press OK.
These options will apply your selected language to every account of the Windows 10.
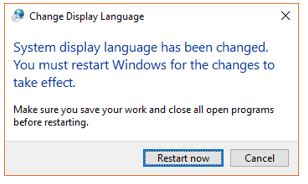
Step 11: Change Display Language
When you press OK button, the Windows 10 system ask you to restart the system to apply the Language changes. Click on Restart Now and you are done!!.
If you want to Change Language of the Windows 10 back to English (default) again go to Settings->Time & Language->Region & Language and select the default language English.
Related Posts
How to Install 7-Zip on Windows 11 or 10 with Single Command
Install Google Earth on Windows 11 or 10 Using a Single Command
How to install Gaming Services on Windows 11
How to Install Telnet Client on Windows 11 Using PowerShell
How to Install ASK CLI on Windows 11 or 10
How do you install FlutterFire CLI on Windows 11 or 10?