Choco is the command that uses in Chocolatey on Windows 10/8/7 platforms to install different software available as Chocolatey packages. Now what exactly Chocolatey is? If you have ever used Ubuntu or Centos or any other Linux OS, they all have their own package manager that we use to install the different applications via the command line such as apt-get or yum. But they don’t work for Windows, thus, this has given the inception of Chocolatey which work as a Windows package manager to install various software via Command Prompt or Powershell, directly using a few commands.
It is built on NuGet infrastructure and is able to manage all aspects of managing Windows software by understanding both versioning and dependency requirements.
So, if you are new to Chocolatey then you can go to its packages to see all the available ones. However, here we are showing a tutorial on how to install the Google Chrome browser using Chocolatey on Windows 10/8/7.
Step 1: Install Chocolatey
If you already have this Windows package manager then leave this step and move to the next step. And if someone doesn’t have it then see this article to know how to download Chocolatey for installation.
Step 2: Open the Power shell
Go to the Windows search box and type Power shell, when it appears, run it under administrator rights.

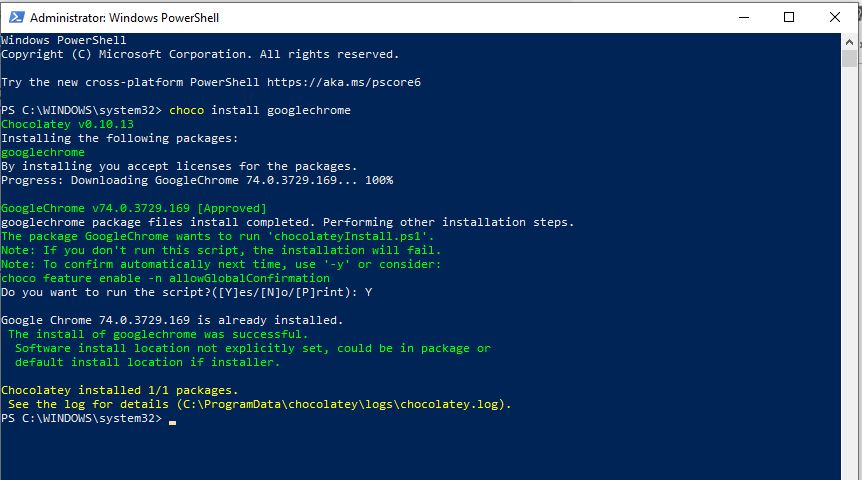
Step 3: Choco command to install the Google Chrome browser
Now in your PowerShell fire the below command to get Google chrome browser packages without using any browser to download the setup and then install the same manually. Just a single command that’s it!
choco install googlechrome
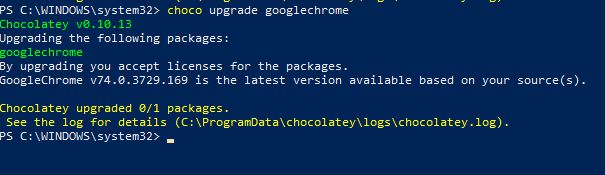
Step 4: Upgrade Chrome via Choco
In the future, if you want to upgrade your Google Chrome browser then that can be done using Chocolatey’s Choco upgrade command in Powershell, here’s that:
choco upgrade googlechrome
You may want to know about:
Related Posts
How to Install 7-Zip on Windows 11 or 10 with Single Command
Install Google Earth on Windows 11 or 10 Using a Single Command
How to install Gaming Services on Windows 11
How to Install Telnet Client on Windows 11 Using PowerShell
How to Install ASK CLI on Windows 11 or 10
How do you install FlutterFire CLI on Windows 11 or 10?