
To install Grunt on Windows, first, we need Node.js and NPM on the same system where we want the Grunt software. So, before delving into the tutorial part to know about this, let’s first see What is Grunt?
The Grunt is a JavaScript task runner which allows automating of different tasks for developers that are repetitive in nature such as minification, compilation, unit testing, linting, etc. It makes the job easier. The best part is that Grunt has a wide range of plugins library that let us automate the task with minimum effort, moreover, if you are working on some project and need some plugin to support it which is not available in Grunt you can create your own using npm.
Grunt uses a command line interface to execute intended commands mentioned by the coder in a file called Gruntfile.
Grunt was created by Ben Alman and is written in Node.js and used by many popular companies including Twitter, Opera, Mozilla, Bootstrap, WordPress, Microsoft, and Adobe.
Coming to the main subject of this article is how to install Grunt on Windows 10/8/7. So, to install and manage the Grunt we need NPM and for that first, we need to install the Node.js on Windows as the NPM is the package manager of Nodejs & comes along with it.
Install Grunt on Windows 11 or 10
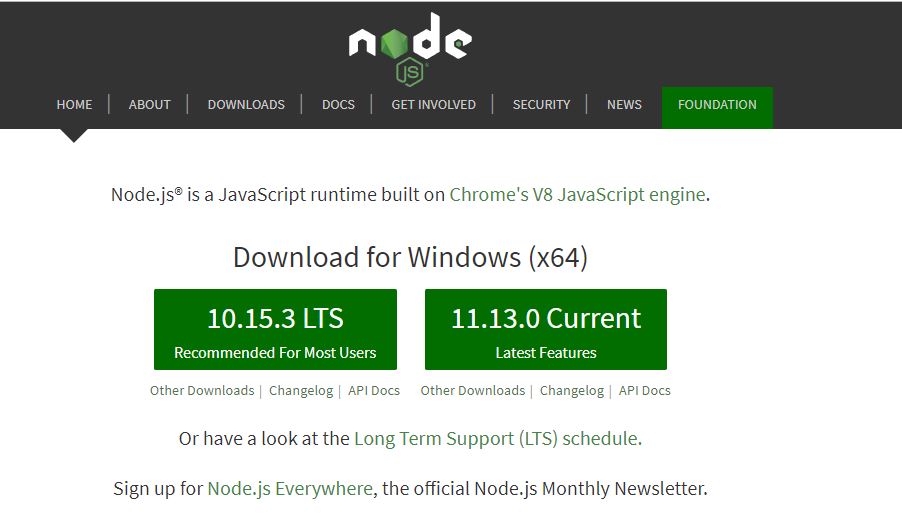
Step 1: Download the Node.JS & NPM on Windows
First of all, go to Nodejs official website here is the link. And download the stable version of Node.js which while writing this article was 10.15.3.
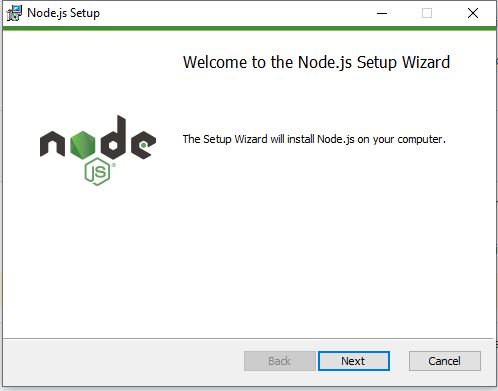
Step 2: Install the NPM & Node.js for Windows
Now double click on the downloaded Node.js setup. And click on the NEXT button when the wizard appears.
The setup wizard for the Node.js or NPM installation will ask to accept the License Agreement. Check the box and click on the NEXT button.

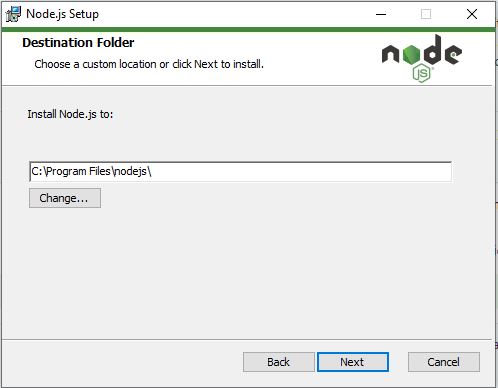
Set the destination folder, in case you want to install it somewhere else, or just leave it as it is for the default one and click on the Next button.
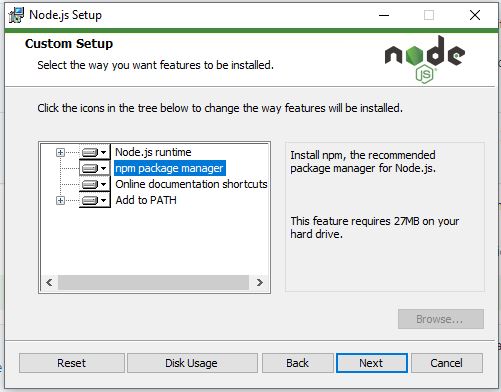
The packages that will install are Node.js java runtime and npm package manager along with Online documentation for shortcuts.
Click on NEXT and then install.
Step 3: Open Windows command prompt
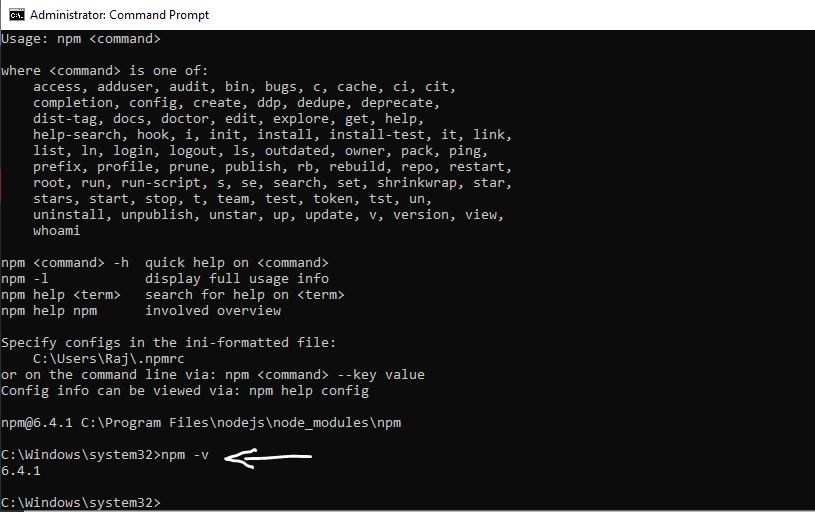
Open the command prompt under administrative privileges and type the below command to confirm the NPM installation.
npm -v
the above command will show the installed npm version.
If you already have Node.js and NPM on your system then you can use the below command to check for the latest update, if available.
npm update -g npm
Step 4: Install Grunt on Windows using NPM
As we know that the Grunt JS works on the command line so for installing the Grunt CLI via NPM package manager on Windows, here is the command:
npm install -g grunt-cli

Step 5: Create a Demo Project to test Grunt (windows)
After installing the Grunt first you can create a project. For example, here I am creating a project called Raj.
For that simply from the command prompt create a directory with your project name. Here I am using raj, as the directory name which is also used as a project name.
mk raj
Switch to the created directory
cd raj
Now create a basic package.json file using a simple command
npm init
Install latest the latest version of Grunt and adds it to your devDependencies −
npm install grunt --save-dev
Install grunt plugins into an existing pacakge.json file using the command:
npm install <module> --save-dev
<module> represents the module that you want to install for the project locally.
For example, here we are installing grunt-contrib-uglify plugin to print metadata:
npm install grunt-contrib-uglify --save-dev
Trivia: Here is the Grunt Plugin list.
Create Gruntfile.js using Command prompt type:
type nul > gruntfile.js
notepad gruntfile.js
Add the following text and save it:
module.exports = function(grunt) {
// CONFIGURE GRUNT
grunt.initConfig({
// get the configuration info from package.json file
// this way we can use things like name and version (pkg.name)
pkg: grunt.file.readJSON('package.json'),
// all of our configuration goes here
uglify: {
// uglify task configuration
options: {},
build: {}
}
});
// log something
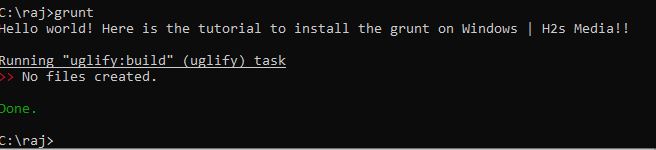
grunt.log.write('Hello world! Here is the tutorial to install the grunt on Windows | H2s Media!!\n');
// Load the plugin that provides the "uglify" task.
grunt.loadNpmTasks('grunt-contrib-uglify');
// Default task(s).
grunt.registerTask('default', ['uglify']);
};
Close the notepad and get back to the command prompt and type the command:
grunt
The output will be something like:
To get more Gruntfile samples, see the official link.
Other Useful Resources:


Nice article, thank you