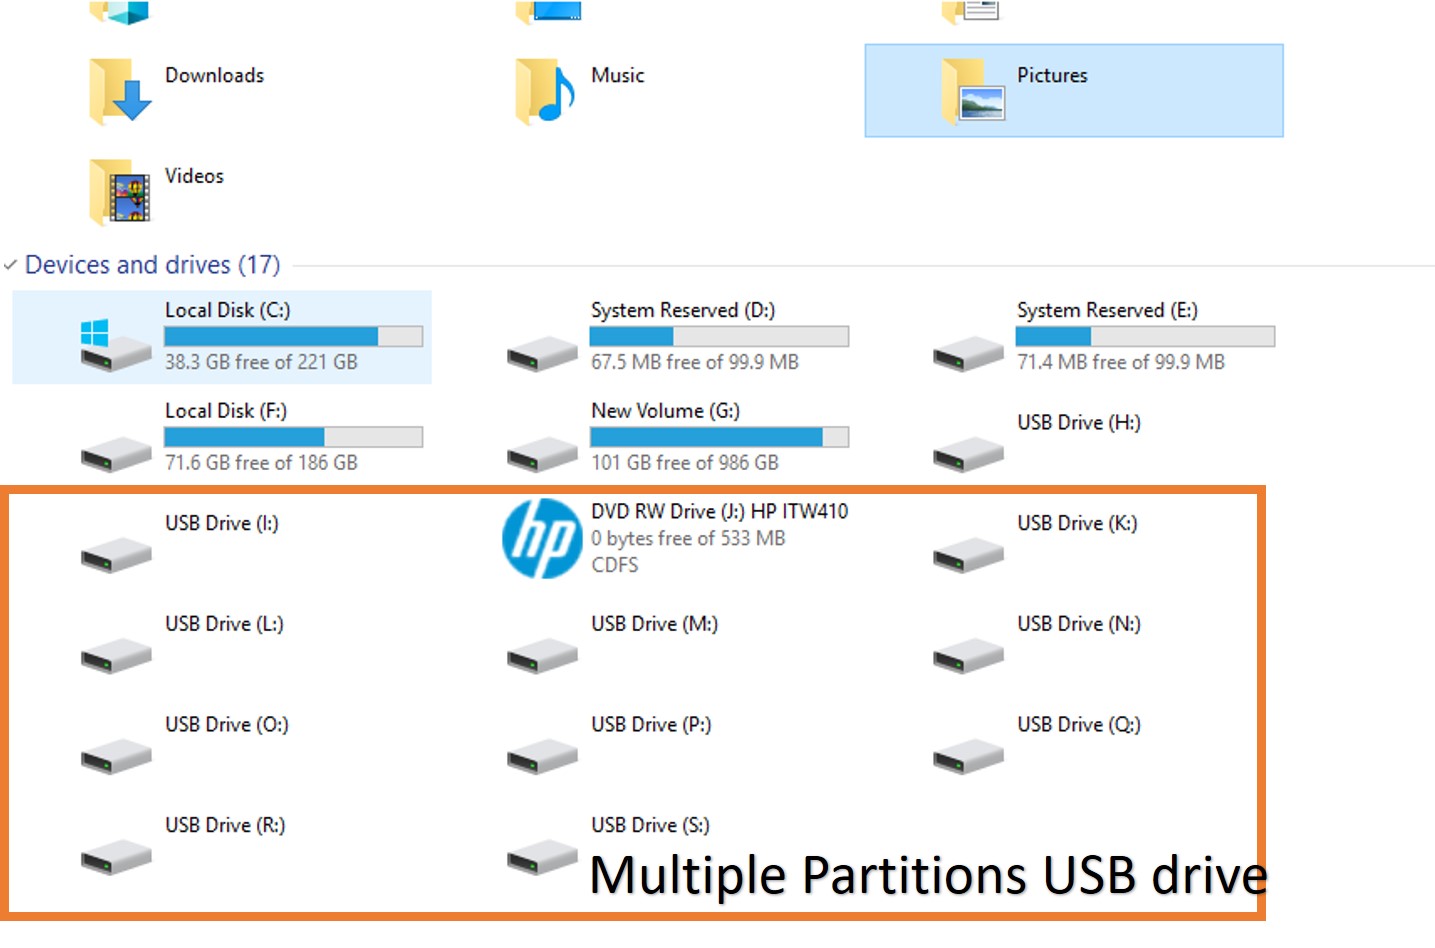
Partition on USB drives or Pen drives seems a little bit irrational to those who have never got such conditions on a USB drive. Because most of the time we only have a single primary partition on a USB drive, that’s why so many people might never have faced such kind of multi-partition problem on thumbnail drives. But recently, while creating a bootable USB drive using software called balenaEtcher, it created 5 partitions on my drive. After that, I was a little bit anxious that it might have corrupted the Pen drive. Because I was not able to format it directly from the My computer interface of the Windows. So, I used the Diskpart command tool and finally able to regress it to its original form. I mean successfully unpartitioned or deleted multiple partitions to make a primary partition on my pen drive.
So, the commands I had followed, I am going to mention in this article, in case somebody also suffering from such a problem and wants to restore the bootable USB/partitioned drive to its original state.
How to remove multiple partitions from a USB drive in Windows 10/8/7
- To restore the USB drive to the original state, we need to run the command prompt under administrative rights.
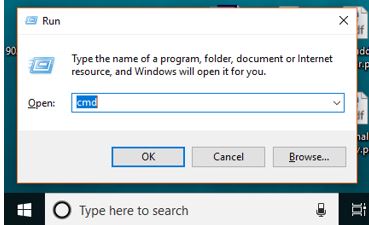
- Press the Windows Key + R key together to open the RUN box.
- Type CMD in Run box.
- Now press the Shift+Ctrl key and click on the Ok button of Run Box.
- The command prompt will ask for permission to run under the administrative mode. Click on the Yes button.
- When the Command Prompt got opened, type: DISKPART and press enter key.
- As the Diskpart prompt appears, type another command List Disk.
- All the Disk that are present on your computer system including the USB drive will appear on the screen.
- Now we need to select the USB drive. So, to select the USB drive type: Select Disk X, replace the X with the Disk number.
- In this step, we will call all the multiple partitions of the USB drive to appear. The command for this is: list partition
- All the partitions of the USB drive will appear.
- Now select each partition one by one to delete. The command for this will be:
- Select partition X, Replace X by the number of partition like 1, 2, 3…
- After selecting the partition, execute the partition deletion command which is: delete partition
- Repeat the same above two steps until all partitions are not removed.
- If any of the partitions of the USB drive is protected then you get the message “Cannot delete a protected partition without the force protected parameter set“. In such a case, you need to perform the forceful partition deletion command.
- The Command to remove or delete protected partition forcefully is: delete partition override
- Once all multiple partitions got deleted, now its time to create a single primary partition using this command:
create partition primary
- After creating primary partition type: Exit.
- Go to My Computer and when you try to open the Pen drive, it will ask to format, just do that.
- That’s all you have to do.
Screenshots for Reference:
Press Windows + R keys from the keyboard. Then type CMD. After that again press Shift+Ctrl and click on the Ok button to run it under administrator privilege.
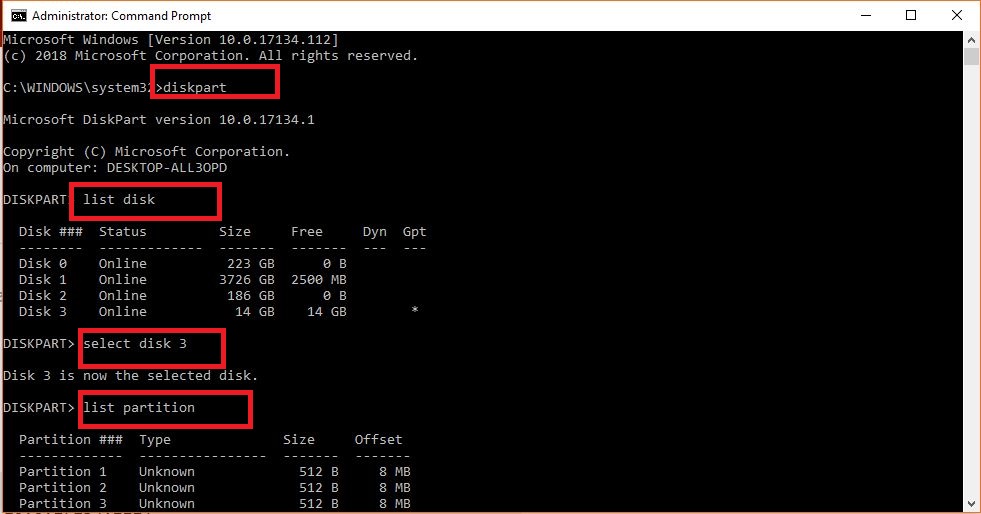
Type Diskpart
Then List Disk
Select Disk X – Note: Replace X with disk serial no. See the screenshot.
Type List partition
Select partition X Note: Replace X with partition serial number.
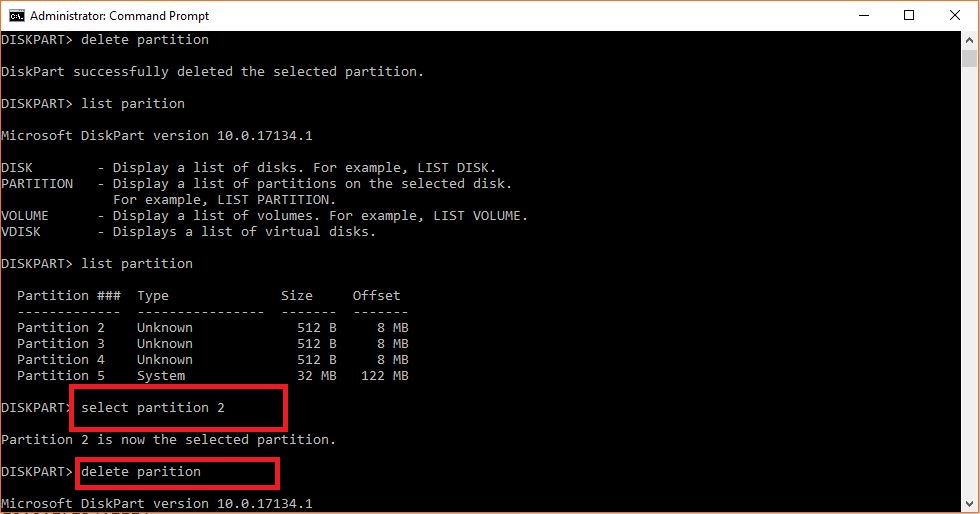
Execute delete command: delete partition
Once all partitions deleted, create a new primary one. The command is: create primary partition
The output of the Command performed by us while deleting multiple partitions of a USB drive to restore it to its original state.
Microsoft Windows [Version 10.0.17134.112]
(c) 2018 Microsoft Corporation. All rights reserved.

C:\WINDOWS\system32>diskpart

Microsoft DiskPart version 10.0.17134.1

Copyright (C) Microsoft Corporation.
On computer: DESKTOP-ALL3OPD

DISKPART> list disk

Disk ### Status Size Free Dyn Gpt
-------- ------------- ------- ------- --- ---
Disk 0 Online 223 GB 0 B
Disk 1 Online 3726 GB 2500 MB
Disk 2 Online 186 GB 0 B
Disk 3 Online 14 GB 14 GB *

DISKPART> select disk 3

Disk 3 is now the selected disk.

DISKPART> list partition

Partition ### Type Size Offset
------------- ---------------- ------- -------
Partition 1 Unknown 512 B 8 MB
Partition 2 Unknown 512 B 8 MB
Partition 3 Unknown 512 B 8 MB
Partition 4 Unknown 512 B 8 MB
Partition 5 System 32 MB 122 MB

DISKPART> select partition 1

Partition 1 is now the selected partition.

DISKPART> delete partition

DiskPart successfully deleted the selected partition.

DISKPART> list partition

Partition ### Type Size Offset
------------- ---------------- ------- -------
Partition 2 Unknown 512 B 8 MB
Partition 3 Unknown 512 B 8 MB
Partition 4 Unknown 512 B 8 MB
Partition 5 System 32 MB 122 MB

DISKPART> select partition 2

Partition 2 is now the selected partition.

DISKPART> delete parition

DiskPart successfully deleted the selected partition.

DISKPART> select partition 3

Partition 3 is now the selected partition.

DISKPART> delete partition

DiskPart successfully deleted the selected partition.

DISKPART> select partition 4

Partition 4 is now the selected partition.

DISKPART> delete partition

DiskPart successfully deleted the selected partition.

DISKPART> select partition 5

Partition 5 is now the selected partition.

DISKPART> delete partition

Virtual Disk Service error:
Cannot delete a protected partition without the force protected parameter set.

DISKPART> delete partition override

DiskPart successfully deleted the selected partition.

DISKPART> list disk

Disk ### Status Size Free Dyn Gpt
-------- ------------- ------- ------- --- ---
Disk 0 Online 223 GB 0 B
Disk 1 Online 3726 GB 2500 MB
Disk 2 Online 186 GB 0 B
* Disk 3 Online 14 GB 14 GB *

DISKPART> select disk 3

Disk 3 is now the selected disk.

DISKPART> create partition primary

DiskPart succeeded in creating the specified partition.

DISKPART> exit
Graphically Delete the Partition:
Recommend to use the command prompt option because some time graphical disk management option does not work effectively.
Follow the steps to delete USB drive partitions:
NOTE: Make sure the USB pen drive is plugged in before you start the below steps.
- Press Win + R to open the Run command
- Type, “compmgmt.msc” and hit Enter or click the OK button
- This command will open Computer Management for you
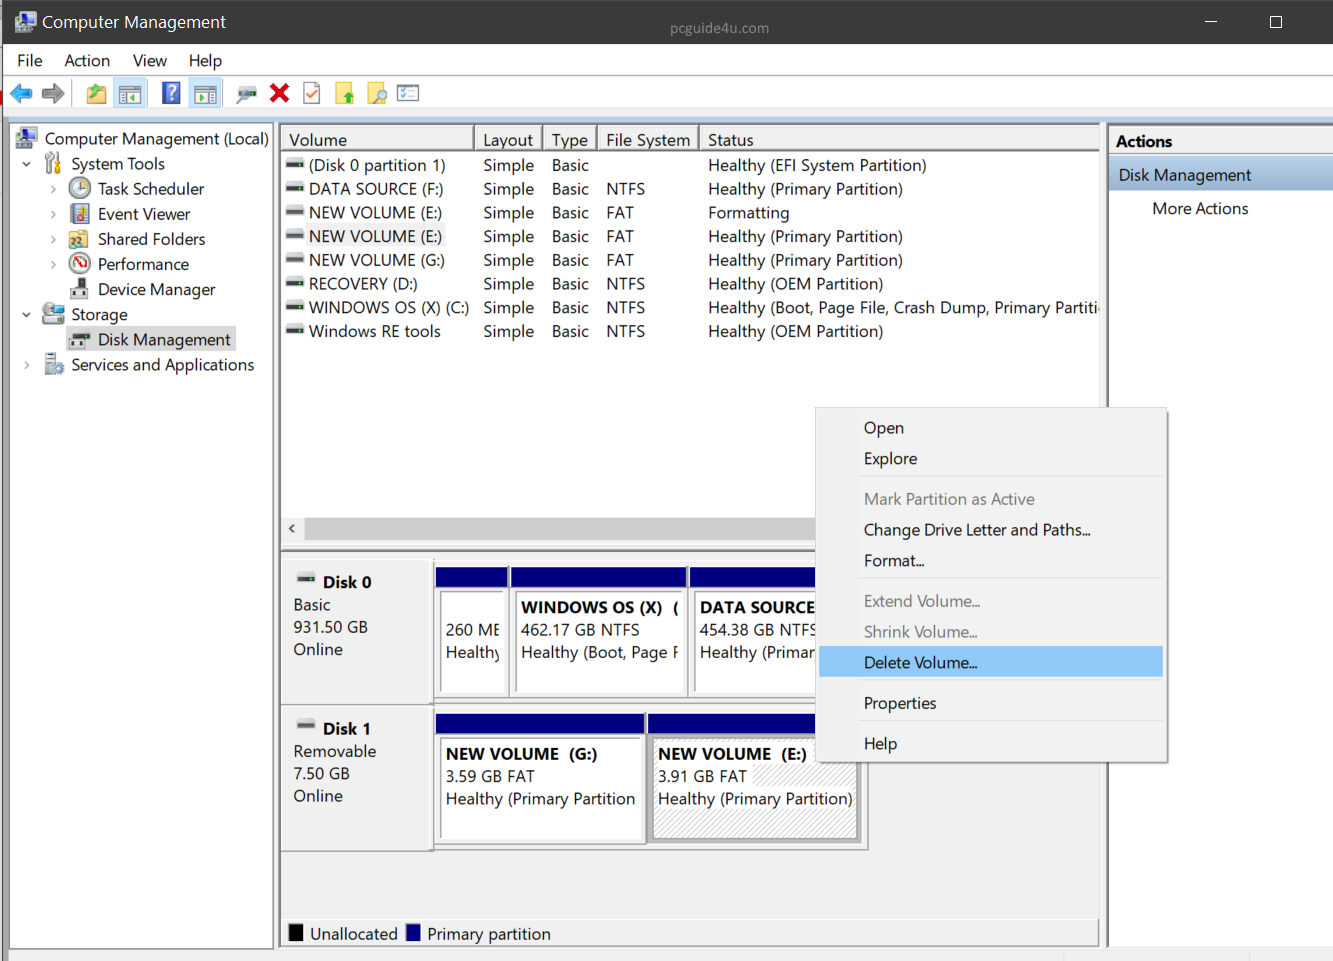
- From the left pane, under Storage, click on “Disk Management”
- Now, Probably Disk 1 is your Removable drive (pen drive), as mine
- Right-click on each partition and select delete volume from the given options.
-
Once all pen drive partitions deleted, they will be unallocated at one partition
-
Now, right-click on the unallocated partition and select “New Simple Volume” to create a single pen drive partition.

If you face any problem while performing this tutorial please let us know, the comment section is all yours!
Other Useful Resources:



Found something …..
Once all multiple partitions got deleted, now its time to create a single primary partition using this command:
”create primary partition”
Swapping around with words here 🙂
So in CMD we use ”create partition primary”
welldone! great work I get satisfied with your services. keep it up!