Here in this tutorial, we will learn the steps to install open source Anaconda Navigator on WSL- Windows Subsystem for Linux – Windows 10 or 11 using Ubuntu 20.04/22.04 Linux App.
Although Anaconda Navigator by default is available for Windows 10 or 11 in the executable file format. However, if you still want to install it on the Linux interface that is running on WSL 1 or WSL 2 Linux Apps such as Ubuntu, then that is possible as well.
If you want to know about the Anaconda, it is essential software that has been developed to use with Python and other scientific packages and their dependencies, such as conda. It supports Linux, Mac, and Windows systems, and can easily solve the coexistence, switching, and various third-party packages of multiple versions of Python.
The installation of Anaconda is quite easy and for those who don’t want to deal with the command-line interface to install packages, various dependencies, and create an environment it also offers the Graphical user interface called Anaconda Navigator…
Once Anaconda is installed, python, conda, numpy, scipy, pandas, and other common scientific computing packages that may be used in general are installed, without the need to download the configuration separately. Due to the split of python3 and python2, using virtualenv to configure with pip, is often very handy.
Those who are familiar with the working of Linux would already know the installation process of Anaconda on WSL 1 or 2, however, the key thing is how to access its graphical user interface i.e Navigator. And that you will know here.
1. Enable WSL and Install Ubuntu App
Those who are new to WSL – Windows 10 Subsystem for Linux must know that the Ubuntu Linux App we download from the Microsoft store will not work until and unless the WSL feature is not enabled on the system. Therefore, I am assuming that you have already activated and downloaded the WSL along with the Linux app to run over it. However, if not then follow this tutorial: How to enable the Windows Subsystem for Linux feature.
2. Open Ubuntu Linux APP
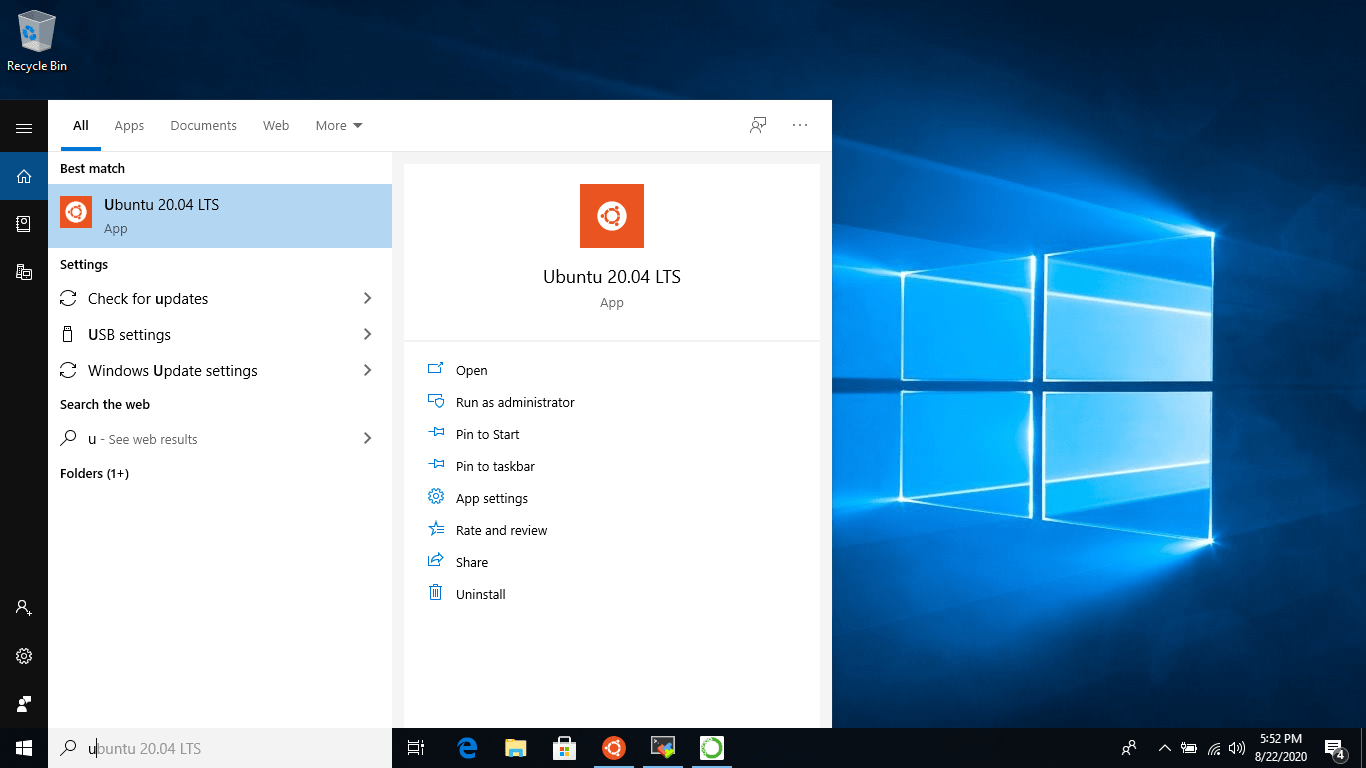
Now, go to the search box and type Ubuntu. Select version 20.04 or 22.04, whatever is available on your Windows 10 or 11 to be used with WSL.
3. Update and Upgrade the WSL app
Before moving further let’s make sure already existing packages on the Linux system are up to date and have their latest state. For that simply run:
sudo apt updatesudo apt upgradeOpen the browser of your Windows 10 or 11 system and go to the official website of Anaconda to download it, here is the link for the same. Scroll to the bottom, right-click on the Linux 64-Bit (x86) Installer, and copy its link.
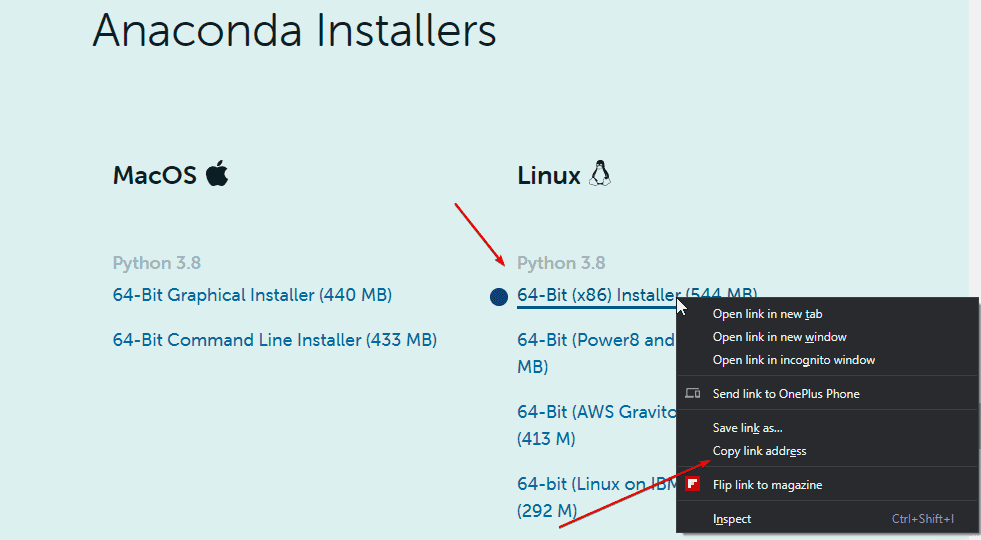
After that get back to the Ubuntu WSL app, type wget and paste the link, for example:
wget paste-linkExample:
wget https://repo.anaconda.com/archive/Anaconda3-2022.10-Linux-x86_64.shWait for some time until it won’t get completely downloaded on your system. The size of the script will be around 550 MB, thus it would take some time depending on the internet connection you have.
5. Run the installer script
Now we have the Anaconda Installer script, let’s run it to trigger the installation process. type ls
You will see the downloaded file.
Type bash or ./ with filename
For example, the name of the file we downloaded in this tutorial is Anaconda3-2022.10-Linux-x86_64.sh, thus the installation command will be:
bash Anaconda*-*-Linux-x86_64.sh

or

./Anaconda*-*-Linux-x86_64.sh
6. Accept the License terms
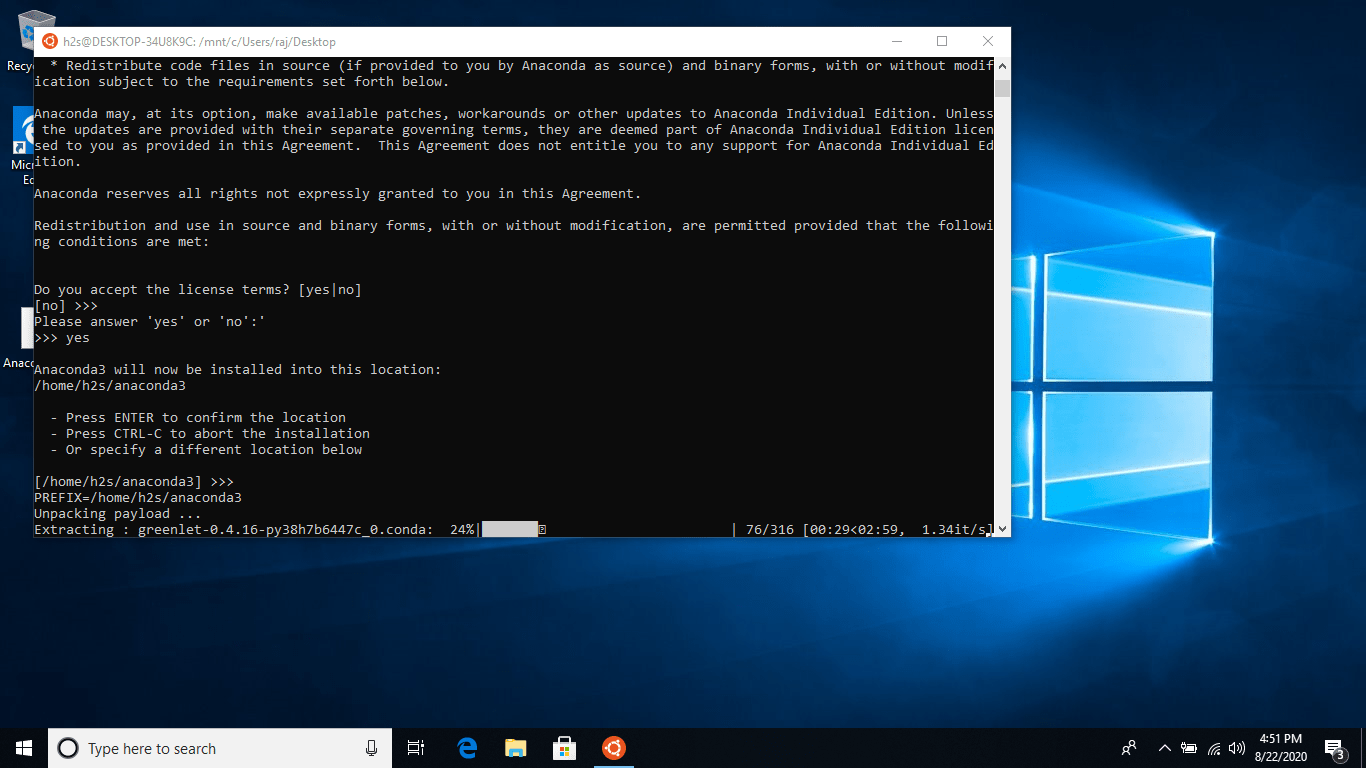
The installer will get activated and ask you to press the Enter key to start the process. When the License Term appears, either read it using the Enter key or just skip the same by simply pressing the ‘q’ key on the keyboard.
After that type Yes to accept the terms and conditions.
7. Select the Installation directory
By default, the Anaconda Navigator on Linux will create the installation folder under the home directory of the system. Thus, you can let it use the same. However, if you want to use some other place on the system then assigned that path and then press the Return key.
Wait for a few minutes until the process of setting up Anaconda Navigator on WSL Ubuntu has not been completed. Once done move to the next step.
8. Reload the Shell
Instead of closing the Ubuntu WSL app to make sure the installation will take place effectively, simply reload the shell. For that:
source ~/.bashrc9. Start using the Anaconda on WSL Ubuntu
Now you can start using the command-line interface for creating the Anaconda environment with different packages for the various projects without interfering with one and another. Well, those who would like to have the Graphical User interface go to the next step.
Error:
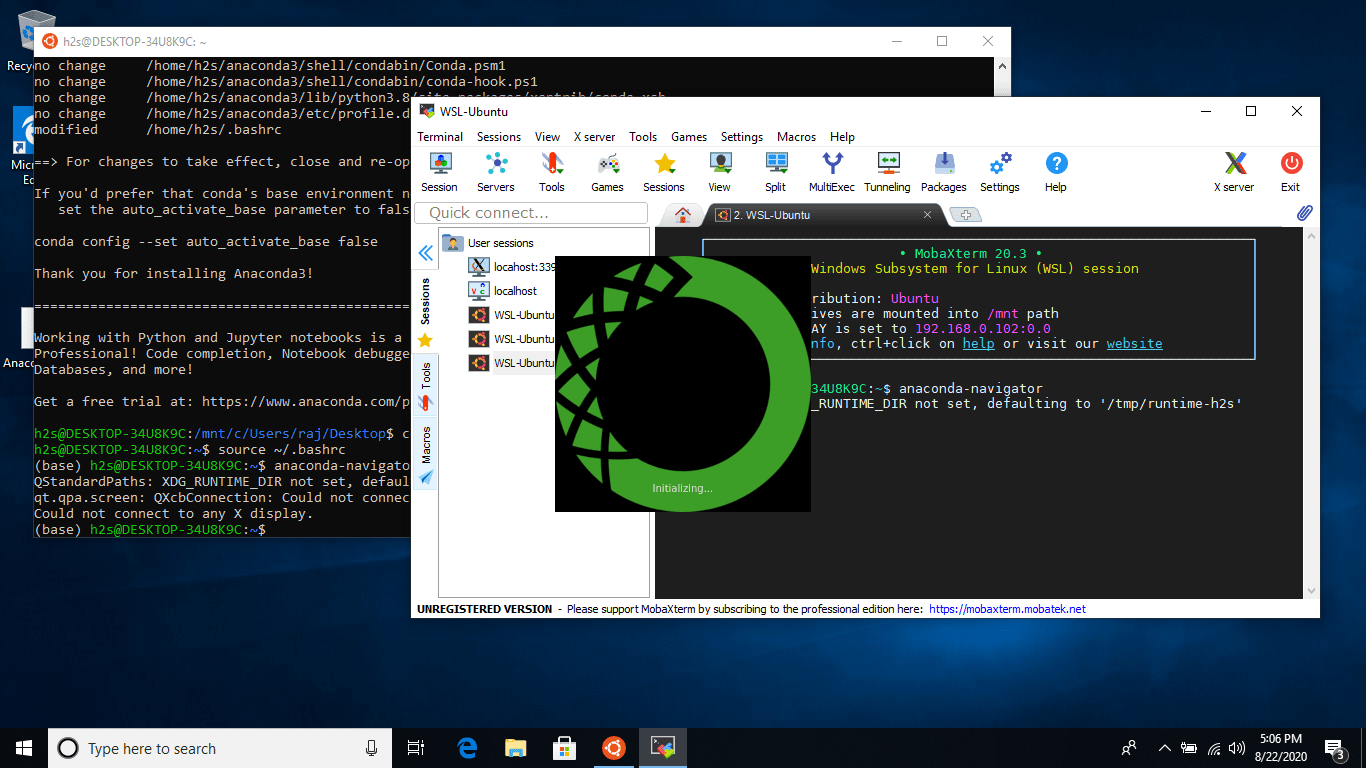
QStandardPaths: XDG_RUNTIME_DIR not set, defaulting to '/tmp/runtime-h2s'
qt.qpa.screen: QXcbConnection: Could not connect to display
Coulld not connect to any X display.
As we know by default, the WSL will not let you open the Graphical Apps straight on the default shell screen, However, there is an alternate way of doing that.
Go to MobaXterm and download it. This is lightweight software that comes with various inbuilt tools to access SSH servers, VNC, SFTP, Command Terminal, and more.
- Open the MobaXterm, once you have that on your system.
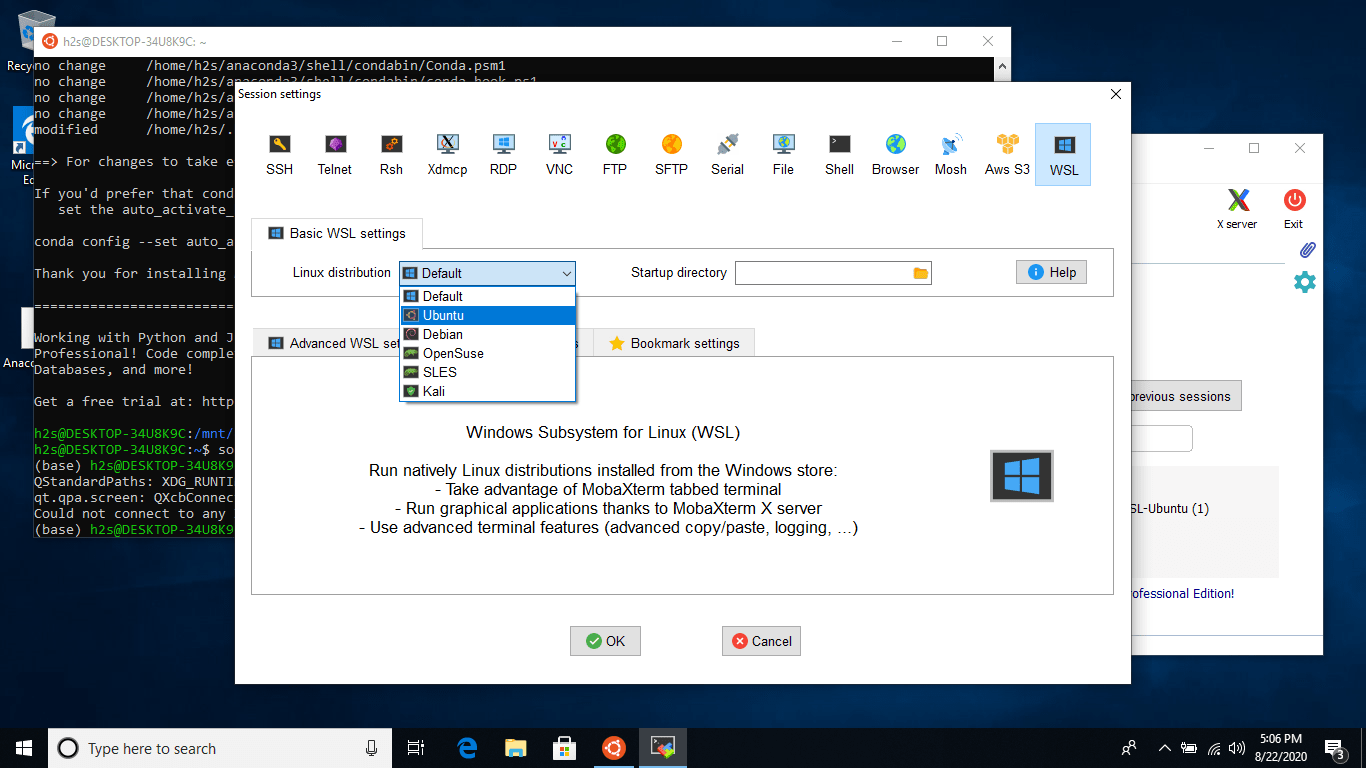
- Click on the Session option given in the Menu of its.
- Select WSL available at the end of the tools menu.
- From Basic WSL Setting, click on the Dropdown box and select Ubuntu and press the OK button.
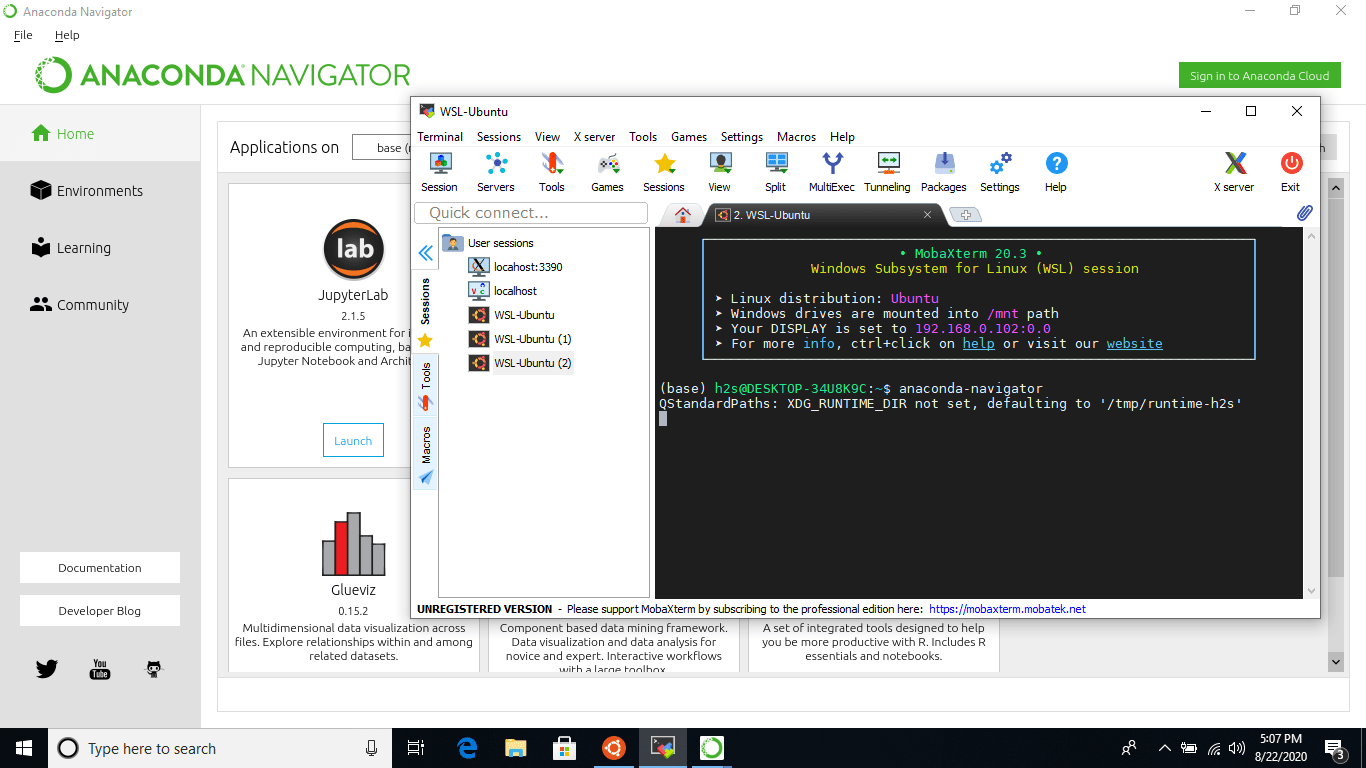
- Now you will see your Ubuntu WSL app on MobaXterm, great.
- There, simply type:
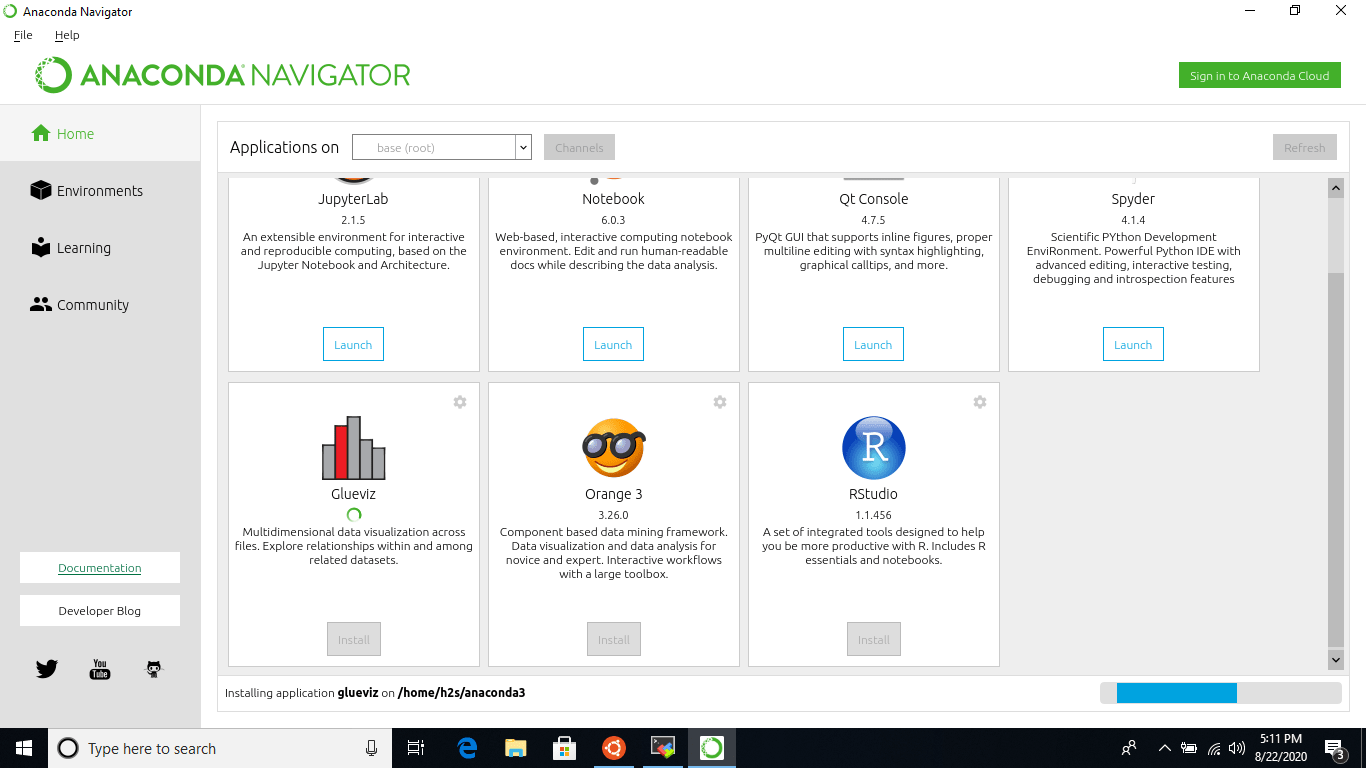
anaconda-navigator - That’s it, this will open the graphical user interface of the Anaconda running on the Ubuntu WSL app of Windows 10.
- Start creating environments and Installation of different packages directly from the GUI of Navigator.


when trying to execute the bash command I get a permission denied response back. How do I remedy this?
Use
sudobefore the commandGreat directions! Very easy to follow. However, when I get to the very last step and type anaconda-navigator, it tells me “command not found” Did I miss something?
same as above – command not found
I have updated the tutorial please follow it again. And this time you won’t get any errors.
Thank you! Its working now. I went through all the steps again and it worked. I wonder what have you changed?
Nothing much. earlier the installation was done with “sudo” which means only the root user could access the anaconda. Hence, I removed it, so that any standard user on Linux could run it.
anyone ran into the problem “from PyQt5.QtWebKitWidgets import QWebPage as QWebEnginePage
ModuleNotFoundError: No module named ‘PyQt5.QtWebKitWidgets”
I am getting an error stating unable to resolve host address ‘repo.anaconda.com’ on the wget command. Thanks for any help.
Hello!
here, I tried your method except that I did not have too much space in my laptop and the installation stopped. when I try to start again they tell me that the path indicated already exists and that it is necessary to update the existing version. if you want to help me!
I want to point out that I am totally new to linux; I hardly know about it.
the last lines of the problem:
[/home/gaetanho/anaconda3] >>>
ERROR: File or directory already exists: ‘/home/gaetanho/anaconda3’
If you want to update an existing installation, use the -u option.
Run
bash Anaconda*-*-Linux-x86_64.sh -uIt worked , thank you very much.
Do you know how to install Jupyter notebooks now? and the Jax library?
It worked perfectly, to the writer thanks alot to provide this writing. specially for us beginner!!
Hi!
Everything worked perfectly for me up until I tried to open the anaconda navigator. When I enter anaconda-navigator I get the following message:
“from PyQt5.QtGui import *
ImportError: libGL.so.1: cannot open shared object file: No such file or directory”
Any idea on how this can be solved?
Try:
sudo apt install -y python3-opencv
sudo pip install opencv-python
This is error I get when I run `anaconda-navigator`:
“WARNING linux_scaling.get_scaling_factor_using_dbus:32
An exception occurred during fetching list of system display settings.
qt.qpa.plugin: Could not load the Qt platform plugin “xcb” in “” even though it was found.
This application failed to start because no Qt platform plugin could be initialized. Reinstalling the application may fix this problem.
Available platform plugins are: eglfs, minimal, minimalegl, offscreen, vnc, webgl, xcb.
Aborted”
What to do?
I followed all the steps but, as soon as I type “anaconda-navigator” I am getting this error:
Traceback (most recent call last):
File “/root/anaconda3/bin/anaconda-navigator”, line 7, in
from anaconda_navigator.app.main import main
File “/root/anaconda3/lib/python3.10/site-packages/anaconda_navigator/app/main.py”, line 19, in
from anaconda_navigator.app.start import start_app
File “/root/anaconda3/lib/python3.10/site-packages/anaconda_navigator/app/start.py”, line 16, in
from qtpy.QtGui import QIcon
File “/root/anaconda3/lib/python3.10/site-packages/qtpy/QtGui.py”, line 14, in
from PyQt5.QtGui import *
ImportError: libGL.so.1: cannot open shared object file: No such file or directory
Thank you so much for the instructions. I did all the steps but when trying to run the following command it gives an error:
Conda install wget
Error:
conda: command not found
Install Wget – sudo apt install wget
i am stuck here , can someone help me out?
anish@anidp:~$ conda activate
(base) anish@anidp:~$ anaconda-navigator
2024-04-17 20:38:02,071 – WARNING linux_scaling.get_scaling_factor_using_dbus:3 2
An exception occurred during fetching list of system display settings.
qt.qpa.plugin: Could not load the Qt platform plugin “xcb” in “” even though it was found.
This application failed to start because no Qt platform plugin could be initial ized. Reinstalling the application may fix this problem.
Available platform plugins are: eglfs, minimal, minimalegl, offscreen, vnc, web gl, xcb.
Aborted
(base) anish@anidp:~$