MX Linux recently gained so much popularity because of its simplicity, all pre-installed necessary software, and midweight. It is an amalgamation of new and old things, I mean its developers have taken a few best things from AntiX and some from MEPIS, Debian-based Linux, to provide a better Linux OS product that can be used easily by novice users. Thus, it is wrong to say MX Linux is a fork of some single existing project instead, a merger of two entities. The core of MX Linux is based on antiX system and other work or ideas are from the MEPIS project.
It has an in-built one-click package installer that allows the user to graphically install the various open-source application from Debian Stable repos, developers’ websites, or other distro-specific repos, MX Test Repo, and Flatpaks.
Here we will learn how to install and set up MX Linux on VirtualBox Virtual Machine which is not a cumbersome job and the same as installing any other operating system on VirtualBox.
MX Linux System Requirements:
The minimum system requirements needed by the MX Linux are not very high, being a mid-weight Linux operating system old PC can also easily run it.
- AMD or intel 1486 at least or better.
- Minimum 512 MB RAM
- 5GB of hard disk or more space to install it.
- CD./DVD Drive support (if you want to install MX Linux using disc)
- If you are planning to install it using a USB drive, then USB boot support in BIOS.
- AC97 or HDA-compatible sound card
Recommended MX Linux System requirements
- A modern i686 Intel or AMD processor
- 2 GB of RAM or more
- At least 20 GB of free hard drive space
- A 3D-capable video card for 3D desktop support
- SoundBlaster, AC97, or HDA-compatible sound card
- For use as a LiveUSB, 8 GB is free if using persistence.
Step 1: Download MX Linux’s latest ISO image
To install MX Linux on VirtualBox, the first thing we need is its bootable ISO image. While writing this article, the latest version of this operating system was MX Linux 19, thus we are downloading the same. It is available in both 32-bit and 64-bit formats, thus here is the official link to get your system-compatible images. However, our system is 64-bit, thus we are downloading the same.
Step 2: Install VirtualBox on your system
If you already have VirtualBox on your system then simply move to the next step. For those looking for a way to install it, they can visit- www.virtualbox.org to get their system compatible VBox setup. Here are the articles related to this: How to install Virtualbox on Windows, Ubuntu, CentOS 8, and CentOS 7/6/5.
Step 3: Run VirtualBox and Create MX Linux VM
- Open VirtualBox.
- Click on the New button.
- Type MX Linux and click on the Next button.
- Use the memory size slide and set RAM to 2 GB or more for better performance.

- Create a Virtual Disk.

- Select VHD, in the case in the future you want to use MX Linux Virtual Machine with Hyper-V.
- Leave the Default Dynamic allocation selection and click on the Next button.
- Set the Virtual Disk size for MX Linux installation, the minimum is 5 GB, however, set it at least to 20GB if you are planning to install various software on it.

- Finally, click on the Create button.
Step 4: Insert MX Linux ISO Image in created VM as booting source
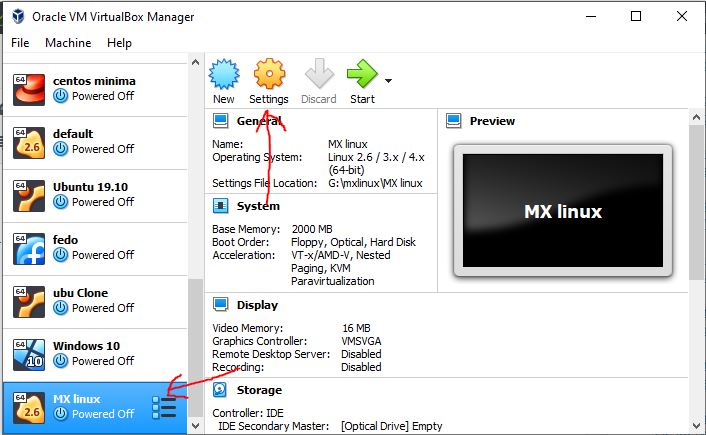
Now, on the left side of VirtualBox, you will see your recently created Virtual Machine, select that and click on the Settings option given in the menu.
Under the Settings, select the Storage option from the left side menu and then click on the Empty Drive icon. After that again select the CD icon given and then Choose Virtual Optical Disk File.

Immediately, File Explorer will open, select your downloaded MX Linux ISO image and then click on the OK button.
Step 5: Start MX Linux VM
To boot it, first, select its VM from the left side and then click on the Start button given on the VirtualBox menu.
On the boot menu, we will have a couple of options:
- MX-19 X64
- Virtual Box Video
- Boot from Hard Disk
- Memory Test
- Switch to Grub Bootloader
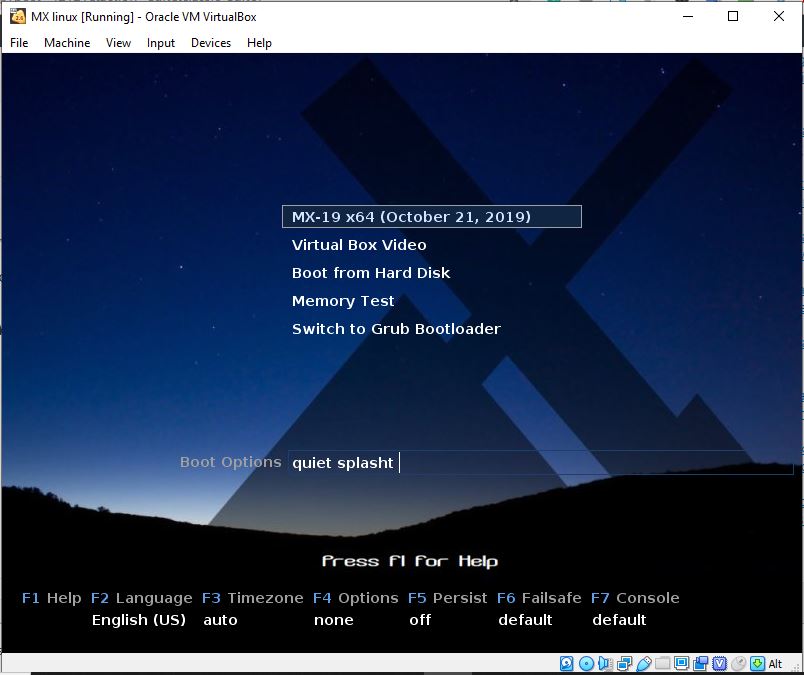
If you want to run MX Linux in a Live environment and install select the first one. The Virtual Box Video one is nothing just to start it with its supported resolution.
Step 6: Follow the steps to install MX Linux On VirtualBox
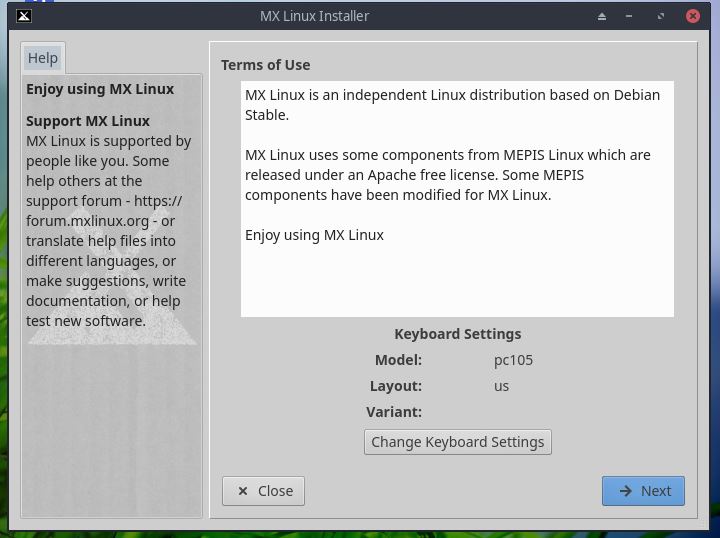
Once you get the Live screen of the OS, click on the installer icon proffered on its desktop.

The installer will automatically set the keyboard layout, just click on the Next button for further process.
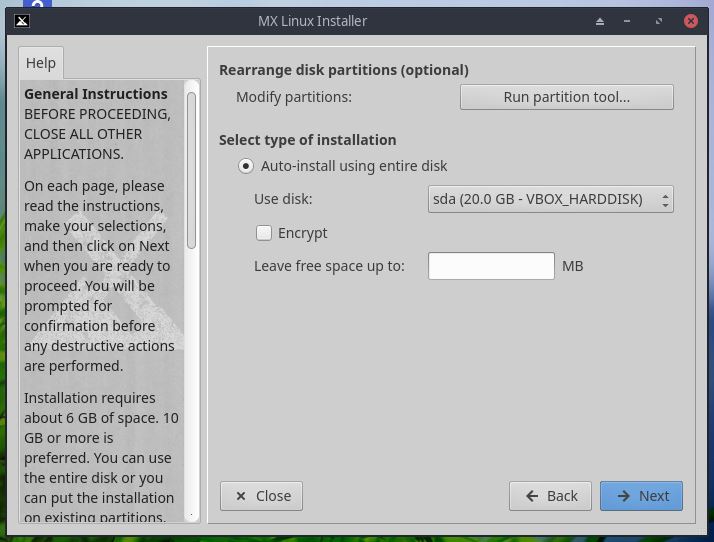
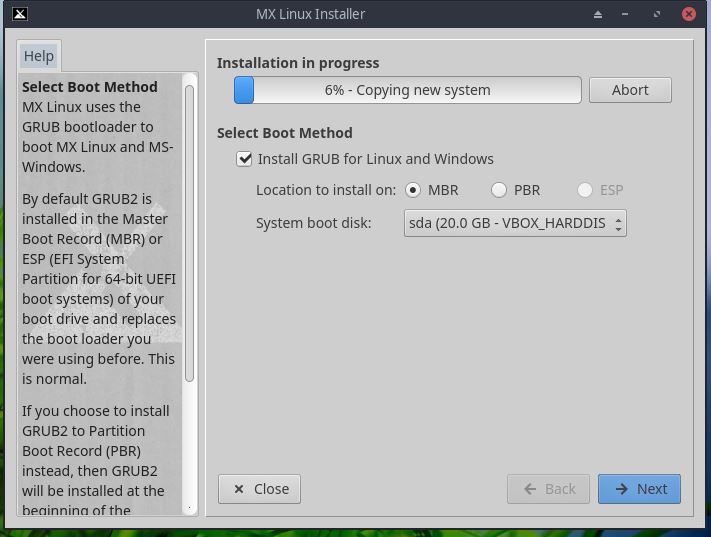
As we are on a virtual machine, thus no need to perform any manual partitioning, let the system handle it. What you have to do, is click on the Next button and accept the formatting of the Virtual drive.
Wait for some time, while copying system files to Virtual Drive click on the Next button to set up further things.
Give some names to your computer to easily identify it on the network. Leave the rest of the things as it is.

Set time as per your location.

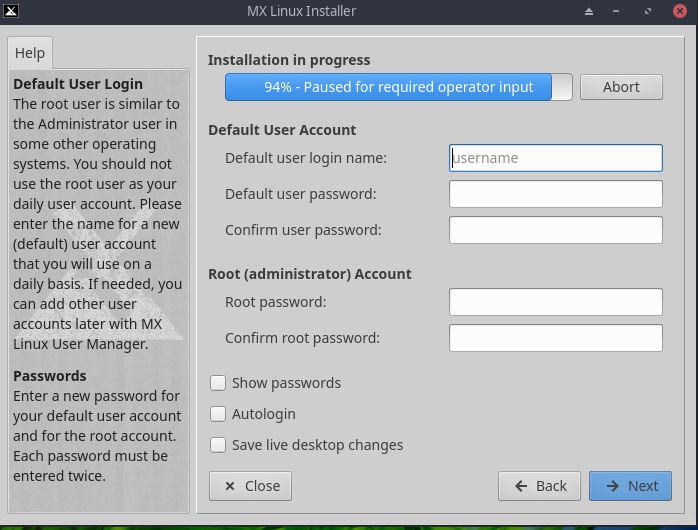
Set the Default username, password, and root password for your MX Linux.
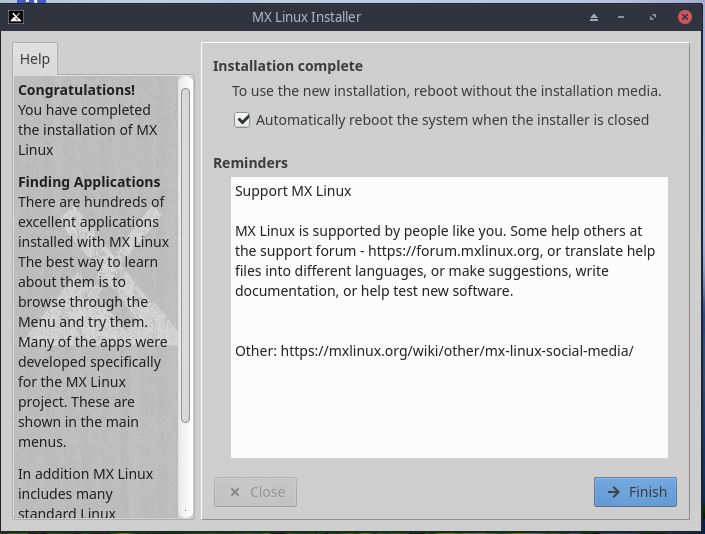
Finally, click on the Finish button.
Now click on the Devices->Optical Drives and unselect MX Linux ISO image, this is necessary to prevent VirtualBox booting, again and again, using the ISO image.

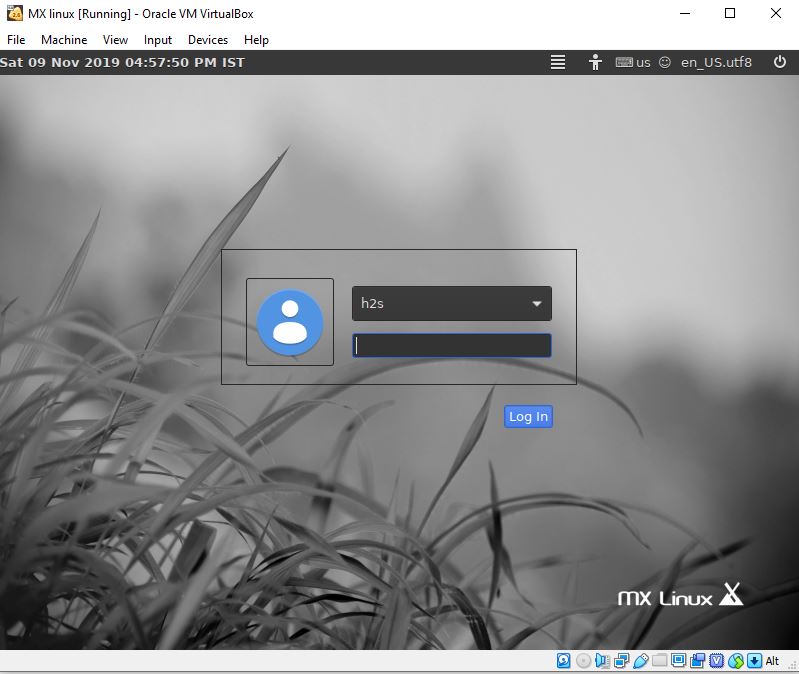
Step 7: Login MX Linux
Enter your Default user password to log in and start using this lightweight and beautiful Linux distro.


This was one of the best how-to’s I’ve ever used. Thank you.
Thank you for the instructions.