No need to use VirtualBox virtual machines to install OpenSuse Leap 15 Linux distro on Windows 10, just you need to enable Windows subsystem for Linux.
OpenSuse is a beautiful Linux that offers two Desktop variants OpenSUSE Leap and OpenSUSE Tumbleweed along with OpenSUSE enterprise Linux server. It is an open source and free to use on PC or server hardware. Yes, of course, like other Linux if you are a beginner then you have to invest some time to learn its curves, yet, easy. The wonderful thing is unlike other Linux distros it offers multiple Linux desktop environment options to install such as GNOME, KDE5 and more.
However, here in this article, you will not get the Graphical user interface becuase we are about to install openSUSE on Windows 10 using its inbuilt features called Windows Subsystem for Linux (WSL). It offers a command line interface by default and indeed one can install GUI by installing it manually. But after that S/he has to access that using a third-party remote desktop tool like VNC or RealVNC which is not much feasible at all for newbies. For a novice, I would like to recommend to download OpenSUSE ISO file and install it on local PC hardware or VirtualMachine to experience GUI based OS. Here is a tutorial on that: Install OpenSUSE Tumbleweed on PC.
Note: Before installing OpenSUSE Linux WSL app from Microsoft store; the Windows subsystem for Linux feature should be turned ON on Windows 10 otherwise you will get an error code 0x8007007e. It is not some system problem or bug, it is becuase the Linux compatibility layer that needed by the Linux distro images to run on Windows 10 is not available.
Step 1: Enable Windows 10 subsystem for openSUSE Linux
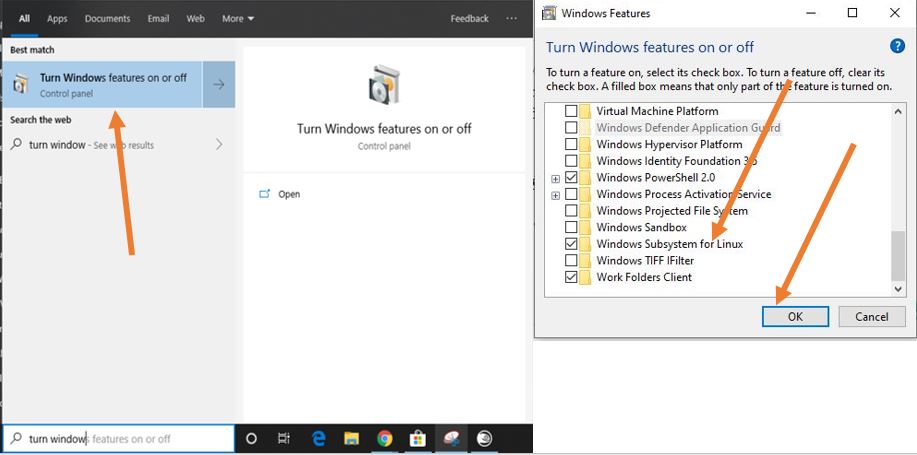
First thing, on Windows 10, go to the search box and type “Turn Windows features on or off“, as it appears, click on it to get the further options.
In the Turn Windows features on or off area, scroll down until you find the option called Windows Subsystem for Linux.
Check its box and click on the OK button.
If you don’t want to use the above method then simply run the Powershell under administrative right to execute this WSL command to enable it:
Enable-WindowsOptionalFeature -Online -FeatureName Microsoft-Windows-Subsystem-Linux
Finally, Restart the PC.
Step 2: Download OpenSUSE Linux on Windows 10
Aforementioned, after installing WSL we can get our Opensuse Linux Distro from Microsoft Store of Windows 10. Again from the search box type Microsoft Store and open it, as appear.
On Store, you will get a search bar on the top right side, there search for OpenSUSE. There are two types of SUSE WSL app are present on the store: one is OpenSUSE Leap and another one is server i.r OpenSUSE Enterprise Linux 12; the procedure to install the both is same. However, here we are using the Leap-15 but you are not limited to it and can try the server one too.
Click on the Get button to download the OpenSUSE Leap Linux on Windows 10 for WSL. Alternatively, you can use this link to it on Windows.
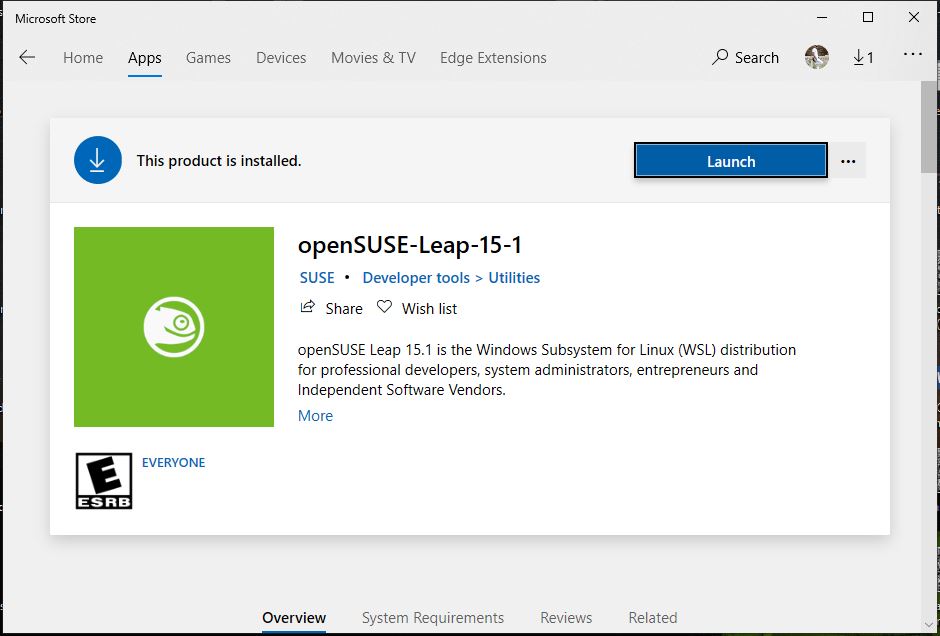
Step 3: Launch OpenSUSE-Leap-15-1 on from Windows 10 store
After downloading click on the Launch button to get the command line installation interface of the SUSE.
Step 4: Installing OpenSUSE Command Window
Once you launch it the first time, you have to wait for some time until and unless it shows ” Installing, this may take a few minutes…” it all depends on your internet connection. So, keep calm and till finish your other works.
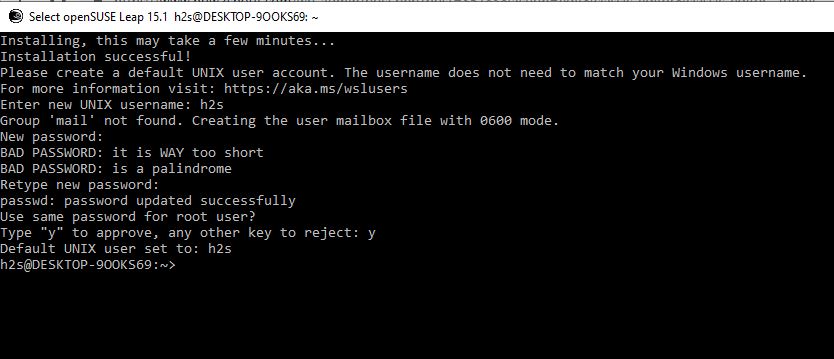
Step 5: Setup Username and Password
At the last stage of setup completion, it will ask you to create a username and password for OpenSUSE. You can enter whatever you want; you don’t need to be worried about Windows 10 username and password, it could be the same as well.
Step 6: Command to Update OpenSUSE
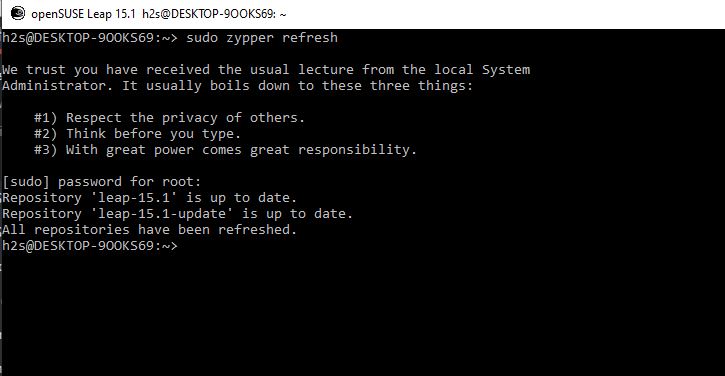
So, this Linux is not Debian or Ubuntu based, thus the commands will also be different to install anything or updating the system. Instead of using apt, it uses Zypper to update or installs packages. Here is the update command:
sudo zypper refresh
Well! in this way we can install OpenSUSE on Windows 10 to test different Linux apps or simply getting expert in particularly this open source OS. Also, WSL is not Limited to OpenSUSE you can install Ubuntu, CentOS on WSL, KALI, Debian in this way too on Windows 10.
One thing needs to be noted that WSL version 1 doesn’t have full Linux kernel, thus few systems or init commands will still not work. However, soon the WSL 2 will be available for standard users and after that these things will be changed.
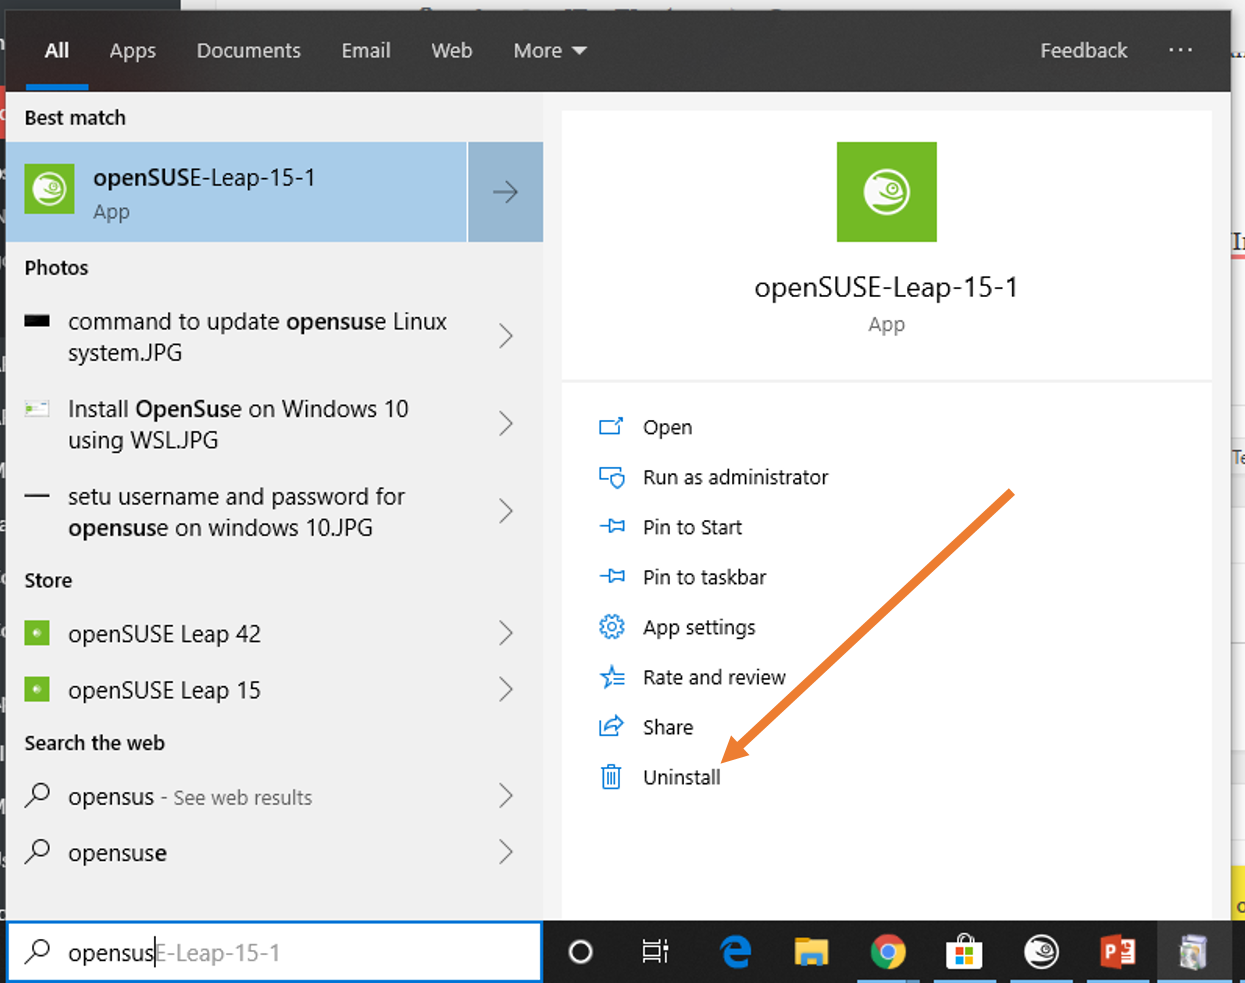
Uninstall OpenSUSE from Windows 10
It can be uninstalled like any other program or application of Windows. In the search box of Windows 10 search for OpenSUSE and click on the uninstall link appear on the left side panel.
Related Posts
How to Install 7-Zip on Windows 11 or 10 with Single Command
Install Google Earth on Windows 11 or 10 Using a Single Command
How to install Gaming Services on Windows 11
How to Install Telnet Client on Windows 11 Using PowerShell
How to Install ASK CLI on Windows 11 or 10
How do you install FlutterFire CLI on Windows 11 or 10?