Start Monitoring your server systems and network devices by installing the Sensu Go Monitoring tool on Windows 11 or 10 using WSL – Windows Subsystem for Linux.
What is Sensu Go?
Sensu is an open-source agent-based monitoring tool well-suited for cloud environments. It is written in Ruby and uses RabbitMQ for messaging and Redis for data storage. Whereas Sensu Go is developed by completely rewriting the original one but in Go language to offer new capabilities and reduced operational overhead.
Sensu Go is a free and paid observability platform that supports server performance metrics and makes it possible to close gaps in the monitoring of correlations between metrics, logging, and tracing. Existing surveillance technologies such as Nagios, StatsD, Telegraf, Prometheus, and others can be seamlessly integrated into Sensu.
There are three editions of Sensu GO- Free, Pro and Enterprise. The free one offers to monitor up to 100 nodes free of cost whereas for more the user can go for the Pro package available with a price of $3 a month per node and the ability to support max 3000 nodes; suitable for SMBs. If you need more than that Enterprise edition is there at the rate of $5 per additional node and with other commercial features.
Sensu Go’s components consist- of the Sensu backend, and the server component whereas the Sensu agent is installed on the systems to be monitored. These can be, for example, servers, virtual machines, or containers. Apart from these two, it also offers Sensuctl, a command-line utility to manage Sensu Go using Sensu’s HTTP API.
Steps to install Sensu Go on Windows 10 or 11
To start with the Sensu Go monitoring tool initially on Windows 11 or 10, your system should have 10 GB of free space and 4GB of RAM. However, if you are in production then 8GB of RAM is recommended.
1. Enable WSL on Windows 11 or 10
Here we are using Ubuntu 22.04 WSL App on Windows, you can use Debian or Ubuntu 20.04 as well. If you already have enabled and working with WSL 1 or 2 apps then you can move to the next step. Otherwise, first, install it. If you don’t know how, here is the article on that- How to install Ubuntu 22.04 on Windows 11 or 10…
2. Add Sensu repository in Ubuntu
The next step is to have the repository that will supply the packages we need to install the Sensu backend on our Ubuntu WSL system because it is not available to install using the default system repository. Hence, in your command terminal run the given commands.
sudo apt install curl
curl -s https://packagecloud.io/install/repositories/sensu/stable/script.deb.sh | sudo bash
3. Install Sensu Go Backend on Windows 10 or 11
We already have the Sesnu repository on our Ubuntu 22.04/20.04 system, now we can easily install the backend using the APT package manager of the system. Here is the command to follow:
sudo apt install sensu-go-backend
4. Start Sensu Go backend service
We require a backed configuration file to start the Sensu Go service, without it you will have an error if you try to start the service. Hence, first, download it using the given command:
sudo curl -L https://docs.sensu.io/sensu-go/latest/files/backend.yml -o /etc/sensu/backend.yml
sudo mkdir /var/run/sensu/
Now, start the service:
sudo service sensu-backend start
To check the service status, use:
sudo service sensu-backend status
5. Configure Username and Password
Once you are sure that the Sensu Go backend is running without any error. Set the username and password to access the Web-based graphical user interface of this monitoring tool. For that, we need to set two environment variables with the required credential values to set the Administrator user and password. After setting environment variables initialize it using sensu-backend init command.
Method 1:
export SENSU_BACKEND_CLUSTER_ADMIN_USERNAME=h2smedia
export SENSU_BACKEND_CLUSTER_ADMIN_PASSWORD=yourpassword
sensu-backend init
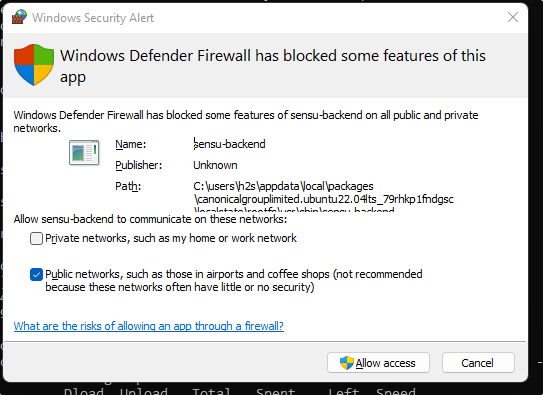
If the system asks to allow the Sensu-backed Firewall, then don’t forget to click on the “Allow Access” button.
Method 2:
Alternatively, the users can use the interactive way to set the username and password using the given command instead of the above:
sensu-backend init --interactive
The system will ask you to set the username and password along with the API. However, the API key is optional — press Enter key to skip it.
6. Access the Web interface
Open a local or remote system browser that can access the IP address of the server where you have installed the Sensu GO monitoring solution.
Point your browser to the server IP with the port number in the following format:
http://server-ip-address:3000
7. Login
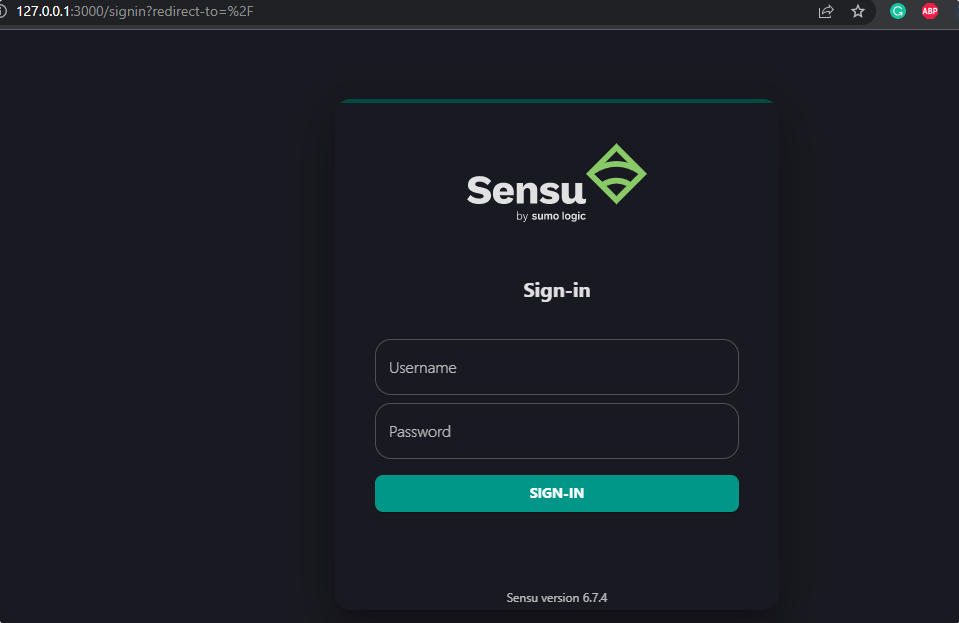
Use the Administrator credentials set for Sensu in Step 5 in this tutorial. After that click on the Sign in button.
8. Sensu Go Monitor Dashboard
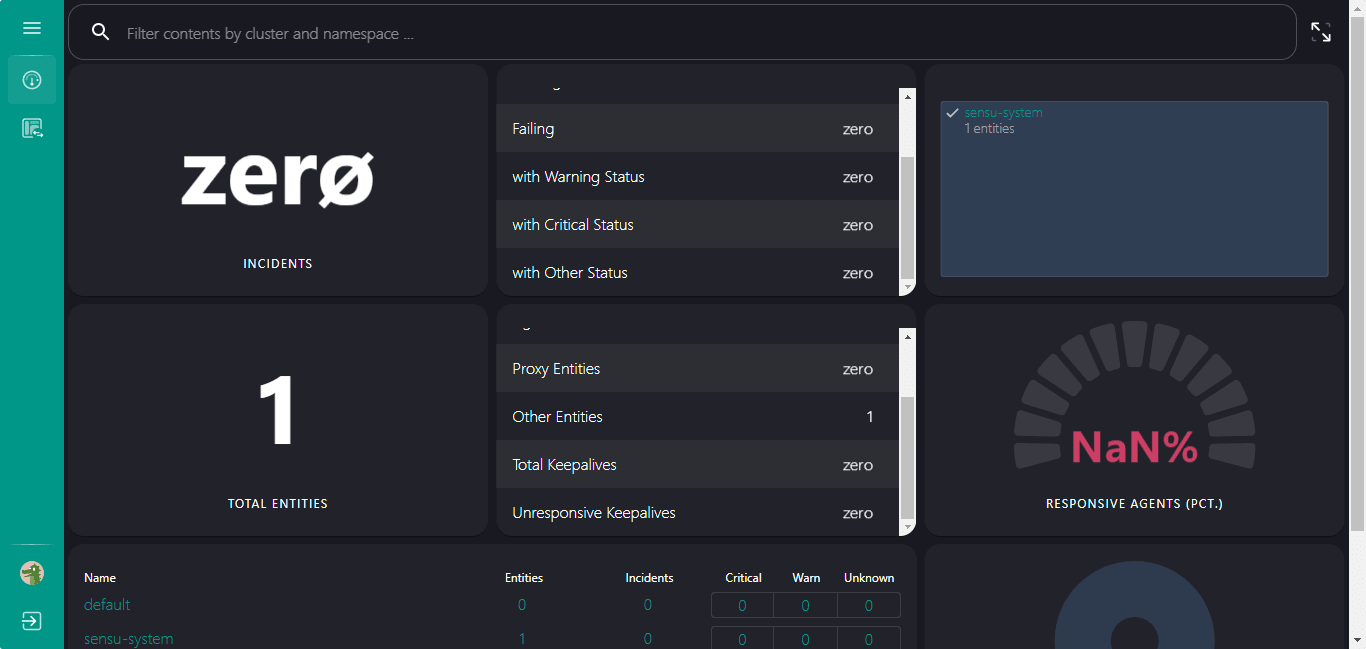
Finally, the Sensu Go’s Dashboard is there from where you can get the overview of metrics fetched from the systems set to monitor using the Sensu Agent. But for that, we have to manually install the agent on each system that we want to Monitor. Go to the next step for that.
9. Install Sensu Go Agent
Now, let’s say you want to monitor some remote system using Sensu GO, for that first we have to ensure that particular system has Sensu Agent.
For Ubuntu or Debian
curl -s https://packagecloud.io/install/repositories/sensu/stable/script.deb.sh | sudo bash
sudo apt-get install sensu-go-agent
For RHEL/CentOS/Rocky Linux/AlmaLinux/Oracle Linux
curl -s https://packagecloud.io/install/repositories/sensu/stable/script.rpm.sh | sudo bash
sudo yum install sensu-go-agent
For Windows
Go to the Sensu website and download the Agent executable file- Here is the link.
10. How to configure Agent for Linux
Let’s say you have to install Sensu Go Agent on Linux such as Ubuntu/Debian or RedHat using the previous step. Now, you want to configure it so that the Backend can identify the system and add it for monitoring.
Here we are using Ubuntu/Debian but the method will be the same for other Linux systems as well.
Copy Agent configuration file
sudo curl -L https://docs.sensu.io/sensu-go/latest/files/agent.yml -o /etc/sensu/agent.yml
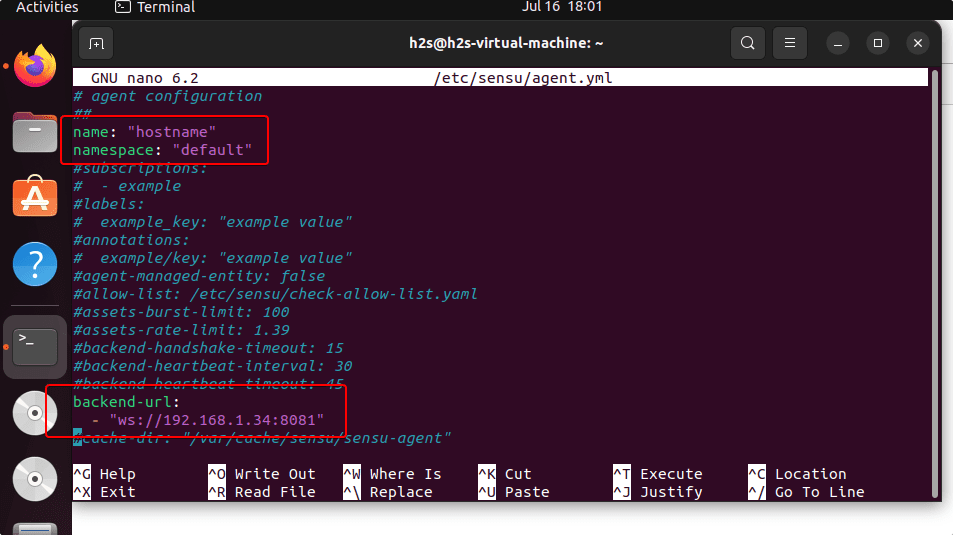
Edit the Agent file and add the Sensu backend Server URL.
sudo nano /etc/sensu/agent.yml
Remove the # from the name, namespace, backend-URL, and IP address as shown in the given screenshot. After that replace the address 127.0.0.1 with your Sensu Go’s Backend server.
Save the file by using the Ctrl+O, hit the Enter key, and then exit – Ctrl+X.
Now, restart the Agent to make the changes into effect.
sudo systemctl restart sensu-agent
11. Start Monitoring on Windows 10 or 11
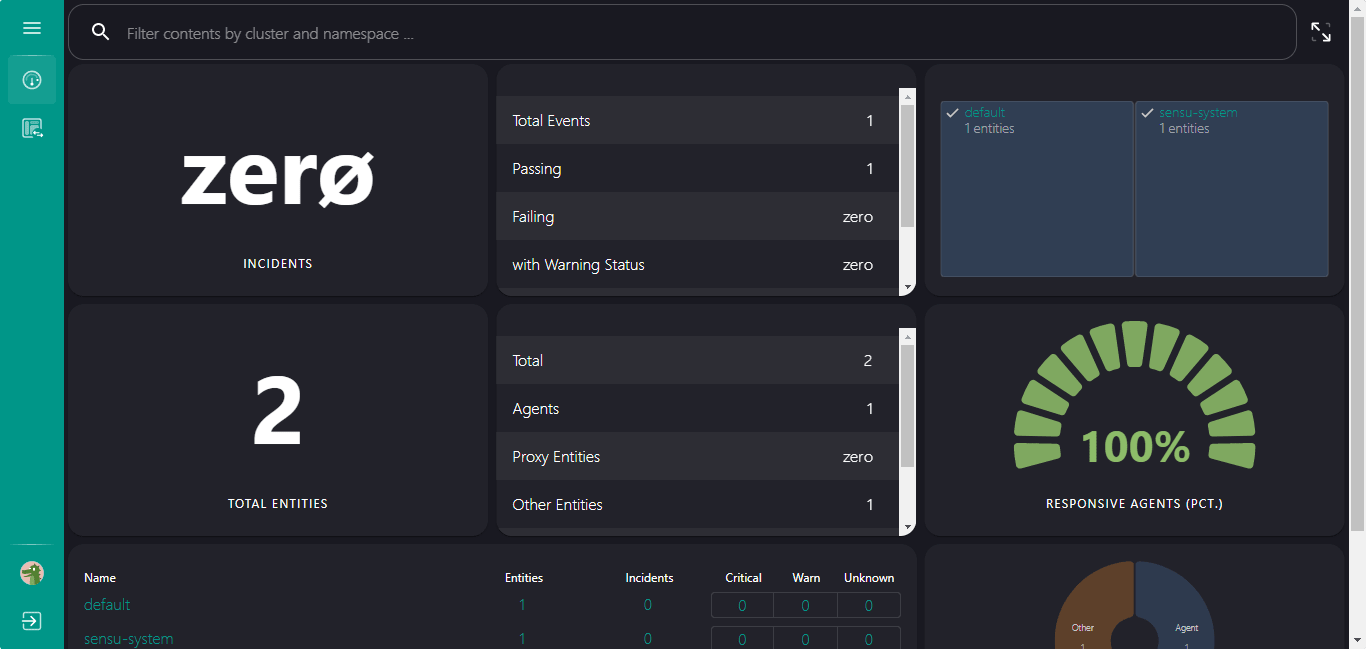
After installing and configuring the Sensu Go Agent on the system that you want to monitor, refresh the Sensu Go web interface running on Windows 11 or 10 WSL Linux app, to see the added device on your Dashboard. You can see we got two entities on is the Backend and the other Agent.
12. How to install the Sensuctl command tool
Sensuctl is a tool offered by the Sensu monitoring solution for managing its resources using the command line. It works by calling Sensu’s underlying API to create, read, update, and delete events, entities, and resources. Sensuctl is available for Linux, macOS, and Windows.
Here is the way to install it on Debian or Ubuntu systems.
curl -s https://packagecloud.io/install/repositories/sensu/stable/script.deb.sh | sudo bash
sudo apt install sensu-go-cli
Know more about this command utility and its usage on the official doc page.
13. Uninstall Backend and Agent (optional)
If you don’t need the Sensu Go backend and Agent anymore on your Windows WSL system then here are the commands to remove them.
sudo apt autoremove --purge sensu-go-backend
sudo apt autoremove --purge sensu-go-agent
Other Articles:
How to Add Google Analytics Dashboard for WordPress
How to install Nginx + PHP + MySQL on Windows WSL
How to install Docker on Windows 10 using WSL 2
Steps to install Akaunting software on Windows 10 WSL
Related Posts
How to Install 7-Zip on Windows 11 or 10 with Single Command
Install Google Earth on Windows 11 or 10 Using a Single Command
How to install Gaming Services on Windows 11
How to Install Telnet Client on Windows 11 Using PowerShell
How to Install ASK CLI on Windows 11 or 10
How do you install FlutterFire CLI on Windows 11 or 10?