Learn the simple steps to install Ubuntu 22.04 WSL app on Windows 11 or 10 using the GUI – Graphical user interface.
WSL stands for “Windows subsystem for Linux”, a way to use Linux on Windows 10 and 11 systems. It was implemented by Microsoft in 2016 for Windows 10 users and later carried forward with improvements in Win 11 as well. The disadvantage is that graphical interfaces cannot run properly on it without enabling WSL 2 and the Virtual machine feature on the system. However, sadly after that, the user will not be able to use the Vmware player or Virtualbox. That’s why WSL 1 is still one of the best ways to initially experience Linux on WSL.
Well, Linux is one the most well-known Operating systems powering thousands of servers around the world. One of the reasons behind this is they are open source, hence provided free of charge and more variable functions. Nevertheless, in the gaming sector, Windows is still the most recommendable OS today. However, when it comes to dual boot Windows and Linux, it is a bit cumbersome with certain Linux operating systems and not always perfect. Hence, WSL is a nice feature by the Microsoft team to start using Linux on Windows.
Steps to install Ubuntu 22.04 WSL on Windows 11 or 10
Installing the WSL is not difficult, here you can find out what you have to do, clearly arranged, and summarized on one page.
1. Enable the WSL feature
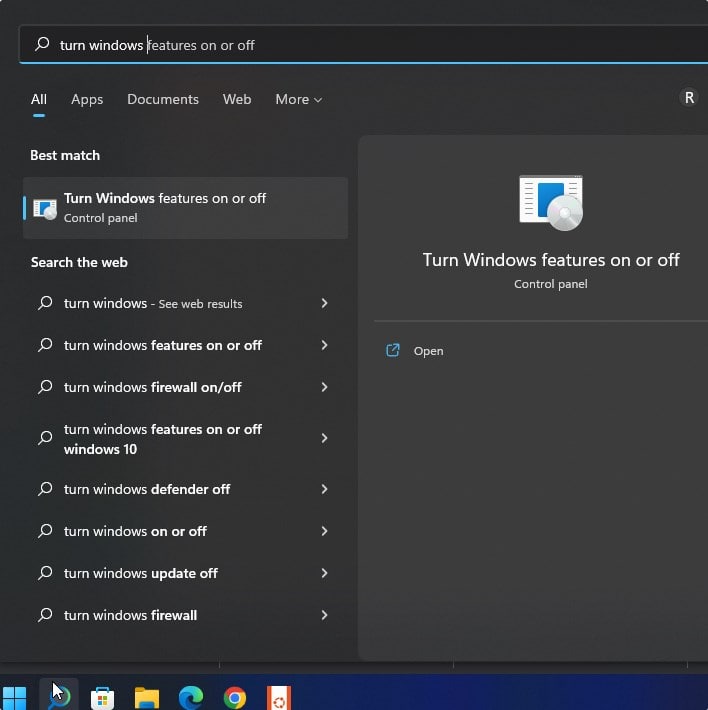
If you already have the WSL feature enabled on your system then you can skip this step. However, if not, then go to the Windows Search icon right to the Start menu button and type “Turn Windows feature on or off” and as it appears in the search result click to run the same.
Now, scroll to “Windows Subsystem for Linux” and select it after that click on the OK button.
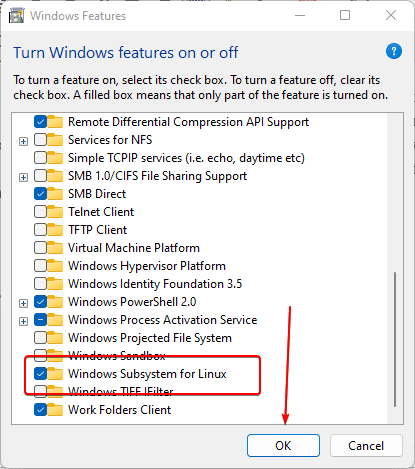
The system will install the selected feature, wait for some time, and once the process is completed restart your system.
2. Open Microsoft Store
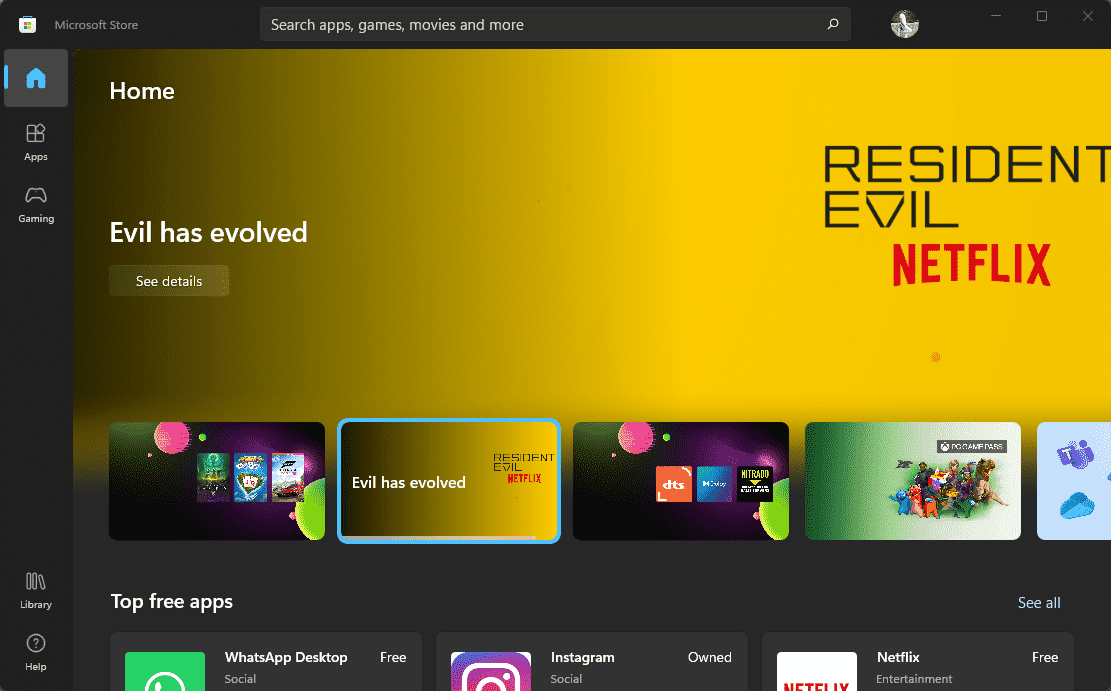
We can install the WSL Linux apps using the command line – Powershell. However, to make things easy, especially for new users let’s use the GUI Microsoft Store. You would already have it as a pinned app on your Windows Taskbar, nevertheless, if not then click on the Search icon and search for it.
3. Install Ubuntu 22.04 WSL app on Windows 11 or 10
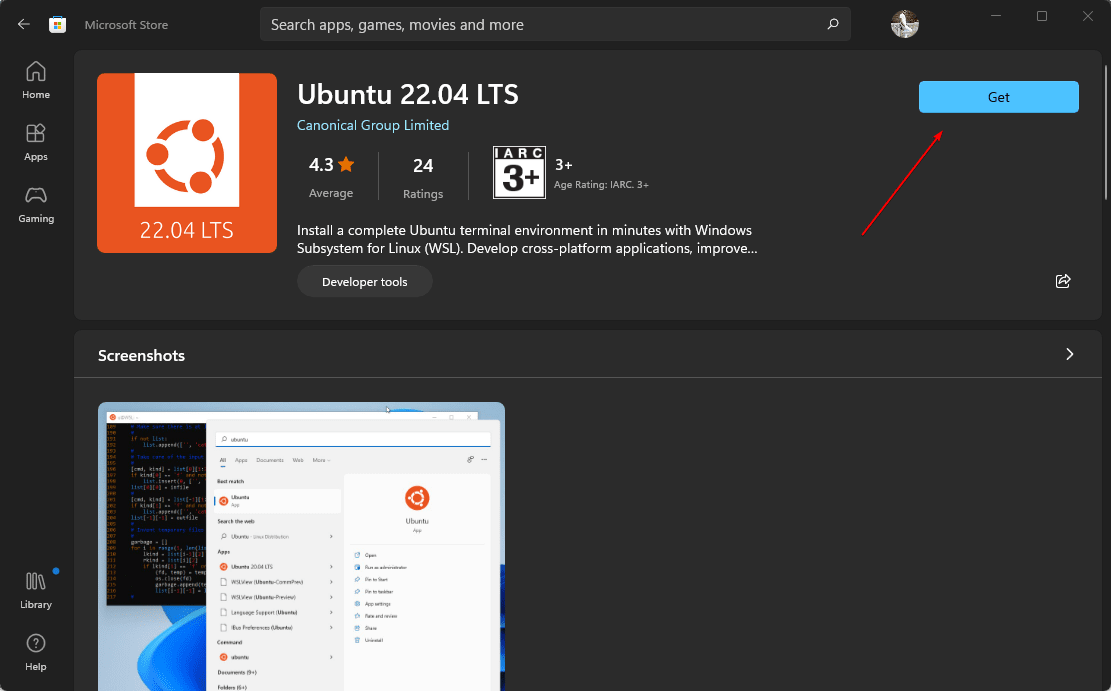
You will see a search icon on the Microsoft Store, click on that and then search for Ubuntu 22.04. Soon, you will have it in the search results, click to open its installation window.
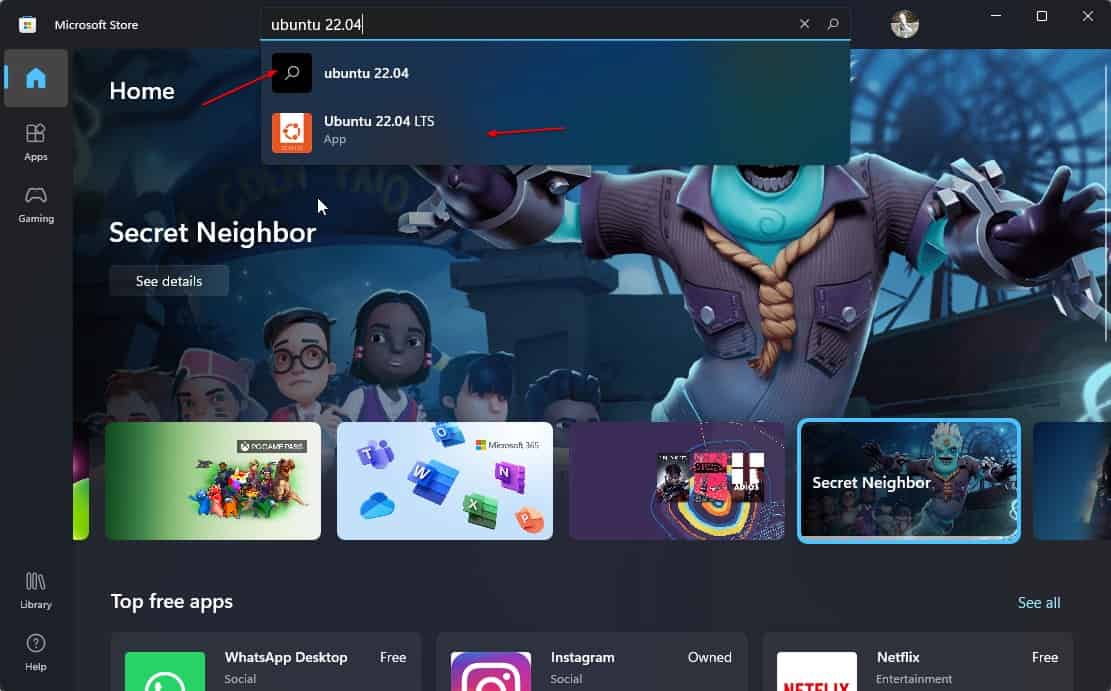
As you see the “Get” icon on your Store for Ubuntu 22.04 LTS, click that. It will download this Linux WSL app and soon install the same on your Windows 11 or 10 system.
4. Open Ubuntu 22.04 WSL and set User
Once the installation is completed, either click on the open button given on the Microsoft store for the app or simply search for Ubuntu 22.04 using the search icon on your Windows 11 or 10.
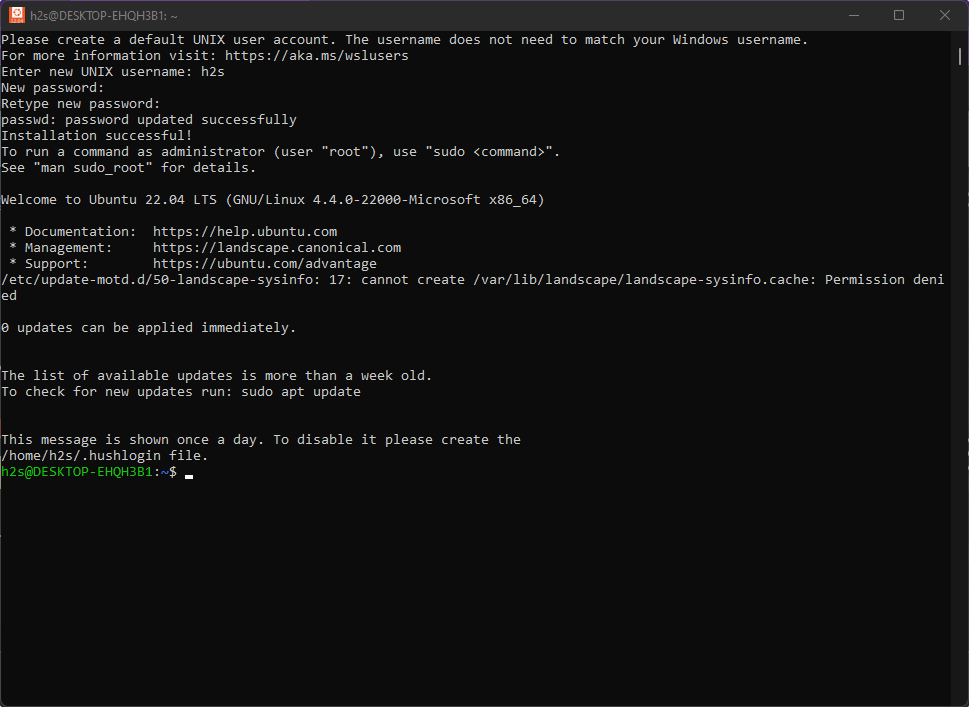
When the app gets started, the first thing it will ask for is to set the username and password for the WSL app. Add the username with the password you want to use.
5. Update and check the version
From here you can start using the Ubuntu 22.04 WSL Linux app with the command line. Let’s first update it and check the version to confirm we have 22.04 on our system.
sudo apt update && sudo apt upgrade
To check the version you can use:
cat /etc/os-release
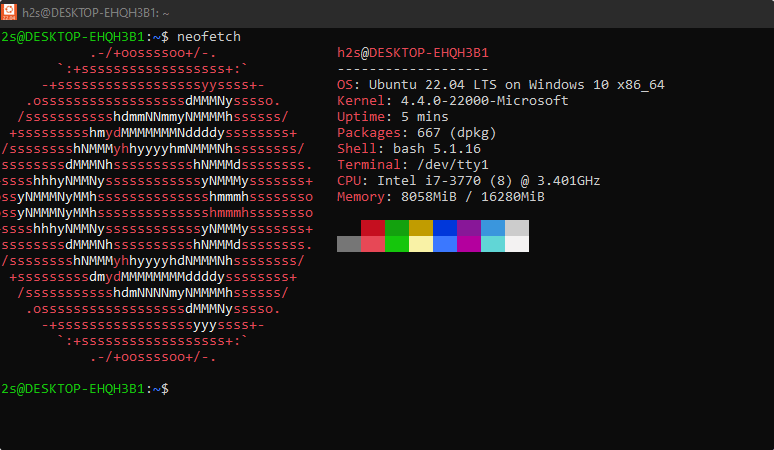
For more information in an interactive format, we can use a tool like Neofetch.
sudo apt install neofetch
neofetch
Other Articles:
How to install Docker on Windows 10 using PowerShell with WSL 2
How to install CentOS 8 on WSL 1 or 2 of Windows 10 or 11
How to run Linux distro app as WSL 2 running on WSL 1
Install Windows 11 on a VMware Player
How to Install PHP Composer on Windows 11


That was awesome!
Thanks!