
In this tutorial, we will list the simple steps to install the Server Manager feature on Windows 11 or 10 that will help the system administrators or IT professionals in managing the remote or locally running Windows server roles. This server feature in Windows desktop makes it easy to deploy roles, manage configurations, and monitor server performance across the network.
Why Server Manager?
In layman’s language, Server Manager is a tool available on Windows to manage any Windows Server OS running system whether it is on a local or remote machine. Although as a management console, it is by default available on Windows Server OS, however, on desktop OS of Windows such as 11 or 10, users need to install it manually. The key task of SM is to allow users to manage the remote server without accessing it physically or using the RDP. Using a Server manager system administrators can perform various tasks such as server role and feature management, server group management, remote management, performance monitoring, multi-server management, role-based access, and security, and can perform integration with other tools.
So, being an IT Admin or just learning how the Windows server environment works, here in this guide we learn the steps to install the Server Manager on Windows 11 or 10 Desktops which is a part of the RSAT tool suite (Remote Server Administration Tools)…
What do we need?
To perform this tutorial, users’ Windows 11 or 10 systems must be using either professional or enterprise edition OS because Windows Home officially doesn’t support it. Apart from that, we need a working internet connection to download the required files for completing the installation process.
Steps for installing Server Manager on Windows 11 or 10
We will show both command prompt / PowerShell and GUI methods to activate Server Manager on Windows Desktops…
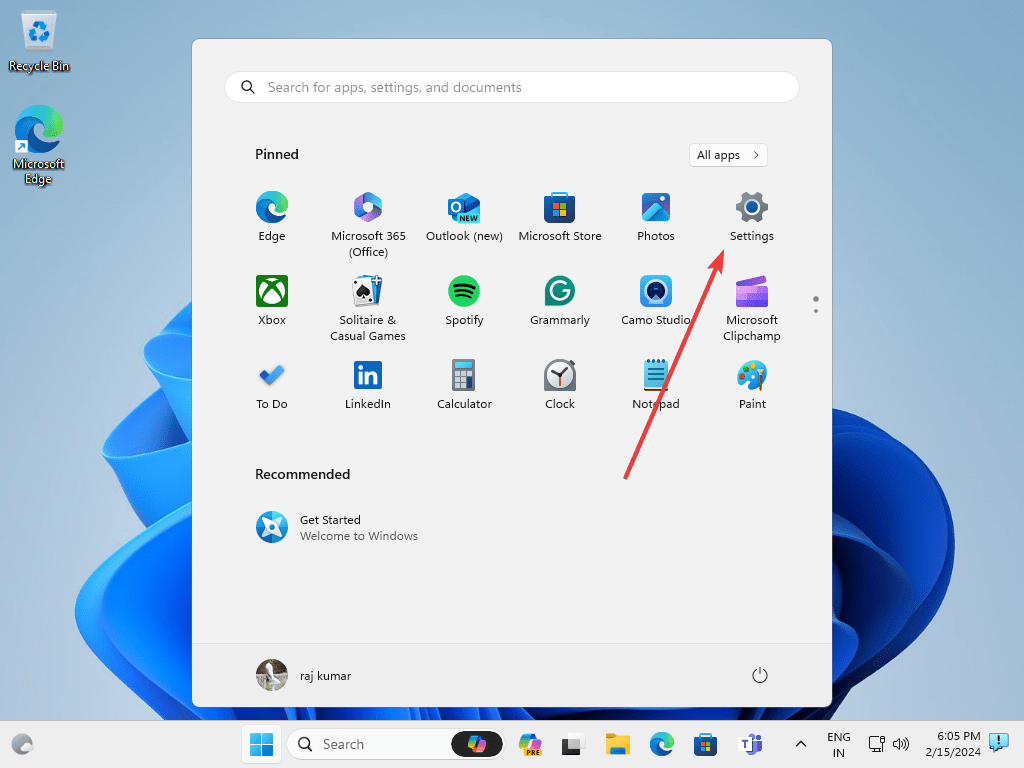
1. Access Windows 10 or 11 Settings
Instead of accessing the traditional “turn windows feature on or off”, here, we will use the common Settings window. You can either press Win key + I to open it or just click on the Start button and select the gear icon.
2. View Features
On the Settings page, access the “System” and then the “Optional Features” option given on the right-side panel. Alternatively, users can search for it using the box given at the top left side.

After that click on the “View features” button available on the top right side. It will reveal a section to search and install various available features on Windows 11 or 10.

3. Installing Server Manager
Now, in the search box of the “Add additional feature” window, type – server manager, and you will see – RSAT: Server Manager in the results, just select the box given in front of it and hit Next, and then the Install button. Soon, the server manager will be on your Windows 10 or 11 system.

4. Access the Management Console
As the system completes the installation process of “Server Manager“, you can close the Settings page and go to the Windows Start menu. Search for “Server Manager” and you will see it in the search results to get started with it.

So, this was the graphical user interface method to install and run the Server manager. Now, let’s also see the command that can be used to install it either via Command prompt or PowerShell.
CMD or PowerShell to install Server Manager (optional)
Those who prefer to use the command line can use the given command. However, before executing it, run the CMD or PowerShell as Administrator.
Add-WindowsCapability -Online -Name Rsat.ServerManager.Tools~~~~0.0.1.0Uninstallation
There might be a time when you don’t require this Windows 10 or 11 feature anymore on your system. At that time to uninstall Server Manager, go to Settings->System select Optional Features and from the list of the installed features select Server Manager to uninstall it.

Whereas, those who want to use the command line to remove it can use the given one:
Remove-WindowsCapability -Online -Name Rsat.ServerManager.Tools~~~~0.0.1.0Other Articles:
Related Posts
How to create email groups in Gmail? Send one email to multiple recipients in a matter of seconds.
Getting the right dashcam for your needs. All that you need to know
How to Install 7-Zip on Windows 11 or 10 with Single Command
Install Google Earth on Windows 11 or 10 Using a Single Command
How to install Gaming Services on Windows 11
How to Install Telnet Client on Windows 11 Using PowerShell