Airdroid is a free app for recording Android screen. Well! That sounds great! Moreover, using the screen recording feature on AirDroid is also quite easy, and even the newbies can record screen using AirDroid without any hassles at all.
Recording the screen can sometimes be a great way to show some tutorial or other important activity or stuff to your friends and others in the easiest possible way. There are several Android display recording tools available online, where some are free, while others are paid. The paid ones obviously come with some additional benefits, which you might not require every single time. In most cases, the free screen recording tools should work perfectly for you. Talking about the recording tools available for Android, there are a handful of such apps, which you can get from the Google Play Store. Some smartphones, like the MI devices, come with its own screen-recording app, and that works fine.
But, if you are not having a smartphone with a screen-recording tool from the OEM, and you don’t want a separate tool for recording the screen, you can use AirDroid, the easy file sharing tool to record the screen on your Android device. AirDroid is free to use, however, there is also a paid version available, which comes with some additional handpicked features. But, the screen recording functionality doesn’t need your money, and you can record screen using the free version of AirDroid.
So without any further delay, let’s get started with the tutorial.
Record Android screen using AirDroid App
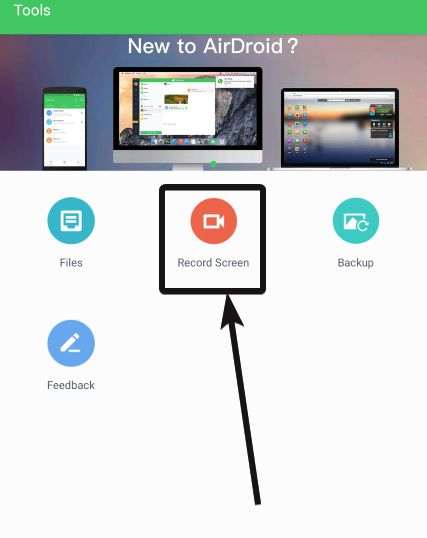
Step 1: Install Airdroid and access Record Screen
Open AirDroid on your Android device, tap on ‘Tools’ and then on the red ‘Record Screen’ button.
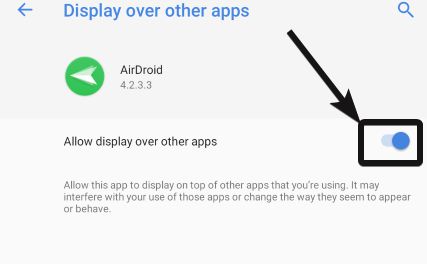
Step 2: Allow AirDroid to draw over other apps
Considering, you are doing it for the first time, you will have to allow AirDroid to draw over other apps. Just allow it in the new panel that appears.
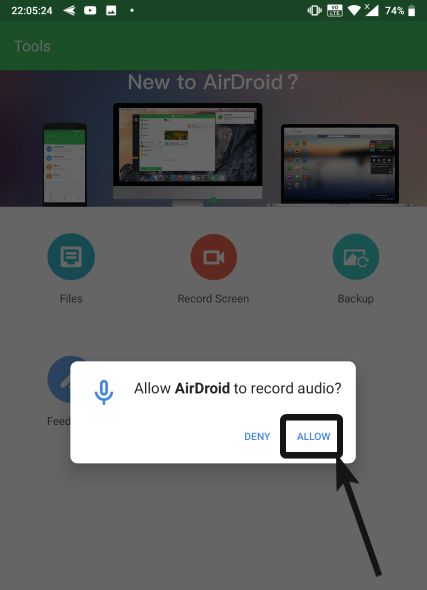
Step 3: Access Microphone to record audio
Now go back to AirDroid. It will ask you for your permission to access the microphone to record audio. Just tap on ‘Allow’.
 +
+
Step 4: Record Android Screen
Now tap on ‘Record Screen’ once again to use the recording feature on AirDroid.
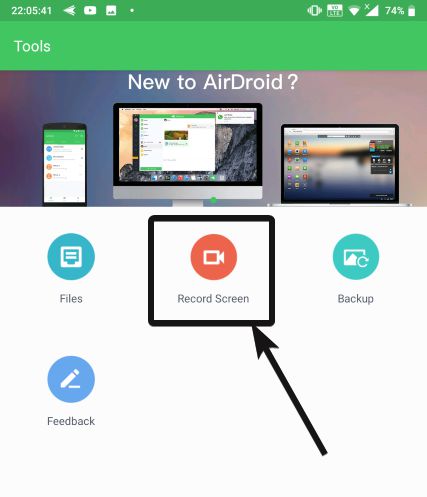
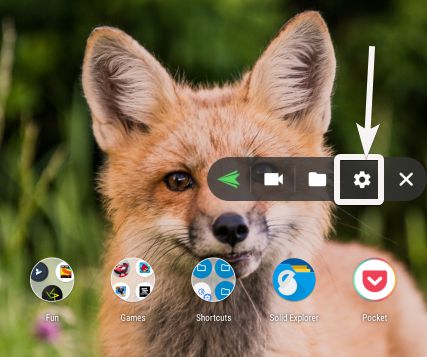
AirDroid will immediately be moved to the background and the AirDroid screen recording panel will be available on your home screen. Here you can start the recording of your phone’s display content, change the settings associated with recording, and have a look at the recorded videos.
Step 5: Airdroid Record screen settings
If you are using this feature for the first time on AirDroid, I will recommend you to review the settings by tapping on the settings gear icon.
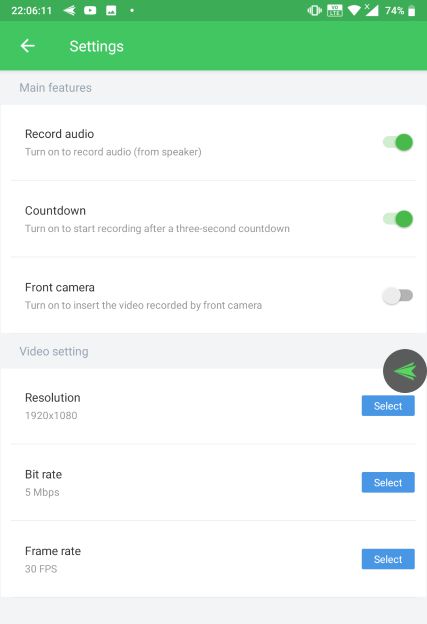
In the ‘Settings’ section, you can configure whether you want to record audio while recording the screen, toggle countdown and fron camera on or off, change the resolution, bit rate, frame rate for screen recording. Once you are done configuring all the settings, you can go back to the home screen to start recording.
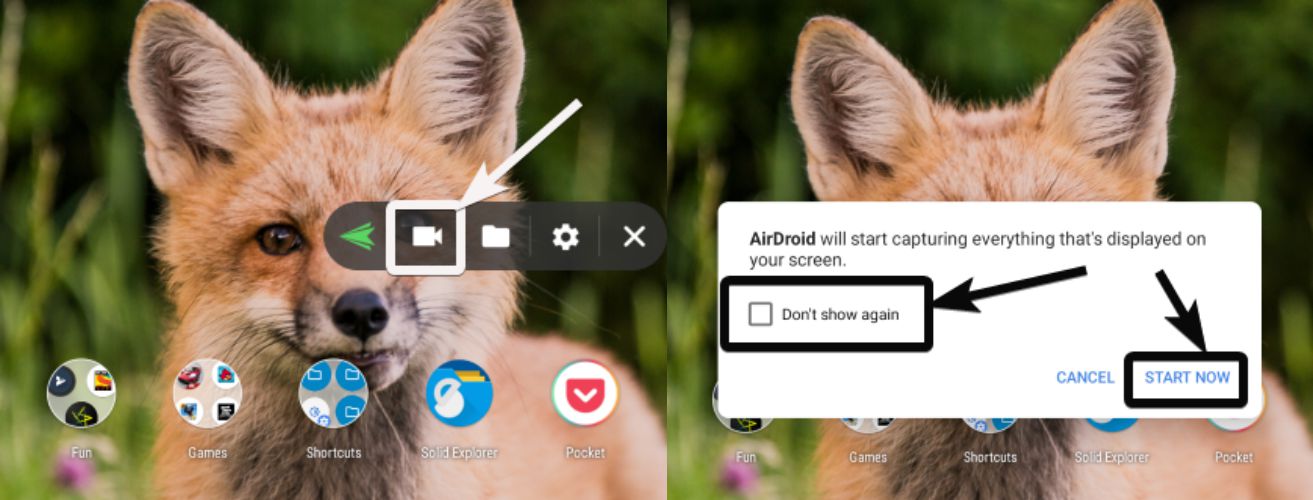
Step 6: Start screen recording
Now to start recording the screen, tap on the small video icon to start recording using AirDroid. As AirDroid will record everything on the screen, you will have to confirm the process. Mark the ‘Don’t show again’ option, which is recommended, and tap on ‘Start Now’ to start the recording process after 3 seconds, which is the default countdown time.
Step 7: Stop Android Screen recording
Now keep doing your tasks on your smartphone, and everything will be recorded. To stop the recording process, just tap on the small AirDroid icon and tap on the button to stop recording.

To view the files, just tap on the file icon to see the list of recordings done by AirDroid.
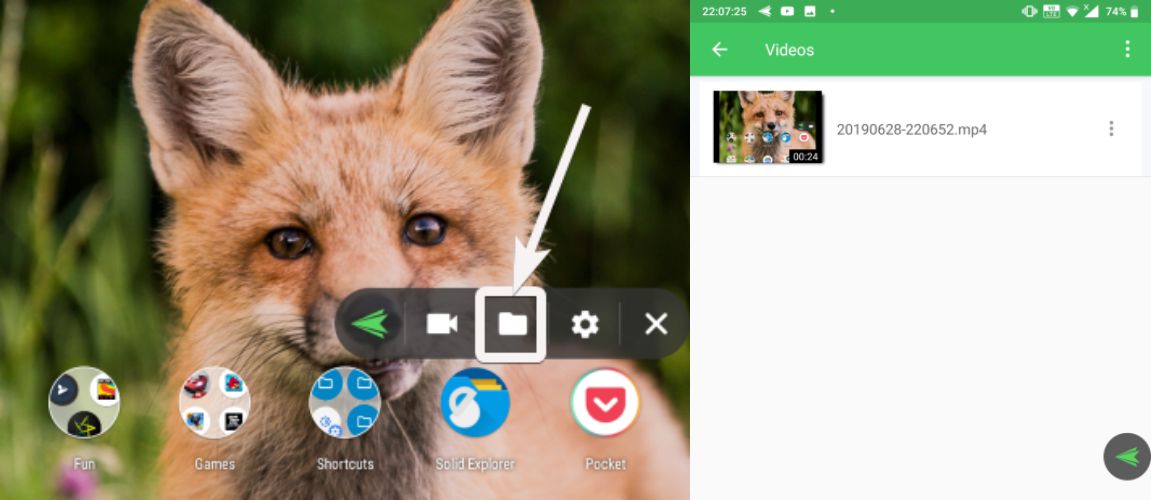
You can even watch the recordings using any video player installed on your Android device. All the screen recordings done using AirDroid will be available in the ‘AirDroid/ScreeRecord’ folder on your internal storage.
AirDroid is a great tool to share files between a computer and mobile device in a user-friendly way. But the ability to record Android screen is a bonus feature available on AirDroid, which can be handy if you frequently need to record the screen and don’t want to use an extra app for the purpose.
So that was it. Did you face any problem with the tutorial? Let me know about it, and your views, in the comment section down below.
Here are few other articles on Airdroid such as Use Airdroid App without Internet and Remotely Control Android Smartphone Using Airdroid.
Related Posts
How to create email groups in Gmail? Send one email to multiple recipients in a matter of seconds.
Getting the right dashcam for your needs. All that you need to know
How to Install 7-Zip on Windows 11 or 10 with Single Command
How to Install ASK CLI on Windows 11 or 10
How do you install FlutterFire CLI on Windows 11 or 10?
How to create QR codes on Google Sheets for URLs or any other text elements