From the simplest tasks of changing the name of the home Wi-Fi and the password to tweaking a number of other complex elements, the control panel of a router is no different from the cockpit of an airplane to control every single element within the aircraft. Knowing some of the most advanced tweaks of your router can help you make things turn your way while accessing the internet with the help of your home Wi-Fi. You can prioritize the internet bandwidth, stop others from using your Wi-Fi, or reduce the speed on your internet plan with a data cap. The router can be configured in a number of possible ways to meet all your needs.
You can easily type in the router IP address on your browser mostly 192.168.1.1 or 192.168.0.1 to access the router control panel, but you have to be on the same network to access it. Depending upon how many devices are connected to the router like a NAS, PC, or anything else, you might find it handy to access everything from your office or friend’s place, when you are connected to the internet through a different network. You might even sometimes need to change the router settings at least when you are not on your home network.
You can accomplish all such tasks by setting up a dynamic DNS. So let’s get started with how can you can set one up for free and access your home cloud storage, take the maximum advantage of your smart router and do other things when you are out of your home.
The steps to follow
The tutorial has two parts. First set up the server. Once that is done, you will have to configure the router. Let’s first start with setting up the server.
Setting up the server
Step 1: dynamic DNS service provider
Your first task will be to choose a dynamic DNS service provider. There are both free and paid dynamic service providers available. I am choosing noip.com for this tutorial, as it is available for free, and the recipe to prepare the dish isn’t going to be difficult at all.
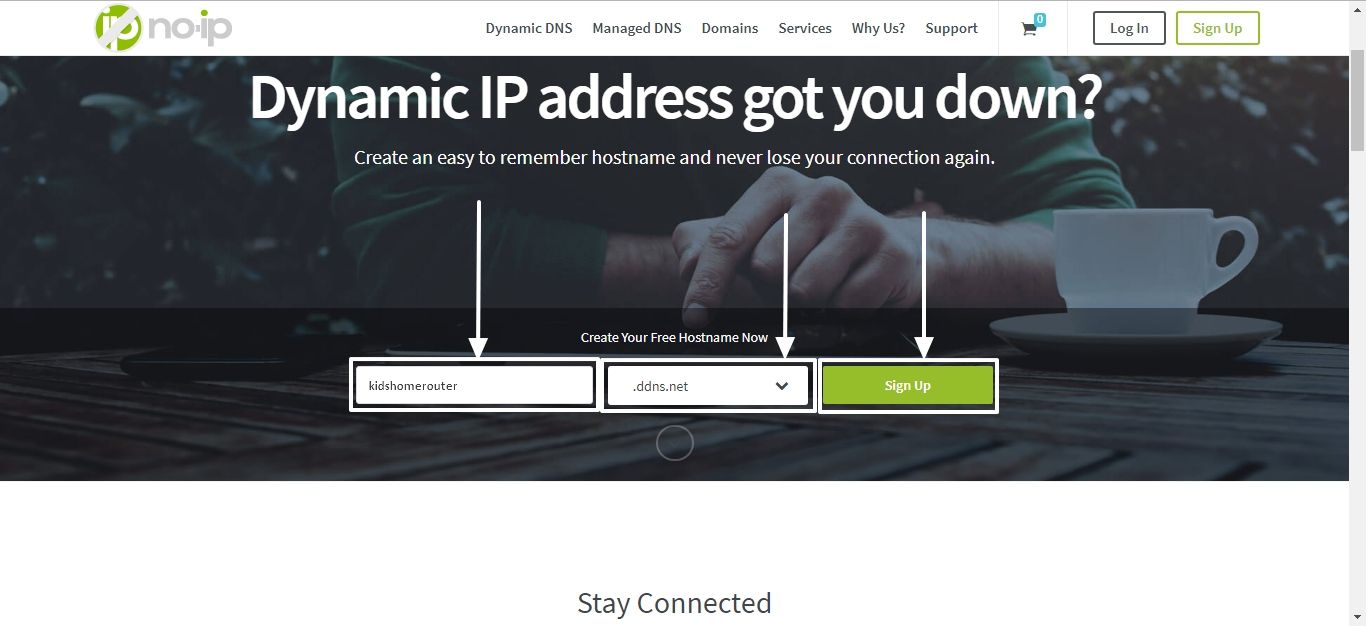
You will get the following user interface, where you will have to choose your hostname and the domain.
Step 2: Hostname
I am choosing a random name ‘kidshomerouter’ as the hostname and ‘ddns.net’ as the domain, as that will be easier for me to remember. You can even choose other free domains other than ddns.net like hopto.org, zapto.org, sytes.net, etc. After you are with it, click on ‘Sign Up’.
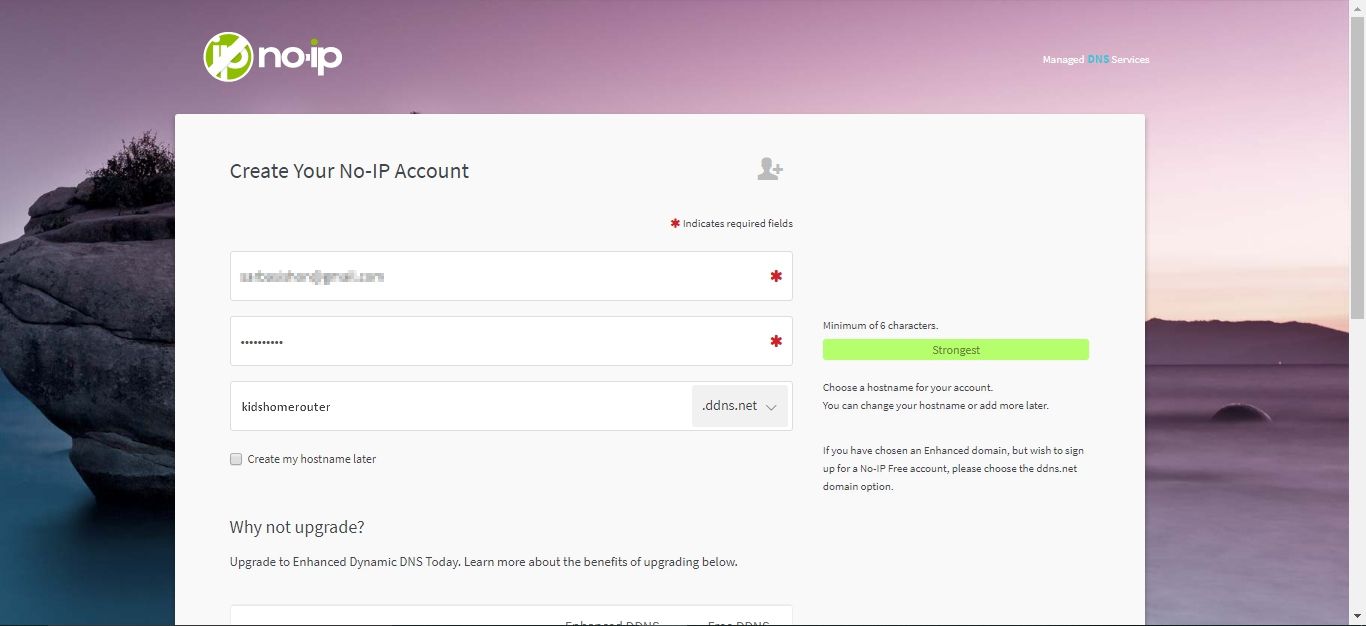
Step 3: Create your No-IP Account
Now in the next page, you will have to enter your email id, the password, which can be later used to change some settings, the complete address, etc. When you are done, scroll down and click on ‘Free Sign Up’. Meanwhile, you can even get an enhanced plan by investing some pennies to get an ad-free experience, with phone support being the bonus feature.
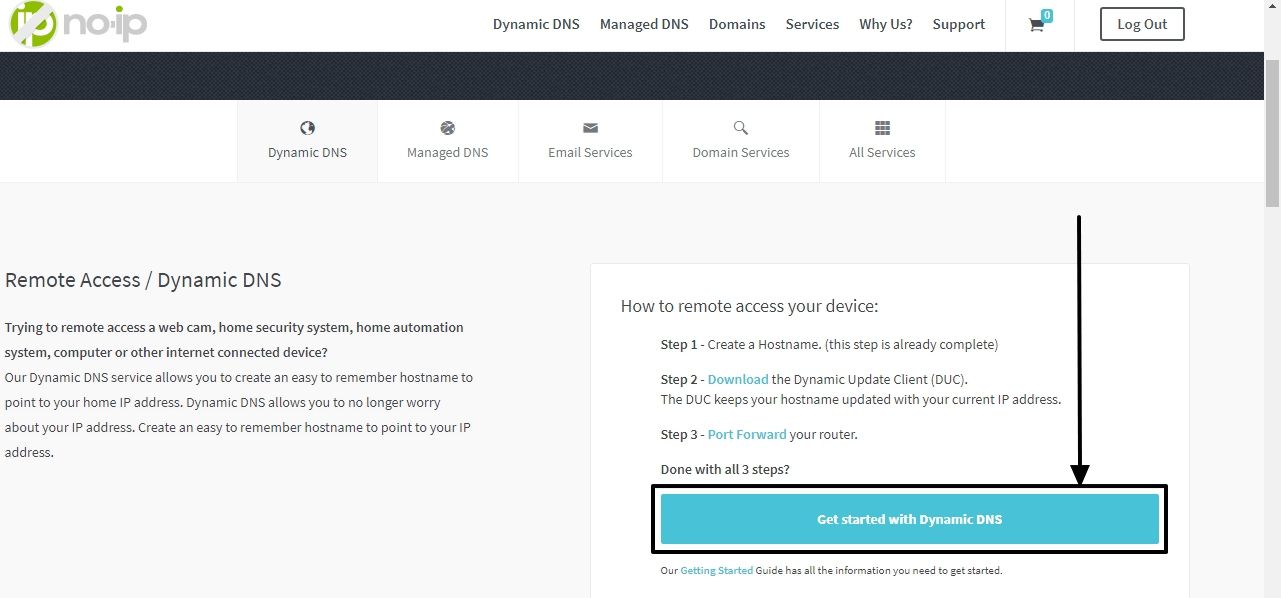
Step 4: Get started with Dynamic DNS
Now you will get a link in the registered email address to confirm your email id. Just click on the link to confirm your email address. You will be landed to a new page, where you will have to click on ‘Get started with Dynamic DNS’.
In the next page, you will have to complete the registration process by clicking on ‘Add Now’.

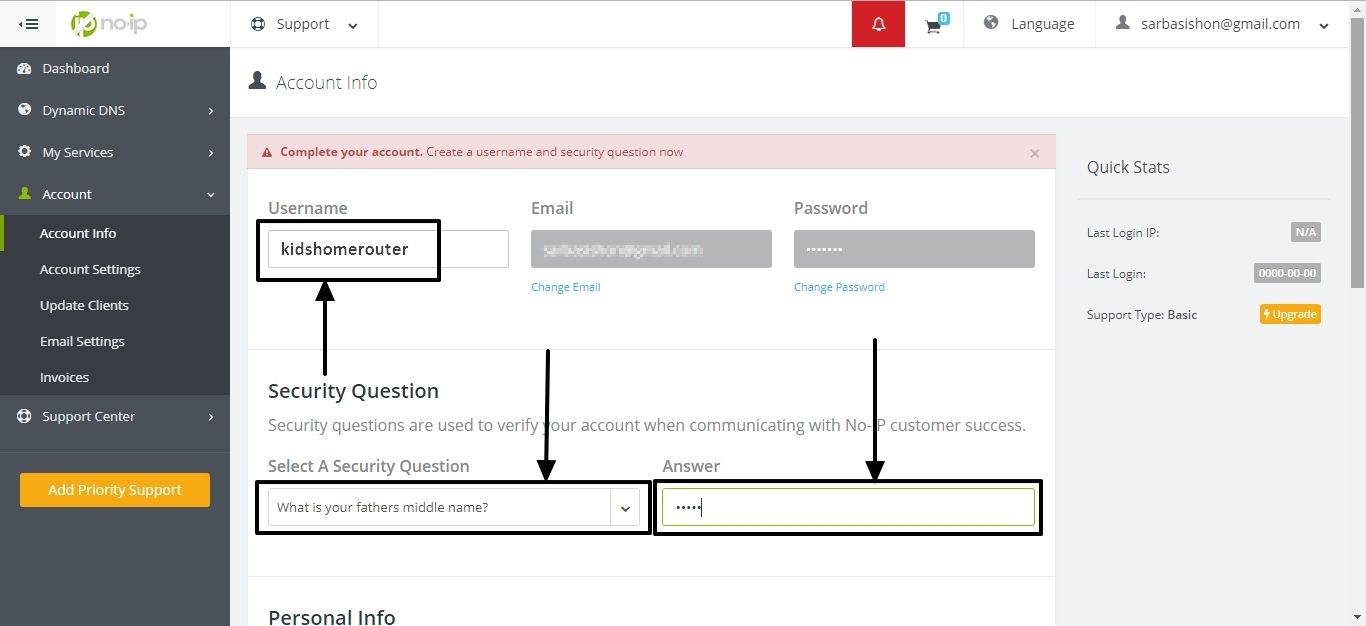
Step 5: Security question
Here you will have to carry on with entering other information about you. It isn’t mandatory to enter all the necessary details. You should just choose a security question, and enter the answer to it, to carry on. When you are done, scroll down, and click on ‘Save’.
Step 6: Setting up the router
Setting up the dynamic DNS is now complete. You can find the hostname i.e. the URL to access your router panel through the internet. You can now exit the browser.
Just enter the address to access the router control panel, which should be 192.168.1.1, 192.168.0.1 or any other address similar to that.
Enter the username and password for authentication, and find out the option fo Dynamic DNS on your router control panel.
The option to set up Dynamic DNS is available in almost all the modern routers. Just in case you can’t find it on your router, you can see the router manual or contact support.
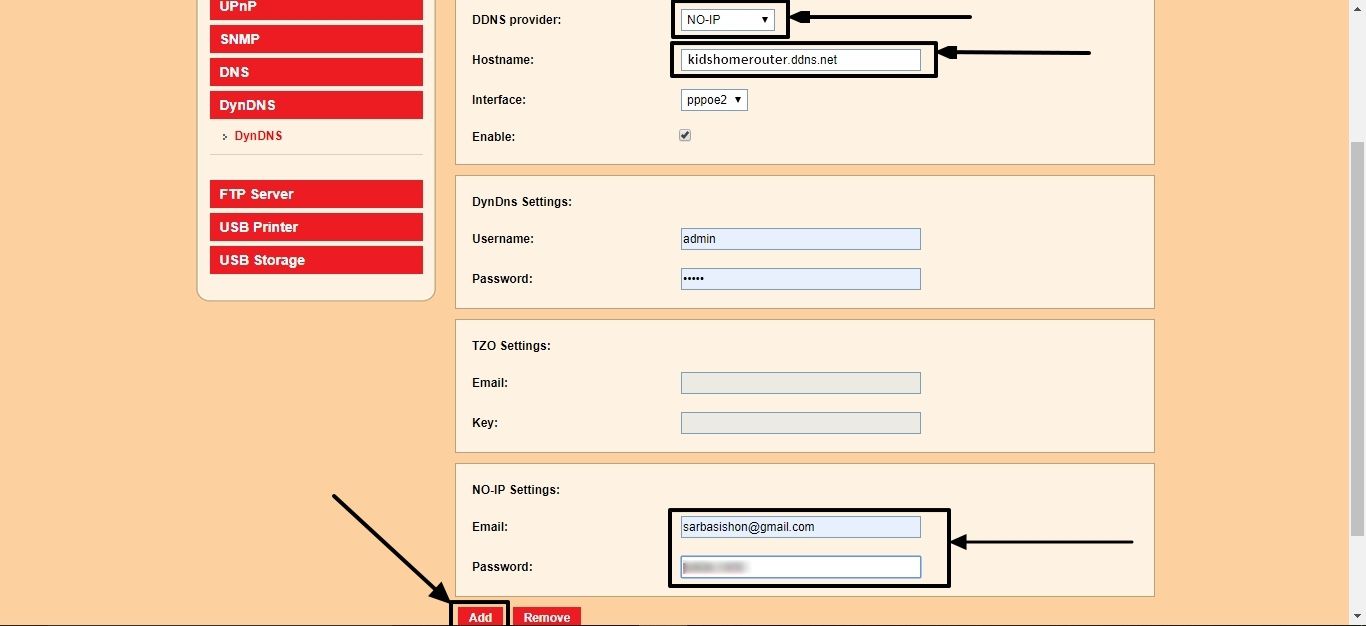
After you get the option to set up dynamic DNS, choose the DDNS provider. It should be ‘NO-IP’ in this case. Complete the setup by entering the hostname, the NO-IP Settings, like the Email address, password, etc. When you are done, click on Save, or any other button depending upon your router to save the settings.
For me, it is the ‘Add’ button.
Step 7: Router control panel
Now everything is set up. Just enter the complete URL, which is ‘kidshomerouter.ddns.net’ on your browser’s address bar. Now you can find the same interface, which can be accessed by entering the address of accessing the router control panel.

You can now configure the settings of your router like a pro, no matter, where you are, even if you are not on the local network. Depending upon the Dynamic DNS provider you are choosing, and the router you use, the user interface can be totally different, if not the total process of setting the thing up. But when there is a will, there is a way. Just contact the Dynamic DNS service provider to get some assistance, and read your router user manual thoroughly to know the device-specific process to set it up.
If you are lucky enough to have a smart router, setting up a dynamic DNS can be a boon for you. Keep downloading your files, access your mini cloud storage, and other digital services from literally everywhere with the combination of a smart router, and the goodness of dynamic DNS.
Hope the information was helpful for you, and you will thank me later for unleashing the potential of your router, even when you are outside. Did you face any troubles? Feel free to comment the same down below.


In step 6, if you are not sure what the router’s IP address is you can go to http://whatsmyrouterip.com/ and it will tell you.
Only works if you are connected to the network tho, which you should probably be if you want to configure it 🙂
helpful