If you want to share your gaming sessions with others, tutorials and everything else, screen recording is undoubtedly the best option you can go for. Even if you are into streaming games, you have to capture the display from a monitor in some way and then broadcast it online. In both cases, recording the screen is a fundamental task, and it can be an extra burden for your computer. You might find that the game is running properly and you are getting a decent framerate when you are just playing it. While, on the other hand, if you are live streaming or recording the session, you find legs in the gameplay and that can be really frustrating.
In such a situation, you can take advantage of using separate hardware that will record the screen and will handle the broadcasting, by taking the burden off your primary computer. But you might not have discrete hardware to record or capture the display output from your computer. But if you have a separate PC maybe a laptop or a computer, even if that isn’t powerful enough, you can use that as a capturing device to capture the video output from your primary computer, and record it to the second computer’s hard drive or broadcast it online. Everything will be handled by the second computer which is acting as the capturing device. Thus, you can play the game smoothly or work on your computer without any issues and the complete screen recording and broadcasting will be handled by the other computer.
So, without any further delay, let’s get started with how you can use two computers for the streaming or screen recording. The process is not complicated as long as you have the things in your hand, put them in place properly, and carry out the steps in tandem. Yes, it is a bit lengthy but it is not tough at all.
Things you will need
Let’s talk about the thing that you will need.
I will call the working computer or the computer, where you will play the game, or do your work as Computer 1.
The computer, which will record the display from the first computer or Computer 1, or the recording and streaming computer will be Computer 2 in the complete tutorial.
Both the computers should be present on the same network, i.e. both should be connected to the same router or switch. I will recommend you to use a wired connection instead of Wi-Fi, for better performance.
You will need NDI Tools by NewTekinstalled on both computers, and the streaming or recording computer should have a streaming or screen recording software that should recognize the NDI recording source. I am using OBS by Streamlabs as the streaming and recording software, however, you can also use a different one.
To download NDI Tools, you will have to sign up on the website. It is only after that you will be able to download NDI Tools on your computer.
Setting up Two PC streaming for streaming or recording
Setting up things on Computer 1
- Install NDI Tools on computer one, and the steps are quite similar to the installation of other Windows programs. Just carry on with the default settings, during the installation of NDI Tools.
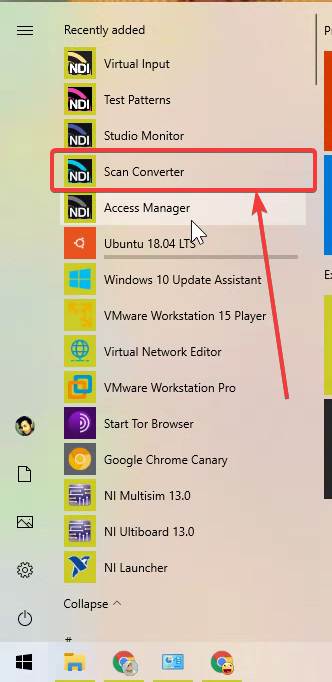
- Now open ‘NDI Scan Converter’ from the start menu.
- You should find the ‘Scan Converter’ icon in the system tray.
- You do not need to change multiple settings from the system tray icon. Just right-click on the NDI Tools icon to change the ‘Audio Source’ to ‘System Audio’. You change other settings if you want to, but that will be unnecessary, as the default settings should work perfectly.

- Now the Computer 1 is ready, and NDI Tools are configured to capture the display from your computer.
Setting up the basic things on Computer 2
- After you have installed NDI Tools and OBS, one Computer 2, open ‘Scan Converter’ from the start menu on Computer 2 exactly the same way. You don’t need to change any settings here.
- NDI Tools on Computer 2 is just acting as the output handler from Computer 1.
- Now, install OBS by Streamlabs, which also has a very basic setup process. Just go with the default settings to install OBS.
- After the installation of OBS is complete, open OBS on your computer from the Start menu, or by using the desktop shortcut. Linux user can see: OBS install on Ubuntu Linux.

- Now, you will get a Windows Defender alert about, whether OBS can have access to both Private and Public networks. Just choose your preferred connections and click on ‘Allow access’.

- You have also given the option to connect with your streaming account to get started with OBS. There are multiple accounts to choose from. If you don’t want to stream, just click on ‘Skip’.

- Next, click on ‘Start Fresh’ to get started with OBS, by applying all the default settings.

- To get started with OBS, you have the option to choose a theme. Just go with the one that looks great in your eyes. I am choosing the first theme.

- Now, OBS will be in front of you. What you just need to do right now is, add the NDI source for recording or broadcasting, from Computer 1.
- Under ‘Sources’, click on ‘+’, and then click on ‘NDI source’, in the ‘Add Source’ window. After that, click on ‘Add Source’.

- Next, you will have to assign a name to the source. You can either leave it to the default one or choose another name that is understandable for you. After you assign a name, click on ‘Add Source’.

- If the NDI source on Computer 1 is configured properly, you can find the name of Computer 1, along with the GPU, in ‘Source name’. If you have multiple NDI sources configured, you can click on the drop-down to select the computer, which is the gaming computer.
- You can set the bandwidth, configure the use of hardware acceleration, and other settings, if you find them important, and click on ‘Done’ to finally add the source.

- Now, the display from Computer 1 will be displayed on Computer 2. You can now either click on ‘Go Live’, use the ‘Rec’ button to record the output from Computer 1. All the recorded sessions will be saved in the ‘Videos’ folder of the computer, which is used for streaming, or Computer 2.

So, it is quite easy to setup up streaming or screen recording using two computers to reduce the load on one computer and keep your work going. The quality is also not bad. I got a decent frame rate for recording a PUBG match, which is quite satisfactory. If you are facing troubles or lags, I will recommend you to reduce the load on the computer, which is recording or streaming, and also make sure that your router or switch is not getting overwhelmed handling multiple data transactions at once. I noticed a few milliseconds lag on the recording PC, which isn’t a big deal, as you are after all recording the session on a second computer.
Do you have any questions, or faced any troubles? Feel free to comment on the same below.
Related Posts
How to create email groups in Gmail? Send one email to multiple recipients in a matter of seconds.
Getting the right dashcam for your needs. All that you need to know
How to Install 7-Zip on Windows 11 or 10 with Single Command
Install Google Earth on Windows 11 or 10 Using a Single Command
How to install Gaming Services on Windows 11
How to Install Telnet Client on Windows 11 Using PowerShell