While Creating some virtual machine on VirtualBox, we have an option to create a Virtual hard disk for a guest operating system of our own choice, that is really great. However, once it created and VM installed using it then expansion of the same virtual disk drive’s size would be a little complex if you don’t know how to do it. Here we let you know the way to use vboxmanage modifymedium command to increase the disk space or size of Virtual hard disk in VirtualBox installed on Ubuntu (Linux)/MacOS or Windows. This tutorial allows you to expand VDI or VHD or VMDK file-based virtual hard disks size.
How to increase VirtualBox disk space in Ubuntu, Windows & MacOS
#In Windows 10/8/7 :
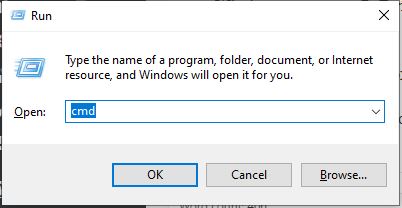
Step 1: Run Command Prompt as administrator
Press Win Key + R to open the RUN box. In the run box type cmd and then press CTRL+Shift button and press ENTER button. When the system asks for your permission to run command prompt under administrator right click on YES button.
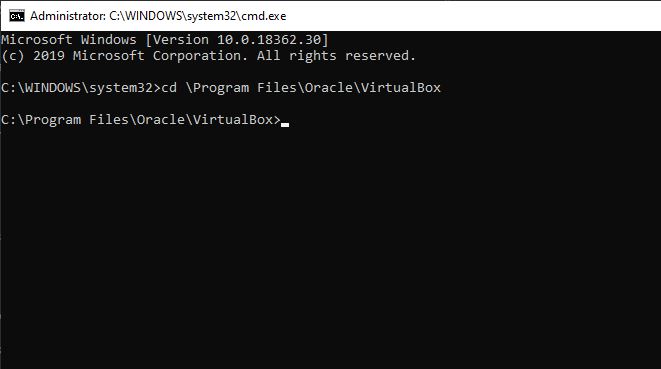
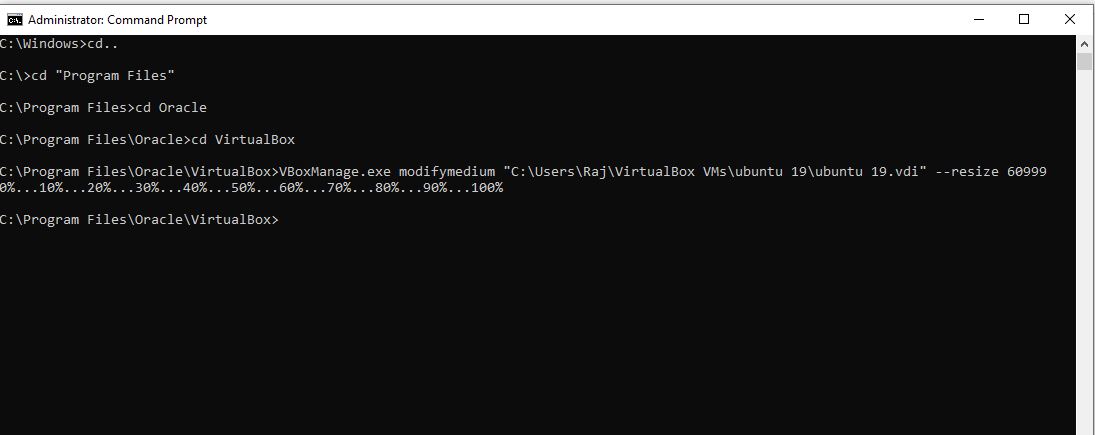
Step 1: Switch to VirtualBox directory
As we know the application we install on the Windows platform, by default, its files go to the C: Drive. Thus, we open VirtualBox directory inside the Command Prompt for that just copy the below command and paste inside CMD and press enter button.
cd \Program Files\Oracle\VirtualBox
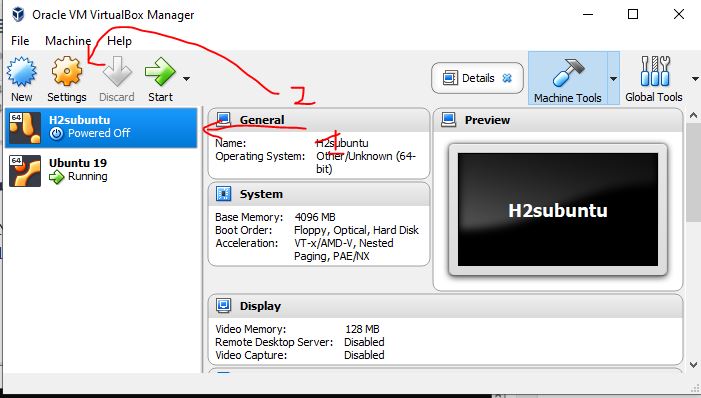
Step 3: Open VirtualBox
After opening VirtualBox directory in the Command Prompt leave it as it is. Now, go and open your VirtualBox. From the left side of the VirtualBox select the Virtual Machine (VM) which actual Virtual Disk size you want to increase.
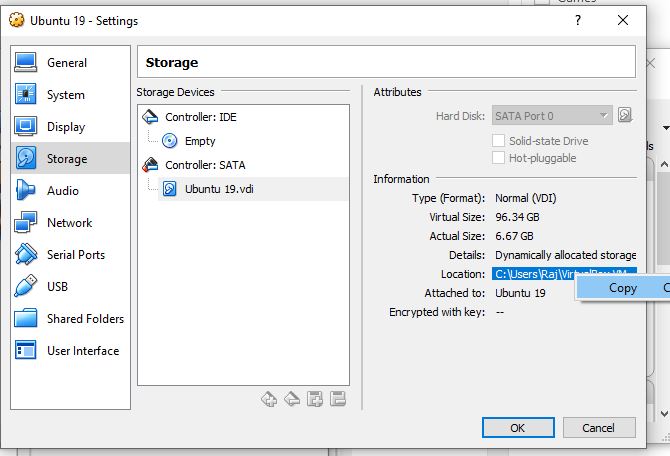
Step 4: Copy the Path of your VDI/VHD/VMDK Virtual Drive
Under the settings select Storage and then your VM’s VDI/VHD/VDMK virtual hard disk and as you select it some info about it will appear on the right side. What we need here is the location of our Virtualbox’s VM drive. Thus, double click on the location, right-click to copy and paste in NotePad and then close the VirtualBox.
Step 5: Now increase Virtualbox disk size
To increase the size of the VM disk drive the command is:
VBoxManage.exe modifymedium ” paste the above step copied disk drive path” –resize value in MB
In the above command replace the green colour text “paste the above step copied.. path” with the path of a virtual drive we copied and pasted in notepad. While the value in MB will replace the amount of size you want to add to your virtual disk drive. For example, we want to add around 60GB to our existing VDI disk then in our case the command will be like this
VBoxManage.exe modifymedium "C:\Users\Raj\VirtualBox VMs\Ubuntu 19\Ubuntu 19.vdi" --resize 60999
Note: Remember in above command the VM drive path is our and you have to replace it with yours.
Step 6: Check increased VirtualBox disk size
Open VirtualBox again, select the VM from the left side -click on Settings-> Storage-> select the Disk drive and in right side info, you will see the increased amount of storage.
#In Ubuntu 19.04, 18.04, 16.04, 14.04… :
The method we used to increase the size of the VirtualBox virtual drive above, the same will apply in Ubuntu too.
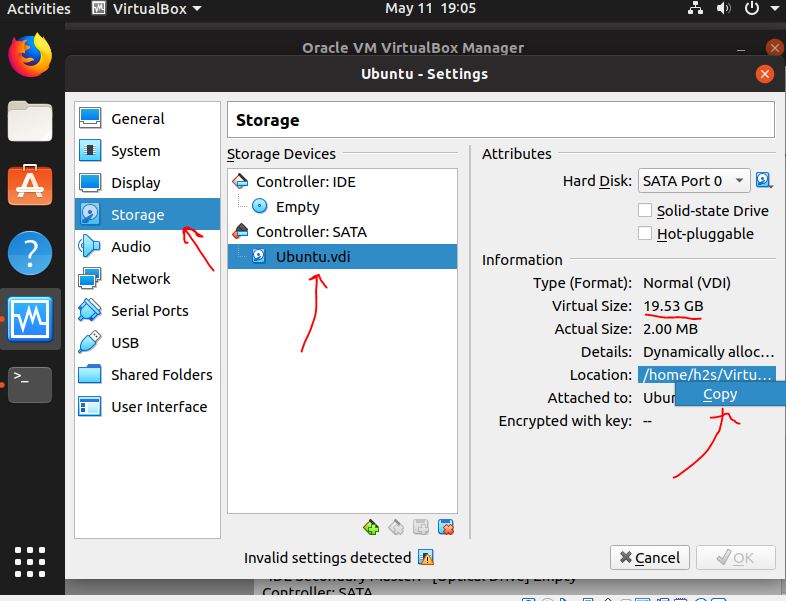
Step 1: Open the VirtualBox on Ubuntu and copy drive path
Open Ubuntu VirtualBox and select the Virtual machine which size you want to increase then go to Settings ->Storage->select virtual disk-> copy the disk location.
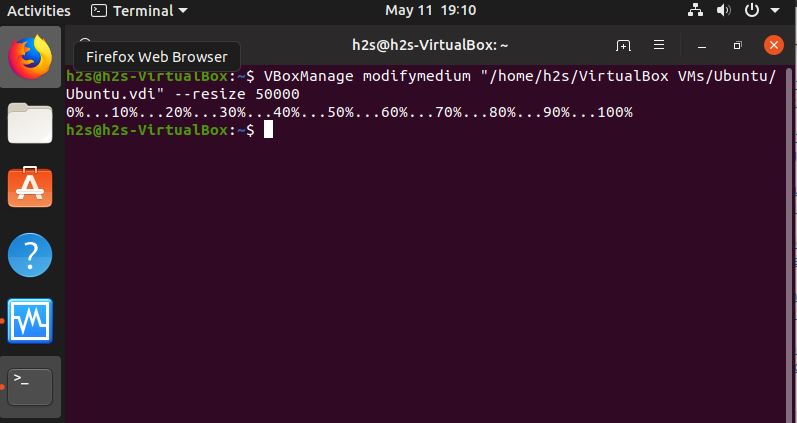
Step 2: Expand Ubuntu VirtualBox disk size
Finally, open the Command Terminal on Ubuntu you can use the keyboard shortcut CTRL+ATL+T. In Command Terminal use the command
VBoxManage modifymedium "path you copied above" --resize amount
Replace the green text with your VM drive path and amount with the size of storage you want to add or expand for the Virtual drive.
See the screenshot for reference:
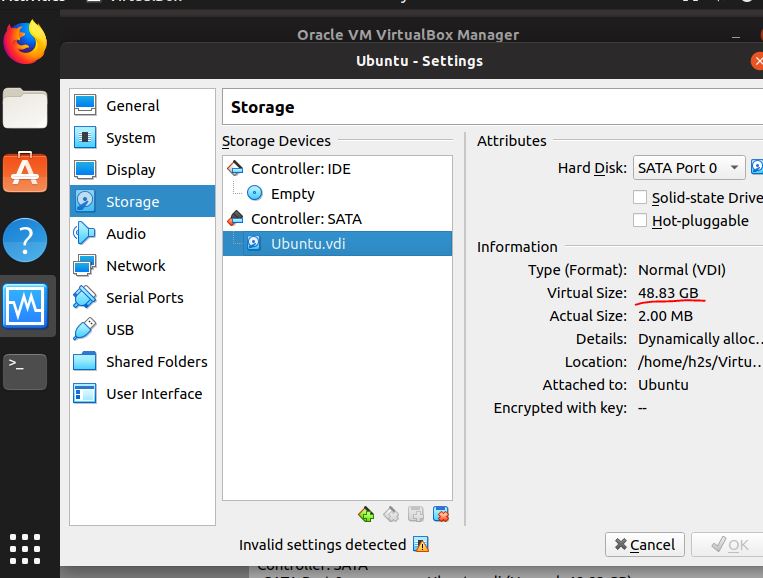
Step 3: See the increased Ubuntu VB virtual drive size
Again go to setting of the VM, select the drive and see the amount of storage size this time. You can see in step 1 the size of drive was around 20 GB and now it is around 50GB.
#Increase VirtualBox disk size in Mac OS
Step 1: Copy the Path of VM disk drive
You can see how to copy the path of the drive which size you want to increase in above steps for windows & Ubuntu, which will be the same for MacOS too. After copying the path, jot down it somewhere and then shut down the VM and quit VirtualBox.
Step 2: Open the Terminal app on MacOS
On MacOS terminal paste the below command in order to navigate to VirtualBox app directory:
cd /Applications/VirtualBox.app/Contents/Resources/VirtualBoxVM.app/Contents/MacOS/
Step 3: Increase the Size of Mac VirtualBox disk drive
VBoxManage modifymedium "path you copied above" --resize [new size in MB]

or

VBoxManage modifyhd "path you copied above" --resize [new size in MB]
For example, let’s say we want to increase the size of some windows guest such as Windows 10 VM VDI file that is located at /Users/h2s/Documents/VM/Windows10.vdi. And we want to add 30GB into our existing virtual disk drive the syntax would be like this:
VBoxManage modifymedium “/Users/h2s/Documents/VM/Windows10.vdi” –resize 30000
Step 4: Relaunch the VirtualBox
When this time you open the VirtualBox on your MACOS, you will see the increase in the size of VM disk drive.
Other Useful tutorials:
- How to make VirtualBox virtual machine boot from USB?
- How to install VirtualBox step by step on Windows 10/7
- Best Free Virtualbox Alternative for Linux
- How to convert ISO to VDMK or VDI using VirtualBox
- Tutorial to install Android VM Image on Virtualbox or Vmware


I foollowed, but, it shows the same size under actual size. Virtual size increased though.
Useful posting. Thank you.
Clarification — Regarding Section 5 under Windows:
“For example, we want to add around 60GB to our existing VDI disk then in our case the command will be like this” Note that for — resize xxxxx xxxxx represents the New size (NOT size increase)
Thanks for the clarification.
I was just wondering about that
when i type in the command to resize, it says access is denied
Make sure you have started the command prompt with Admin rights.
Whenever I Copy the exact text, aside from the name of my virtual machine, it just says “Syntax error: –resize: RTGetOpt: Command line option has argument with bad format.”. I have followed this completely so I’m not sure what I’m doing wrong.
I followed the instructions and confirmed the new size of the virtual disk had increased to my desired size yet when my windows virtual machine the total disk space is the original size of the virtual disk.