Learn the simple steps to block or remove internet connection for some particular application running on Windows 11/10/7 using in-built “Windows Defender Firewall with Advanced Security”.
Well, there are many situations in which we need to revoke permission of some application to access the Internet connection on the system. If that is the situation, then the trick given in the article will help you to do that without turning off the Internet access for the whole computer.
What Windows Firewall?
It is a security layer or tool offered by Microsoft in its Windows OS to enhance security. It helps to protect the system against unwanted connections from the internet by monitoring incoming and outgoing network traffic. And on the basis of pre-defined or custom rules, it allows or blocks specific traffic.
Why should I block a connection?
The reason depends upon your needs, however, generally, if you have some confidential information within the software and you don’t want it to access the internet or outside network then it is worth isolating the program. Due to the data lock, no data can be sent to the Internet and the program is a safe haven.
How to block Internet connection for Windows 10 or 11 Programs in the firewall?
Open Windows Firewall
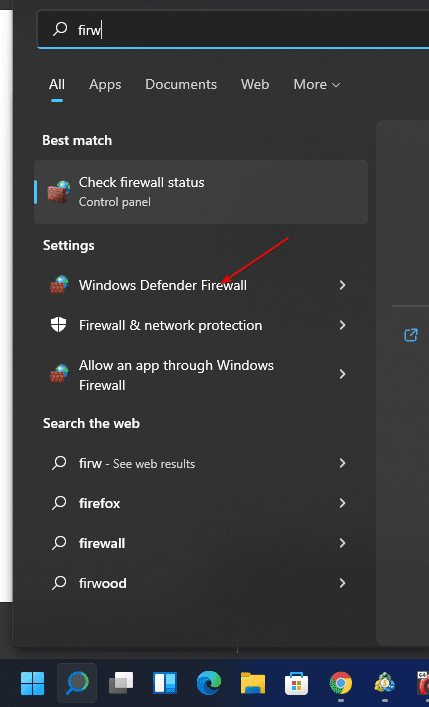
Step 1: In the search box type- “Windows Firewall with Advanced Security”. Make sure that you have administrator rights for the option.
Create a New Outbound Firewall Rule
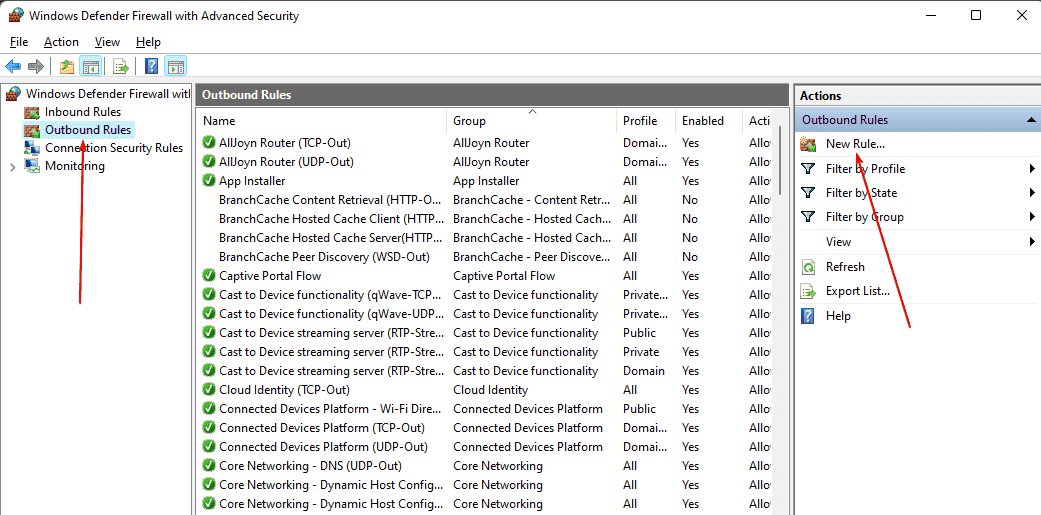
Step 2: Once the Firewall opens, select the “Outbound Rules” option given on the left side and then click on the “New Rule” option given on the right-side panel.
Select the type of Firewall rule to create
Step 3: On the opened window, select the Program as type to create a new firewall rule. After that hit the “NEXT” button.
Select the full path of Program
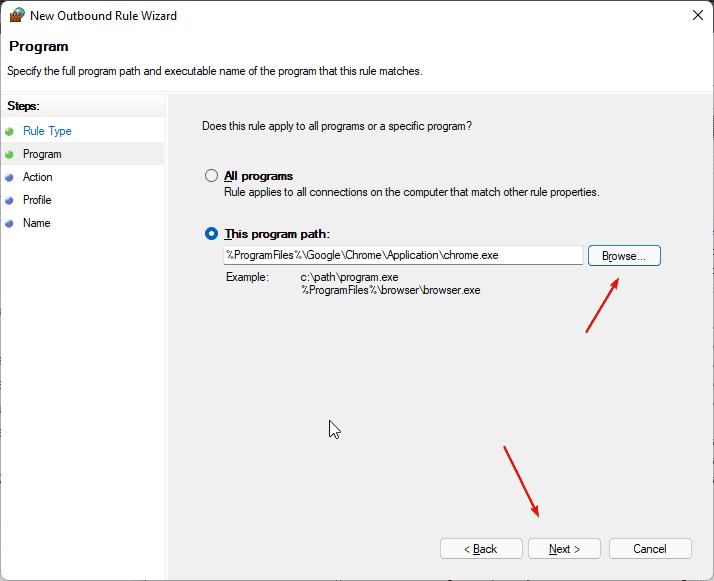
Step 4: Now, click on the Browse button, navigate to system’s C: drive, and under program files select the Application or program’s .exe (executable) file to block the internet connection for it. Here we are selecting Chrome.exe.
Block the Connection
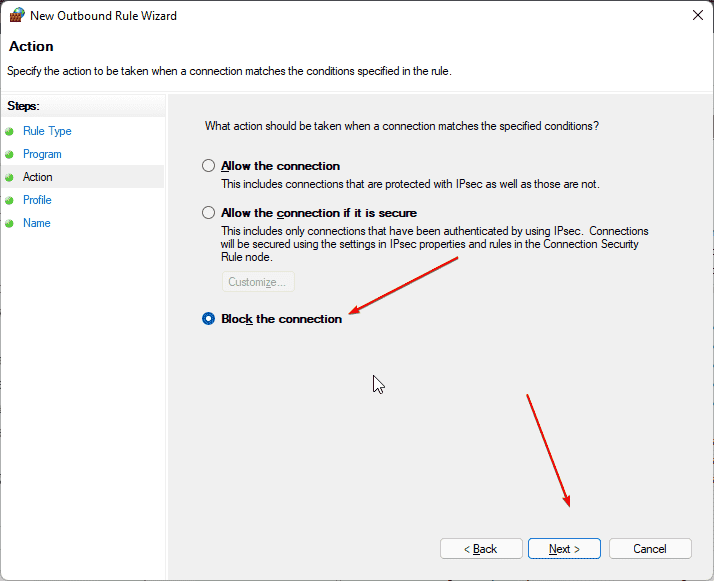
Step 5: Finally, check the “Block the connection” option and move to the next window.
Specify a name to Windows firewall rule
Step 6: As we have created a new firewall, hence give some name to it, so that we can identify it later.
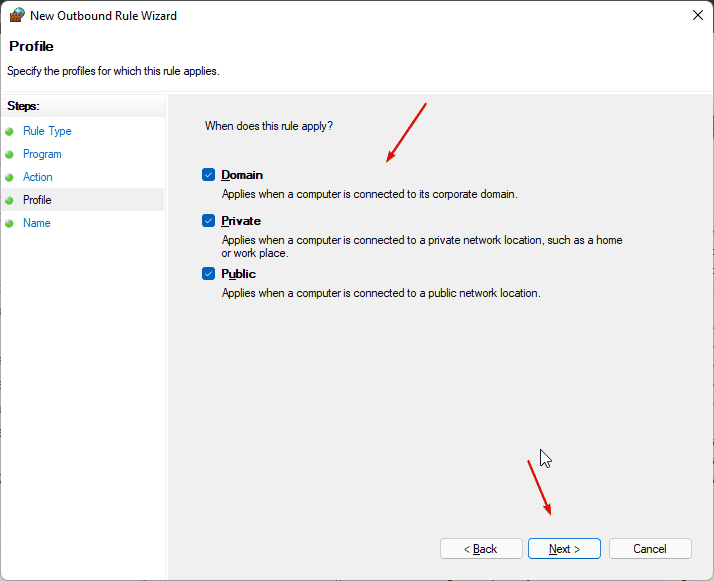
Set network location where the rule should apply
By default, the newly created firewall rule will be applied for all the three network locations- Domain, Private and Public. Hence, you can simply click on the Next button.
If everything is done, your program has now been successfully isolated. It can no longer connect to the Internet until the rule is deleted.
Check the App
For example, here we have blocked the internet connection for the Chrome browser. And you can see that in the given screenshot that the firewall has successfully blocked its access to the outside world.
Delete Rule to get a back internet connection
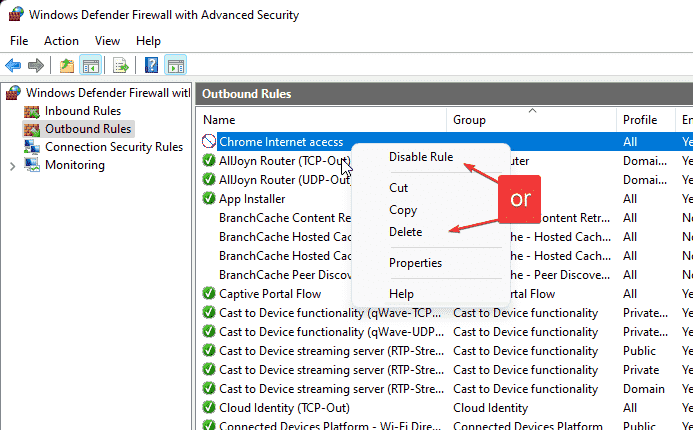
In case after some time you don’t want the firewall rule anymore, then either disable it to get back the internet connection for the app or simply delete it.
For this process open the Windows firewall and then under the “outbound Rules’ select your created rule; you can recognize its assigned name. After that right-click and select the desired option.
Other Articles:
- How to allow RDP in Windows 10 or 11 firewalls: GUI & Powershell
- How to allow a program through the firewall in Windows 10
- 9 Free & Best Open source Firewall to Secure Network
- How to allow Windows 10 ping through the firewall



Related Posts
How to Install 7-Zip on Windows 11 or 10 with Single Command
Install Google Earth on Windows 11 or 10 Using a Single Command
How to install Gaming Services on Windows 11
How to Install Telnet Client on Windows 11 Using PowerShell
How to Install ASK CLI on Windows 11 or 10
How do you install FlutterFire CLI on Windows 11 or 10?