Windows 10 firewall often works as a barrier to establish RDP (Remote Desktop connection), if not set to allow its connection or port. Here we will learn the commands and GUI method on how to enable and allow RDP service in Windows firewall.
The built-in firewall on the Microsoft Windows platforms is not a new feature, it has been there since Windows XP to protect our PC from network attacks. Moreover, it is the first line of defense as we connect to a common internet connection. Therefore, for security reasons some services are blocked by default unless we allow them manually in the firewall with some rules for incoming and outgoing traffic. If you are an administrator and handling a group of computers then it is recommended to use GPOs (group policies) to enable or disable services to access the outside world.
Requirements for Windows Remote Desktop
The first thing you must have is the Windows operating system Pro or Enterprise edition to run RDP, since Windows 10 Home edition doesn’t support this feature, thus no remote desktop connection will be possible.
The second thing is the same network, yes, an RDP connection can initially only be established if the devices are located within a network. In case, the computer is in some remote location then, of course, we can use the internet, however, before that a virtual connection needs to be established using VPN, to make the remote computer virtually available in the same network where your PC or laptop is.
Steps to allow RDP in Windows 10 firewall using GUI
The moment we enable the RDP service on Windows 10, the system will automatically enable the pre-define rule to allow the RDP port and its services through the firewall to connect remote computers either using a local intranet or the internet (via VPN).
Enabling Windows 10 Remote Desktop Steps:
- Go to the Start button and click it or press the Windows logo key on your keyboard.
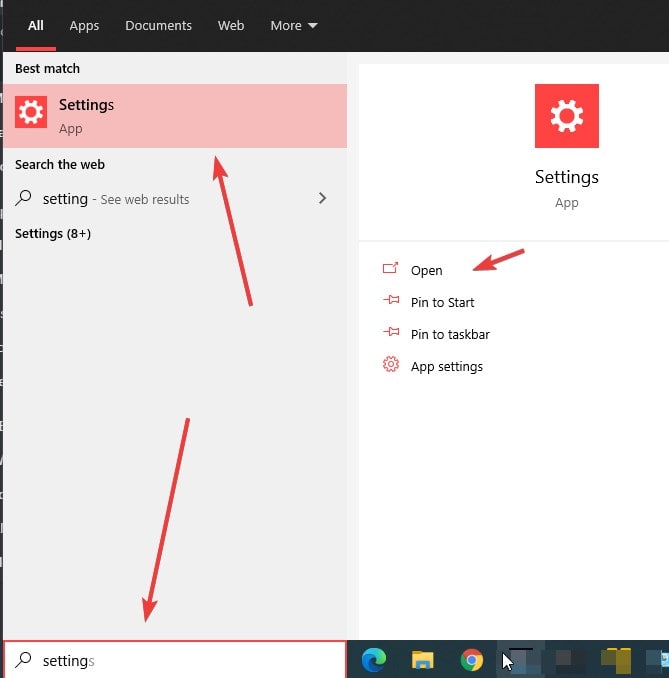
- In the Search box, type “Settings“. As its app appears, click to open it.
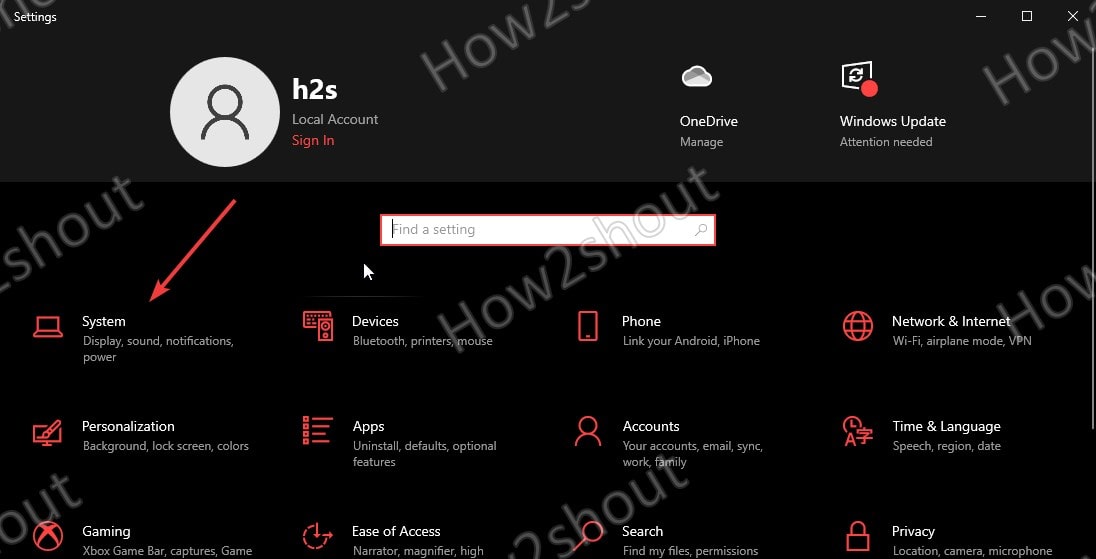
- Select System to get the settings related to it.
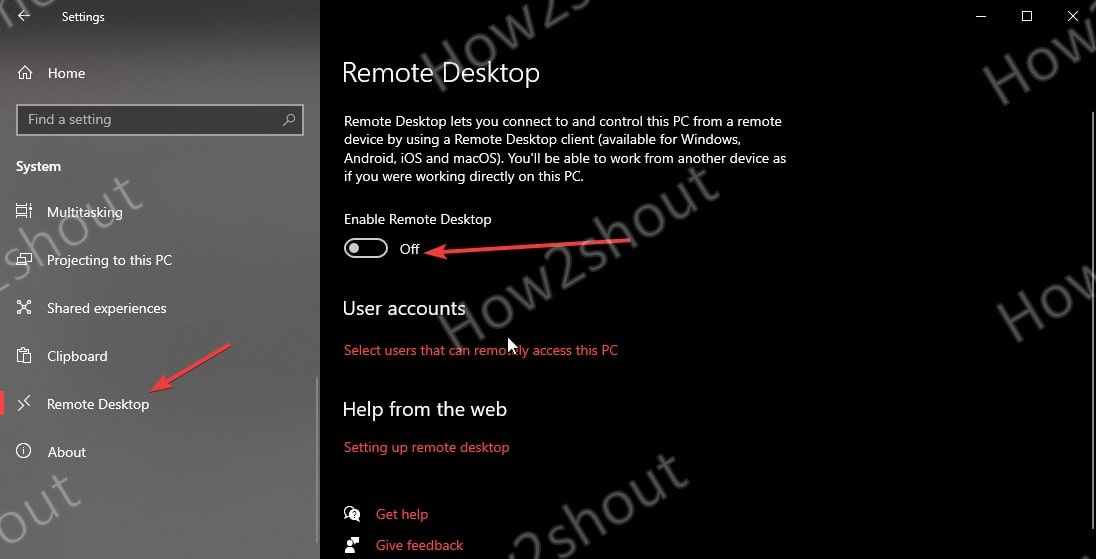
- Using the left side menu panel navigate to the “Remote Desktop” option and open it.
- Click on Enable Remote Desktop toggle button and Confirm the same when the pop-up appears.
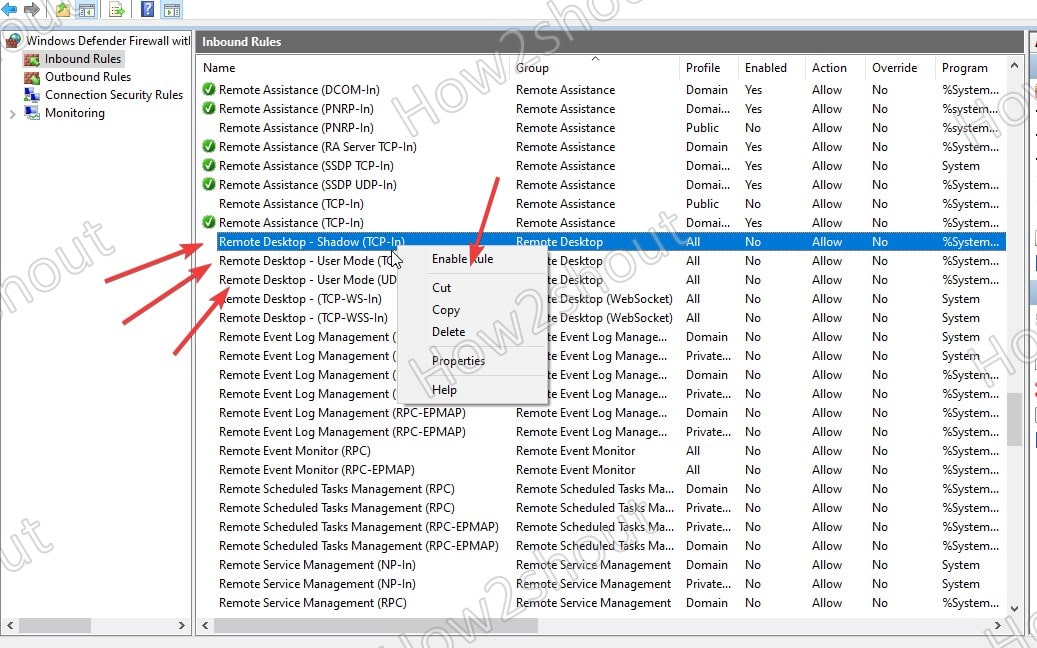
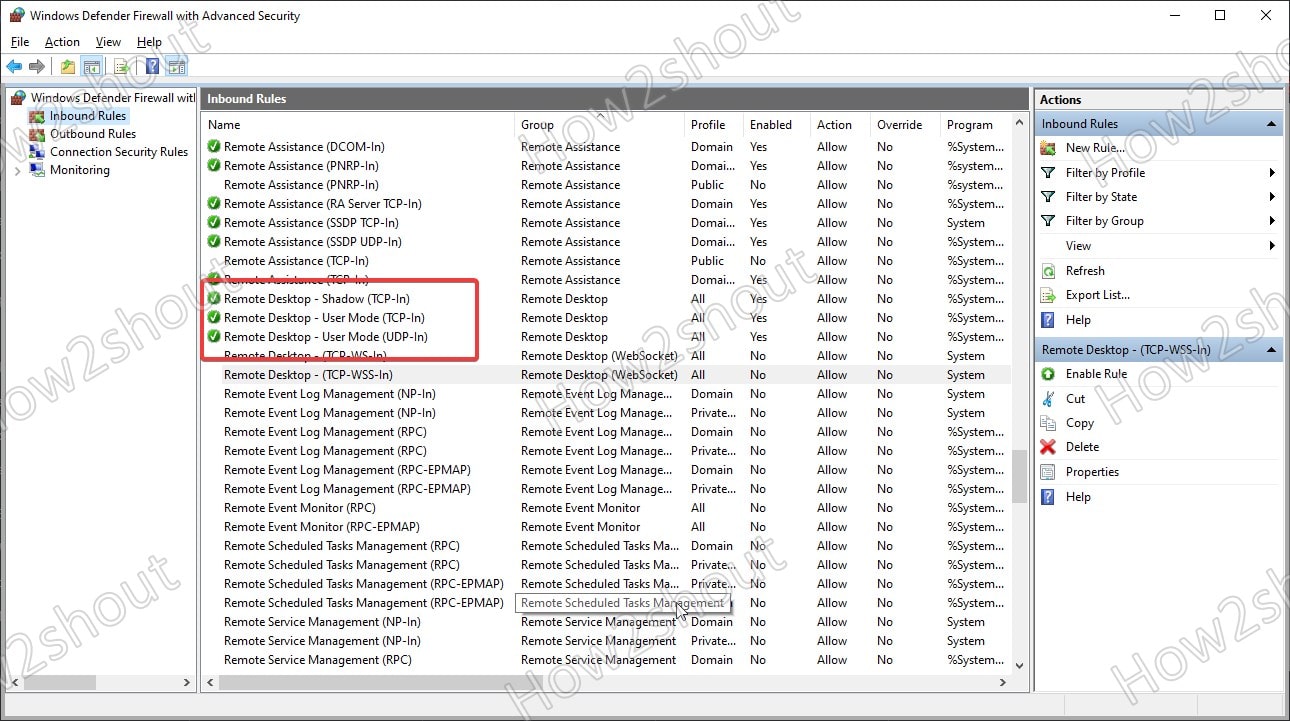
- This will also allow three Remote Desktop rules in Windows 10 firewall, that are Shadow (TCP-In), UserMode (TCP-In), and UserMode (UDP-In)
- Now, you and other users can connect the system using RDP protocol & TCP 3389 from other computers.
Here are the screenshots to understand the above steps clearly…
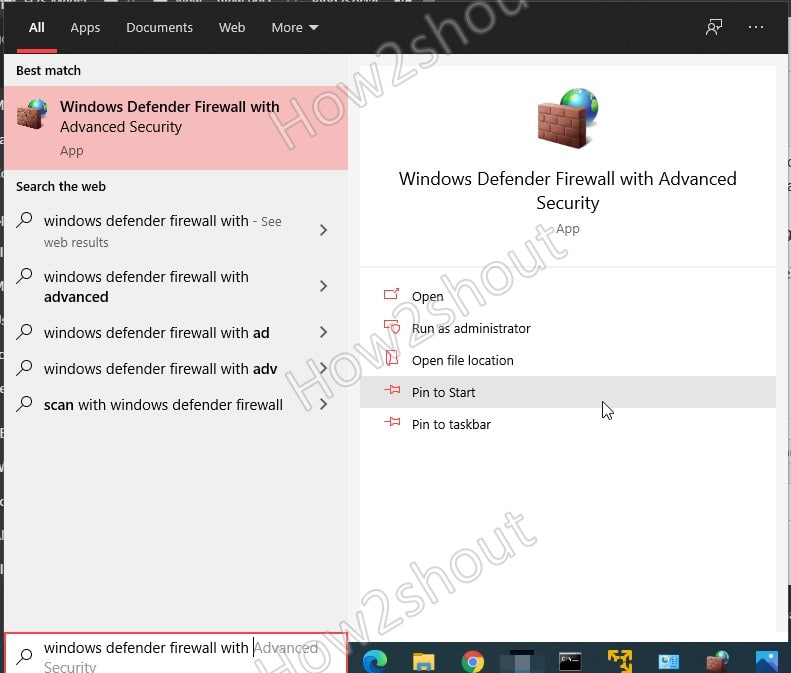
In case, you want to enable the firewall rule to allow TCP 3389 port manually then, in the search box search Windows firewall with Advanced Security.
After that click on the Inbound rules option and then one by one right-click on the Remote Desktop services and enable them…
Enable Windows 10 Remote Desktop using Command Prompt PowerShell
If you want to skip all the above steps then the easiest method to not only enable but also allow RDP service in Windows 10 firewall is the command line and here are the ones to use in prompt or Powershell.
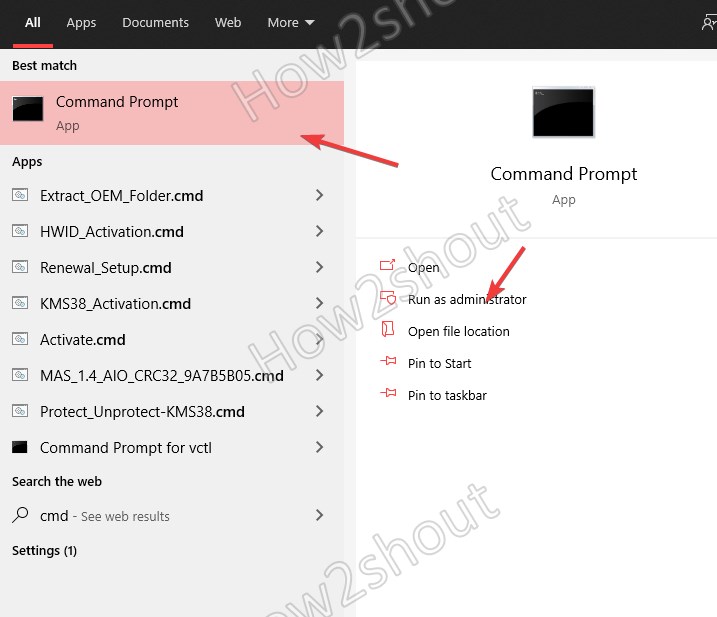
Step 1: In the search box either type PowerShell or Command prompt and when as per your command-line tool choice, the one appears, run it under administrative rights. Here we are using the CMD.
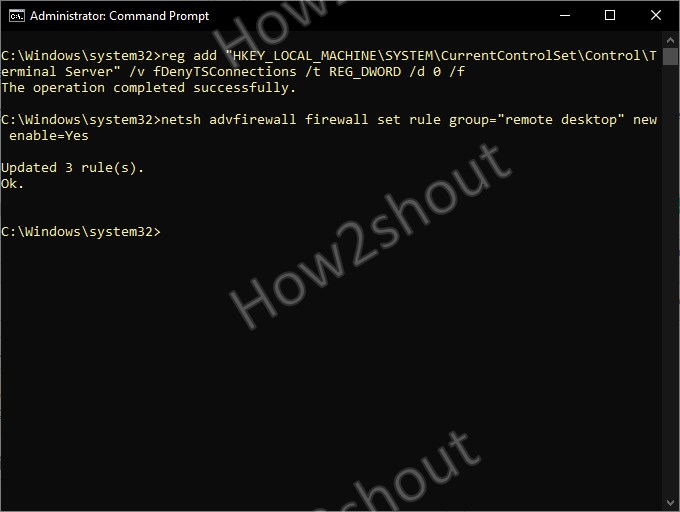
Step 2: First, we need to enable RDP service and for that run, this command:
reg add "HKEY_LOCAL_MACHINE\SYSTEM\CurrentControlSet\Control\Terminal Server" /v fDenyTSConnections /t REG_DWORD /d 0 /f
Step 3: Allow Remote desktop in Windows firewall by running netsh command:
netsh advfirewall firewall set rule group="remote desktop" new enable=Yes
Disable RDP and its Firewall rule in Windows 10
In case after some time you want to again turn off the remote desktop service and disable its rule then here are the commands:
Command to turn off RDP:
reg add "HKEY_LOCAL_MACHINE\SYSTEM\CurrentControlSet\Control\Terminal Server" /v fDenyTSConnections /t REG_DWORD /d 1 /f
Block RDP in firewall using this command:
netsh advfirewall firewall set rule group="remote desktop" new enable=No
Other Articles:
- How to allow Windows 10 ping through the firewall
- 9 Free & Best Open source Firewall to Secure Network
- How to Enable Remote desktop on Windows 1 8/7
- How to install RemoteBox on WSL Windows 10
- Access Linux desktop GUI from Windows remotely
- How to send key combinations to a remote computer via TeamViewer


dont forget to mention you will not be able to enable rdp on windows 10 home edition without installing additional software from github.com. Microsoft is a joke you probably want to switch over to linux.