If you want to try out one of the prominent Microsoft OS that is Windows XP on an emulator/VM in Windows 10/8/7 then download it by following this tutorial. Moreover, VM is a better option than Windows XP Mode that is only meant to be used on Win 7 and uses Virtualization as well.
Those are 90’s kids they for sure have experienced Windows XP, however, those have not used it so far they can still use it for free. Yes, we don’t need to pay anything as Windows XP ISO is 100% legally available to download; for free usage along with the product /serial key. Furthermore, this also helpful for users who want to play some old games or execute software that only support the XP.
However, we won’t recommend using Windows XP as your default OS for various day to day tasks, it is because of security risks. As we know the Microsoft has abandoned it thus No updates at all. Means prone to viruses and other threats. Nevertheless, using Windows XP on emulators or virtual machines would be a wise idea because of its isolation from the main system.
Well, there is no dedicated Windows XP emulator for Windows 7 or 10, however, the only one feasible way of doing this is Virtual Platforms; those will help us in emulate XP without any prior knowledge of virtualization. Such platforms are Virtual Box, Vmware, or native Windows Hyper-V virtual platforms for both Windows 10 and 7.
Note: Virtualization and Simulation/Emulation results in the same but the working is different. Virtualization provides synthetic hardware abstraction to run Guest OS as nearly with the same performance as they will have on the physical hardware. Also, they directly use the physical hardware with the help of the host (Type-2); thus only the required resource will be used for better performance. However, with Emulation, this is not true because it runs OS on a run-time emulator of physical hardware, which means it emulates whole hardware and drivers. This is why we are able to use PlayStation emulators on Windows to play the old games because of the complete hardware emulation. This usually tolls and highly reduced performance.
1. Download Windows XP ISO
The method we are going to show is not limited to any particular operating system, yes, that means Windows, macOS, Linux such as Ubuntu, RHEL, CentOS, etc can run XP as well using VMs. The ISO file is freely available to download on Archive.org along with the serial key. Here is the link to visit the page to get it.

2. Install Hyper-V for Windows XP
For Windows 10, 8, or 7, the practical virtual environments to emulate Windows XP that are easy to run are VirtualBox, Vmware Player, and Hyper-V. You can install and use any of them, however, if you don’t want to install any third-party application then Hyper-V is best to go. As on all professional versions of Windows, it comes out of the box. The only thing we need to do is enable it from the Settings. Nevertheless, those already using Virtual Box or interested in that only, they can see our tutorial: Windows XP install on VirtualBox VM.
Enable Hyper-V
- Here we are showing the Hypervisor, so to enable it on the Windows system, go to the Search Box.
- Type “Turn Windows features on or off “. When it appears click to open it.
- Now search for hyper-v and check its option.
- Wait to installation gets completed.
- And reboot the system.

3. Create XP Virtual Machine
Next to create a Simulator or Virtual machine for Windows XP on Windows 10 or 7. Go to search box type Hyper-v. There you will see the Hyper-V Manager under that your system name. Right-click on that and then select the New option with corresponding Virtual Machine as well. This will open the wizard to create a new VM for our XP OS.

4. Specify Eumaltor Name and Location
To easily identity the Windows XP emulated instance later, we need to give it some name. However, it would be great to use its own name. Well, still you are free to use something else that you could easily remember. Type the tag you want to use for your machine and then click on the Next button.

5. Specify the Generation
As the Windows XP is a 32-bit operating system, thus we have to go for the default that is Generation 1 Virtual Machine. It supports both 32 and 64 bit operating systems and provides hardware compatibility that available in all the previous versions of Hyper-V.

6. Assign Memory
In this step, we will assign RAM or memory that requires by the VM, as this is an Ist generation OS and requires really low hardware resources thus it good to leave 1GB. Nevertheless, you can assign more depending upon what kind of application you are planning to install over it.

7. Configure Network
If you want to use the internet or access the local network on Windows XP Virtual Machine emulation; then it is really important to configure the Connection. Select Default Switch.

8. Connect Virtual Hard Disk
Those are on Windows 7 and already have downloaded the Windows XP mode then instead of creating a new one select “Use an existing virtual hard disk” option and select that the VHD image of XP extracted by it. However, those are on Windows 10 or don’t have any existing image they need to create one. Go with the default option that is “Create a virtual hard disk” and enter the amount of size you want. For example, those want to store big files and software on Windows XP Virtual machine they can enter the greater size. Otherwise, go with 5 to 12 GB for normal usage.

9. Select Windows XP ISO as an Installation medium
This is another important step. If you want to emulate Windows XP on VN, the selection of installation medium is necessary. Select the ISO file which we have downloaded in the first step of this article. Choose “ Install an operation from a bootable CD/DVD ROM⇒Image File (.ISO)” and then click on the Browse button and select the downloaded ISO file.

10. Start the XP VM
Once the all above steps are done then you will have the Windows XP emulator in the VM form. Its time to start it. For that click on your computer name given under the Hyper-V manager and then select the corresponding Virtual Machine. Either double click on it just click on the Start option given on the Actions and then hit the Connect button given there.

11. Install Window XP Professional Setup
Now finally you will see the familiar blue screen of XP, press Enter to continue the setup.

Press F8 to agree with the terms and conditions, format the Hard disk partition, Enter the Serial Key that was available on Archive.ORG where you have downloaded the ISO file.

Finally, you will have the ready Windows XP Emulator on your Windows 10 or 7 system with familiar start-up sound. Just maximize it to use it as a native OS on the host the system or just go for Remote Desktop connection on any other system available in your network.
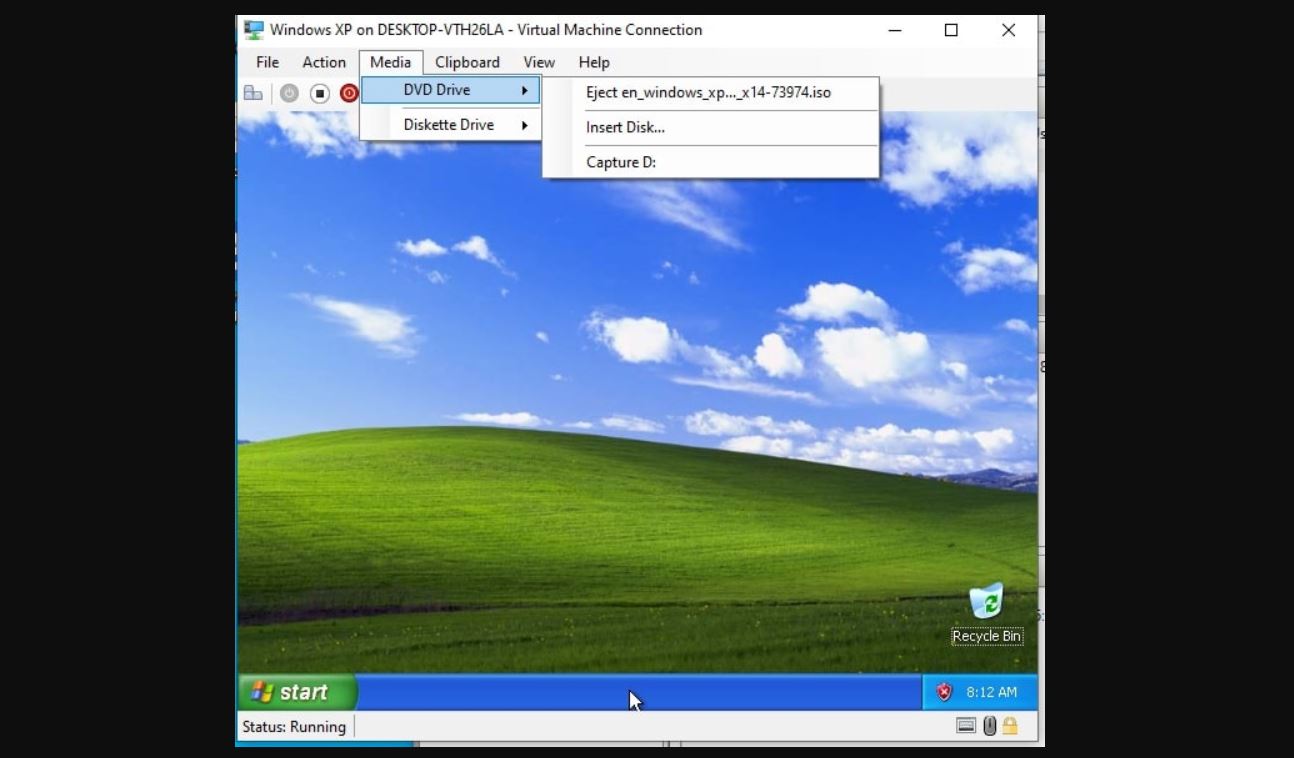
Eject the Media
Select on the Media option and then DVD Drive and select the Eject option.


hi,thinks you it works, but I want to use pen because I have tablet instead of mouse?