Learn how to convert and use an existing Vmware Workstation pro virtual machine (VM) in Oracle VirtualBox by exporting it in OVF format.
To create and deal with virtual machines you might depend upon Oracle VirtualBox or VMware Workstation Pro, which are the two most popular cross-platform virtual machine managers available out there. Even though you might be comfortable on one of the two most popular virtualization platforms or any other popular virtualization platform, it sometimes becomes necessary to switch to a different virtual machine platform, for example from VirtualBox to VMware Workstation or vice versa.
In this tutorial, we will talk about, how you can switch VMs from VMware Workstation Pro to Oracle VirtualBox so that you can use a virtual machine created using VMware workstation on VirtualBox.
Steps to Convert VMware Workstation Pro VM to use in VirtualBox
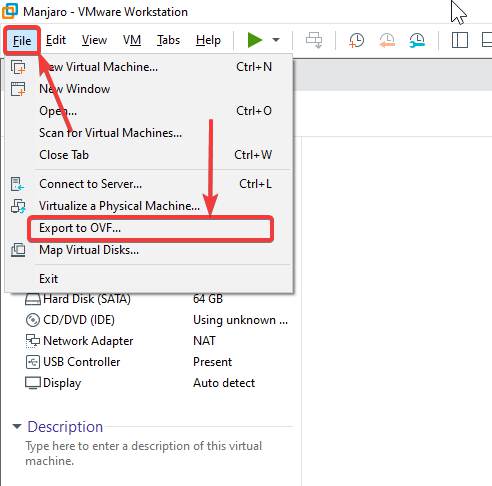
1: Export VMware Workstation Pro Virtual Machine to OVF
Open VMware Workstation Pro, and click on the virtual machine that you want to virtualize, in a new VMware tab. After that, click on ‘File’, and then click on ‘Export to OVF…’.
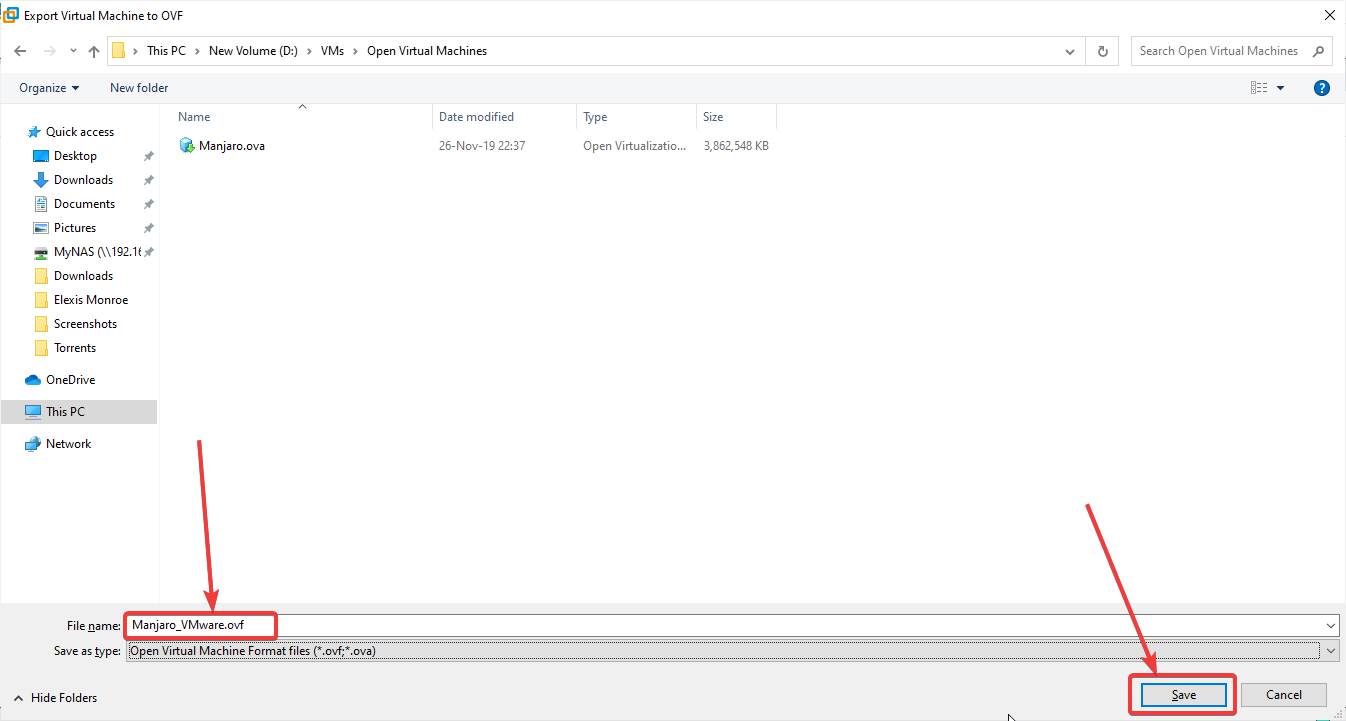
2. Save the OVF File
Choose the location where you want to keep the converted virtual machine, give it a name, and click on ‘Save’.
The export or conversion process will immediately start, and just like in the previous case, it might take several minutes, depending upon the size of the virtual hard drives.
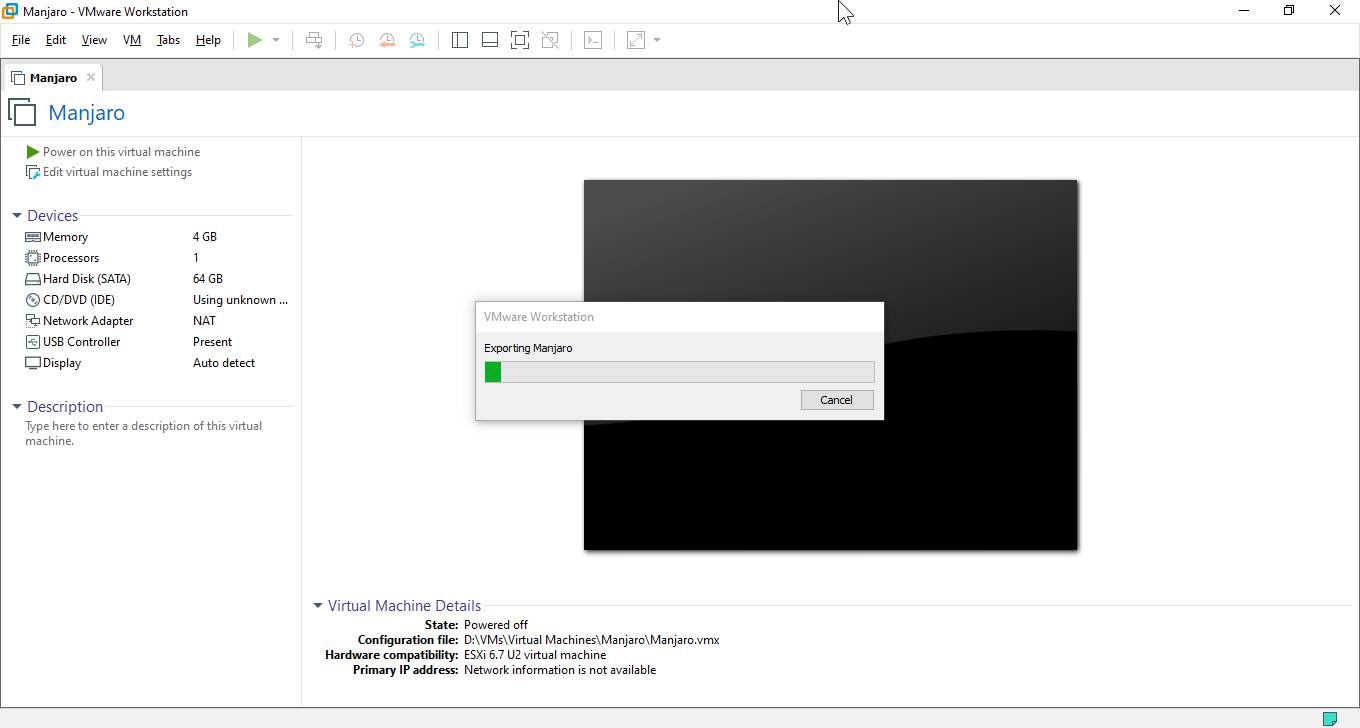
After it is completed, you should find the converted virtual machine in the desired location.
3. Open VirtualBox
Once you have exported your Virtual machine from VMware player workstation pro, next open your Oracle Virtualbox running on Windows, macOS, or Linux.
4. Import Appliance (OVF) to Oracle VirtualBox
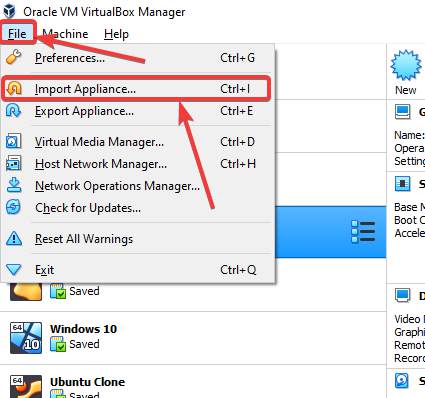
On Oracle VirtualBox, click on ‘File’, and then on ‘Import Appliance…’. You can alternatively use the ‘Ctrl+I’ shortcut key.
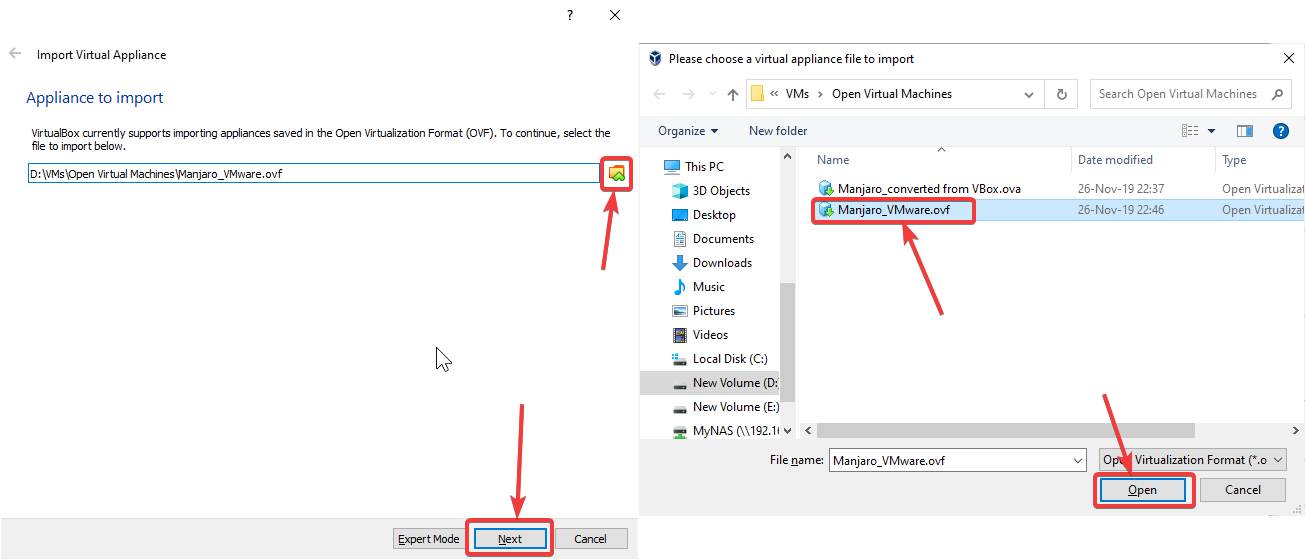
Now, click on the small browse icon, and locate the ‘OVF’ file on your system. Now, click on ‘Next’. You can even click on ‘Expert Mode’ to change some advanced settings.
5. Vmware Virtual machine in VirtualBox
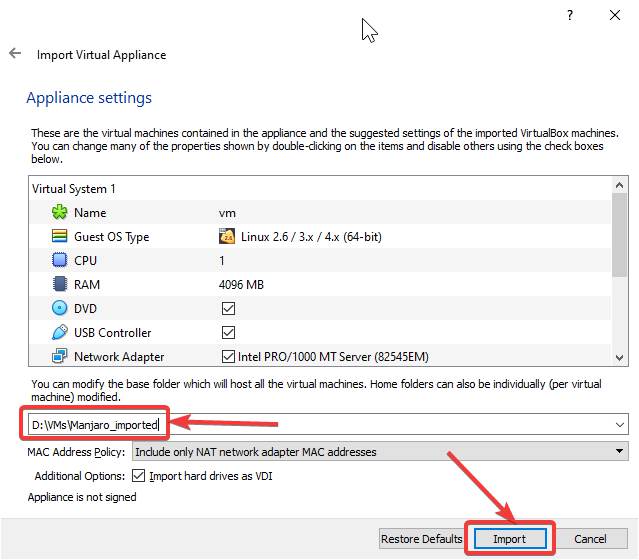
All the details about the virtual machine will be displayed to you. You can choose the location, where you want to keep the virtual machine, by clicking on the small browse icon. After you have reviewed the information, and have made the necessary configuration about where you want to save it, click on ‘Import’.
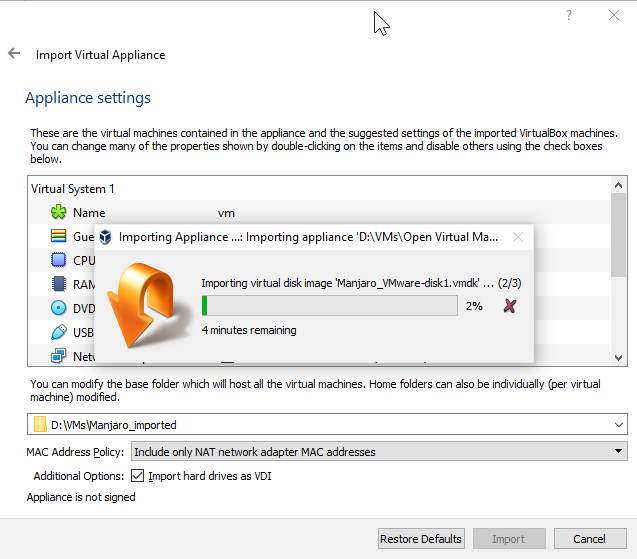
Now the import will start, and will again take some time for completion.
6. Start Vmware VM in Oracle VirtualBox
After the import is over, you can find the virtual machine in the list of the virtual machines that are available within Oracle VirtualBox. For me, the name is ‘VM’. If the name isn’t good enough, you can definitely change it, as per your requirements.

Now, you can open the virtual machine, and it should work perfectly. You might come across certain warnings and errors, but most can be easily ignored.
Other Articles:
How to convert a virtual machine on Oracle VirtualBox to use with Vmware
How to install Vmware workstation Player on Ubuntu Linux
How to use a Bootable USB drive in VMware Player to install OS
Related Posts
How to create email groups in Gmail? Send one email to multiple recipients in a matter of seconds.
Getting the right dashcam for your needs. All that you need to know
How to Install 7-Zip on Windows 11 or 10 with Single Command
How to Install ASK CLI on Windows 11 or 10
How do you install FlutterFire CLI on Windows 11 or 10?
How to create QR codes on Google Sheets for URLs or any other text elements