If you deal with virtual machines, you might already know about virtual storage devices that can be created manually by you for certain requirements. If you need to encrypt certain files and folders on your system but not the entire to volume or partition, you can create a virtual storage device, but the files and folders in that, and then eventually encrypt the virtual storage device so that you can easily share the encrypted volumes with others safely. There can be a number of other circumstances when it can really be useful to create a virtual drive, and talking about Windows, you can easily mount a virtual drive if you have one supported virtual storage device on your system.
However, if you want to create a virtual storage device, you need to use some third-party program, and that said, today I will talk about one of the best and most lightweight programs that can not only help you to create virtual drives of any size and any format, but you can also use the program as a handy shortcut to mount those virtual drives on your system running Windows. This is going to be easier than you can think of and today and talk about how to use this simple yet powerful program on your computer. If you can use encryption software like VeraCrypt along with the software that I will talk about, you can easily encrypt all your virtual storage devices easily.
So, without any further delay, let’s get started with how you can create and manage virtual storage devices on your Windows computer in the easiest way with the most lightweight software available on the internet.
Downloading VHD Manager Windows 10
Step 1: The first step is to download Simple VHD Manager v1.4 by a developer called Sordum. This is a small portable program, and thus, you will not even need to install it on your computer.
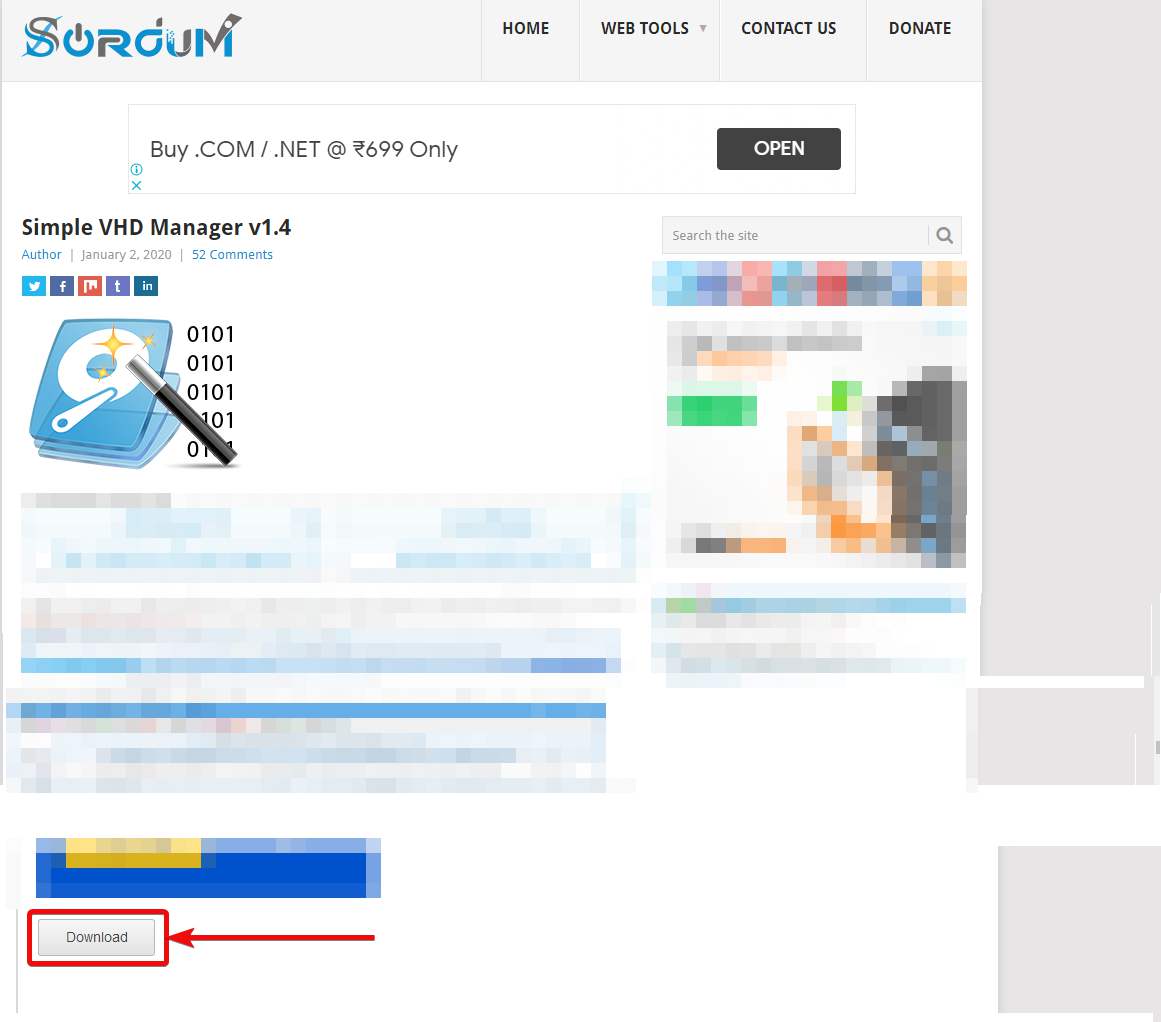
Step 2: After you have downloaded the program, it will come as a file named ‘VhdManager.zip’ within your default ‘Downloads’ folder.
Step 3: Just open it, and extract the folder with the name ‘VHD_manager_v1.4’ to a folder to use the application on your system.
Also see: Create Virtual Hard Disk on Windows without any third-party software.
Creating a virtual disk using a VHD Manager application
Step 1: Open the file with the name ‘VhdManager.exe’ or ‘VhdManager_x64.exe’ depending upon whether you are using a 32-bit or 64-bit version of Windows, and you can find both these files within the folder ‘VHD_manager_v1.4’.
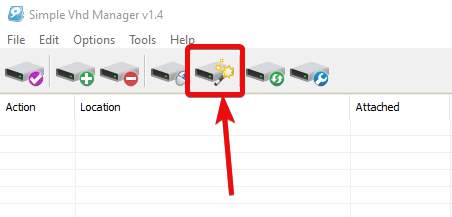
Step 2: Now that the application is open, you can get started with creating a new virtual hard drive, or mount an existing virtual drive on your system. So, let’s start with, how you can create a virtual hard drive using VHD Manager. Just click on ‘File’, and then click on ‘Create and Attach VHD’ or directly click on the ‘Create and Attach VHD’ in the toolbar, as shown in the screenshot below.
Step 3: Now, you will have to enter the size of the virtual drive, in either GB or MB, which you can select from the drop-down menu, and you can type in the space in the textbox corresponding to the drop-down menu.
Step 4: Choose one between VHD and VHDX as the format for the virtual disk. Both VHD and VHDX will be supported by Windows, however, VHDX comes with some extra features like, the ability to create bigger volume, expand volumes, and much more. So, just choose the preferred format among the two.
Step 5: You can also choose between ‘Dynamically expanding’ and ‘Fixed’. With ‘Dynamically expanding’, the chosen size of the virtual drive will not be reserved at once, and the size will increase with adding more files to the virtual disk. But with ‘Fixed’, the storage space will be reserved in advance. ‘Dynamically expanding’ seems to be a more economical option.
Step 6: Finally, click on ‘Create and Attach VHD’ after you are done with changing all the settings.

Step 7: Now, as usual, you will have to choose the location where you want to create the virtual disk and assign a name to it. After that, click on ‘Save’.
Step 8: The virtual disk will be attached to your system. You will instantly get the option to format the virtual disk in any format you want, and click on ‘Start’. Just click ‘OK’ in the warning that appears.

Step 9: You can start using the virtual disk, and you can see the file in Windows Explorer, or within ‘This PC’.

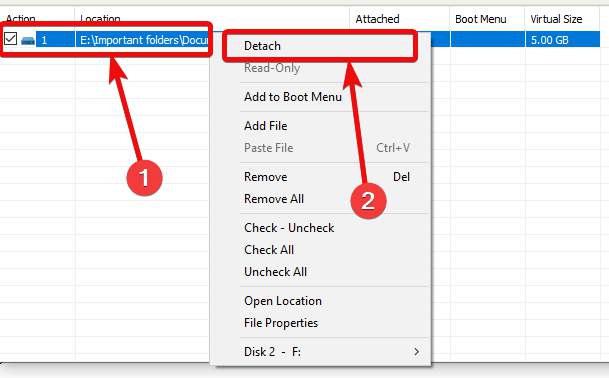
Step 10: After you are done with the virtual disk, you can now detach it from your computer, by clicking on the virtual disk in the list, and then by clicking on ‘Detach’.
Attaching a virtual disk already created
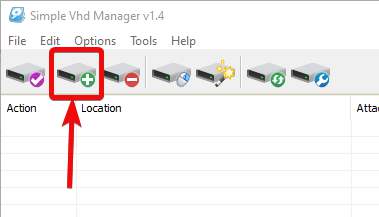
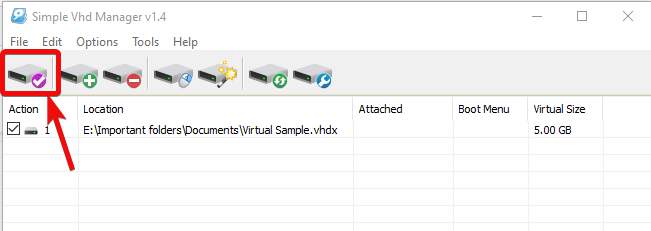
Step 1: Now, if you have a virtual disk ready, you will first have to add the disk to the list before you can mount it on your system. Click on ‘File’ in the menu bar, and then click on ‘Add File’. Alternatively, click on ‘Add file to list’ in the toolbar.
Step 2: Just select the file containing the virtual disk from the explorer window that comes up, and click on ‘Open’.

Step 3: After it has been added to the list, click on ‘Attach Marked Files’ from ‘File’ in the menu bar or click on ‘Attach marked and detach unmarked files’ from the toolbar.
Now, the file will be mounted on your Windows computer as a disk.
Other options
Besides the options to create and mount virtual disks, VHD Manager also comes with some extra features, like the ability to open ‘Disk Management’ right from within the interface, by clicking on the button as shown in the screenshot below. You can also click on ‘Add to Context Menu’ to be able to deal with virtual disks through the right-click context menu.

You can find several useful options that can make it even easier dealing with virtual disks with the context menu shortcuts.
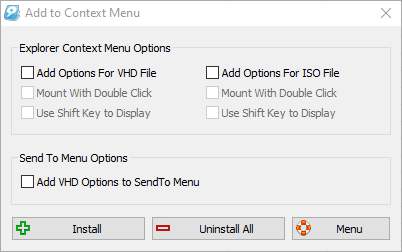
So, there are a number of options available within VHD Manager that can make it easier to deal with virtual disks on Windows computers. You can also trigger additional commands from within the interface, as well. You can explore the other additional options that can come in handy to you in a number of situations.
So, that was all about, how you can deal with virtual disks in the easiest possible way on Windows computers. Do you have any questions? Feel free to comment on the same below.
Read more:
- How to increase Virtualbox disk size Ubuntu/Windows/macOS
- Install Virtualbox guest additions Windows or Linux
- How to mount an ISO file in Windows 10?

Related Posts
How to create email groups in Gmail? Send one email to multiple recipients in a matter of seconds.
Getting the right dashcam for your needs. All that you need to know
How to Install 7-Zip on Windows 11 or 10 with Single Command
Install Google Earth on Windows 11 or 10 Using a Single Command
How to install Gaming Services on Windows 11
How to Install Telnet Client on Windows 11 Using PowerShell