Today, it is easier to scan with our mobile phones rather than using a physical scanner, where we first have to put the document to be scanned within the scanner and use the software to save the scanned document to a file. If you are scanning multiple documents, you will have to do these steps repeatedly, and needless to say, it will take a significant amount of time to do that. But, if you do that with your mobile phones, you just need to take a photo of the document and can later crop them as per your requirements, saving a lot of time. The difference in quality between a document scanned using a smartphone or scanner will hardly matter to most people.
Even if you sometimes need to get the documents scanned by a scanner, for the most part, you can get the job done with the help of your smartphone. Even if you are scanning with your smartphone using some app, you have to crop the documents after scanning, apply the appropriate filters, which will also take some time, though not as much as scanning a document using a scanner. But today I will talk about how you can save scanned documents to Google Drive directly with a single tap just like you save a photo to the gallery by tapping on the capture button on your camera app. Yes, that is possible if you are having Google Drive. After the scanning is complete, you can find the scanned document as a pdf file in the default folder location on any of your devices that are signed in with the same Google account.
So, without any further delay, let’s get started with how you can scan photos with a single tap on your smartphone using Google Drive.
Scanning a document and save it on Google Drive with a single tap
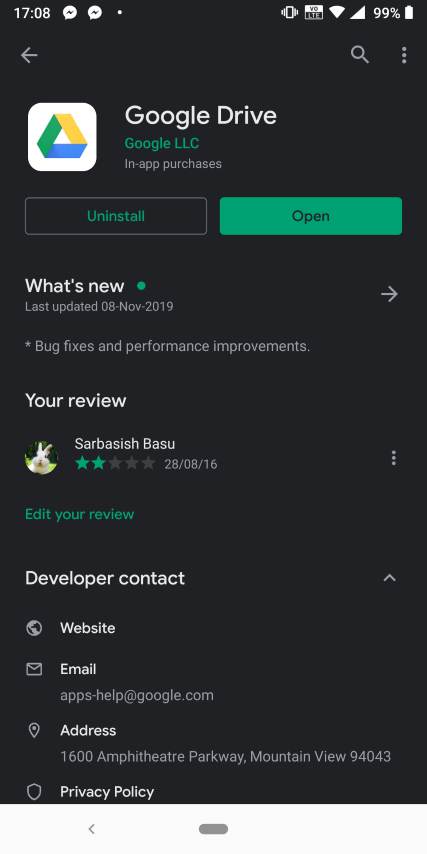
Step 1: If you don’t have Google Drive installed on your Android, which is unlikely to happen, click on this link to download it.
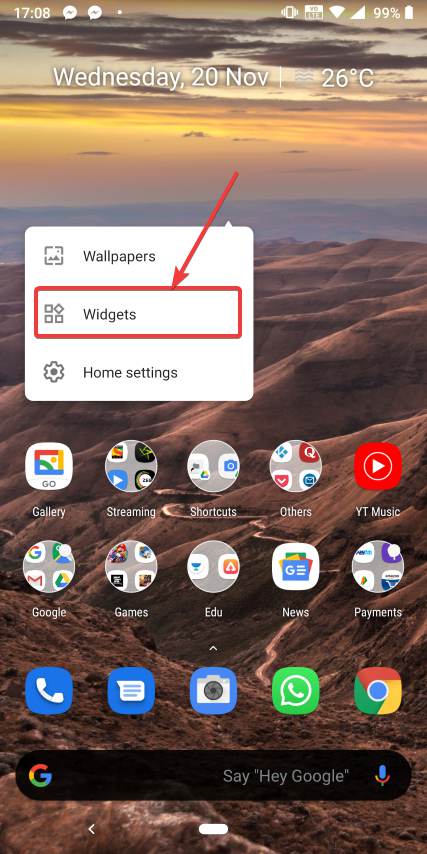
Step 2: Now, proceed with the basic setup, and long-tap on the home screen to tap on ‘Widgets’.
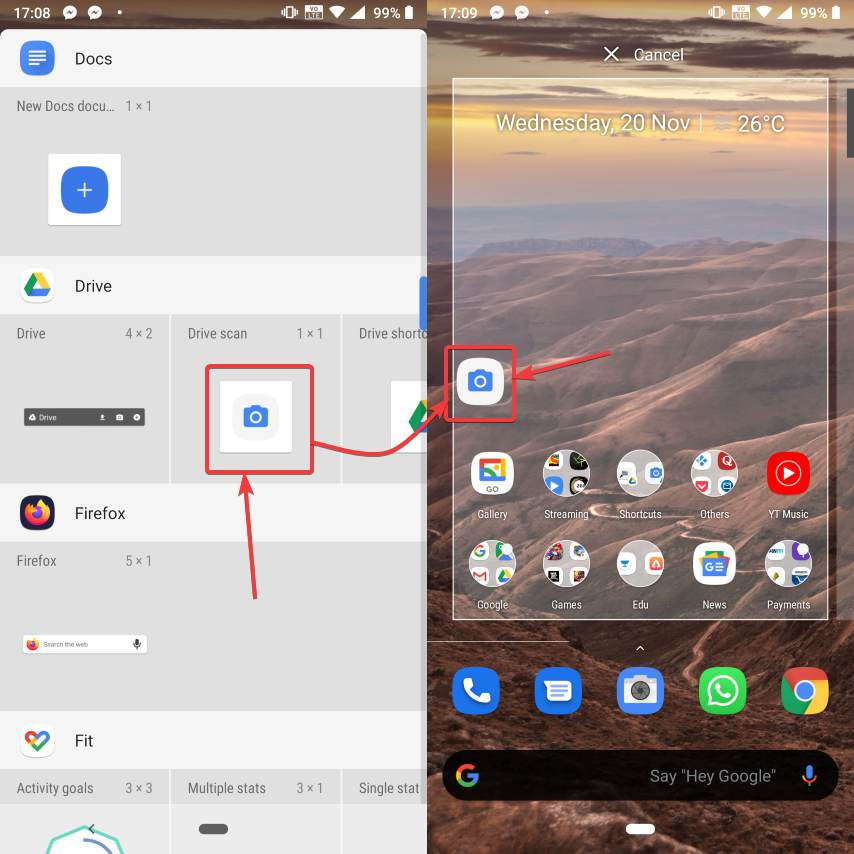
Step 3: Scroll down, and you will find ‘Drive scan’ under ‘Drive’. Just long tap on the icon to pull it to your home screen.
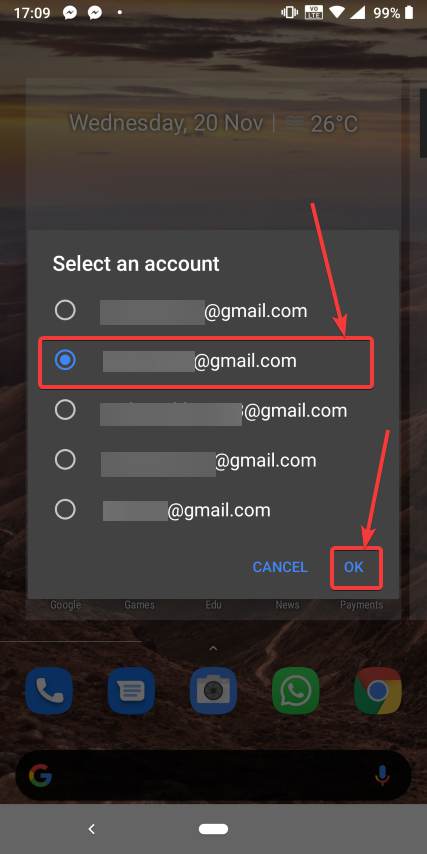
Step 4: If you have signed in to multiple accounts on your Android phone, choose the account, where you want to store all your scanned documents by tapping on it, and then tap on ‘OK’.
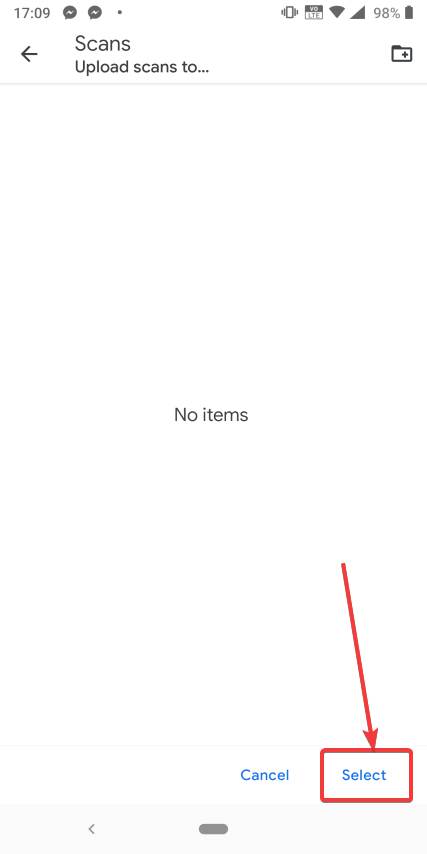
Step 5: Now, you will have to choose the folder, where you want to save the scans. You can also create a new folder with the desired name, and use it to store all your scanned documents. Once you select it, click tap on ‘OK’.
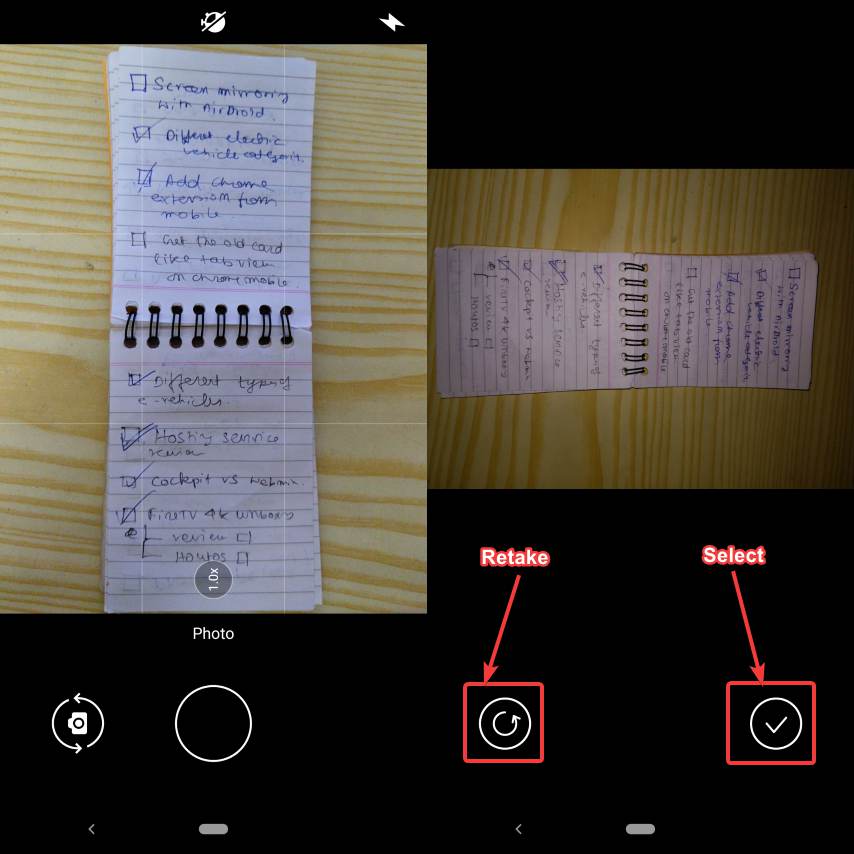
Step 6: Now, the ‘Drive scan’ feature is ready. Just tap on the ‘Drive scan’ icon, and your default camera app will open, where you can capture the photo of your document. You can just use the tick button to save it as a scanned document, or you can even retake the same by tapping on the cross button if you think, the captured image is not up to the mark.
Step 7: Now you can get the option to add more pages or apply a different filer on the scanned document. If you do not want to capture more, tap on the tick.
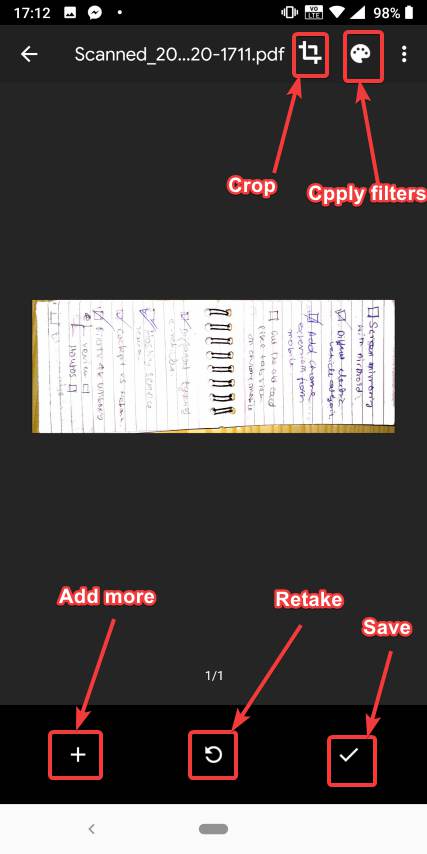
The document will now be saved as a PDF file within the folder chosen by you, and a default filter will be applied to the image captured if you didn’t change the filter so that you can save ink if you want to print it again. The default filter should apply for most users, however, you can even use a different filter, later on, if you think, it isn’t working for you. This can be very useful in everyday situations, and the best part is, as the scans are getting saved to Google Drive, you can find them at any place and anywhere, without the need to manually uploading to the cloud services or save them manually.
So that was all about, how you can use the Drive scan feature to store the scanned documents right to Google Drive. Do you have any questions? Feel free to comment on the same below.
Other Articels:
- Google Drive on Linux mint 18/19
- How to embed google drive video without iframe in WordPress or blog
Related Posts
How to create email groups in Gmail? Send one email to multiple recipients in a matter of seconds.
Getting the right dashcam for your needs. All that you need to know
How to Install 7-Zip on Windows 11 or 10 with Single Command
How to Install ASK CLI on Windows 11 or 10
How do you install FlutterFire CLI on Windows 11 or 10?
How to create QR codes on Google Sheets for URLs or any other text elements