Today’s DBAs are responsible for one or more production databases located within an organization’s network or in the Cloud. That calls for tools that will allow them to perform administrative tasks wherever they may be. Many early Cloud Database-as-a-Service (DBaaS) providers offered a Web interface for this purpose. Lately, the trend has been towards applications that specifically target mobile devices, since people always have at least one mobile device with them.
What is in short supply are options for sharing your settings, queries and models among devices and with your teammates. That’s where Navicat comes in. The company introduced a Cloud-based service called Navicat Cloud that is now part of all its database client applications. In this tutorial, we’ll learn how to connect to Navicat Cloud from the Navicat Premium development and administration tool to invite and collaborate with your co-workers to a database project, where you can create and edit together.
As mentioned in the intro, Navicat Cloud has been integrated into all existing database administration products, including Navicat for MySQL, PostgreSQL, Oracle, and Navicat Premium. They support the synching of connection settings, queries, models, and virtual groups on Windows, Mac OS, and Linux operating systems.
You’ll find the access point to Navicat Cloud under File > Navicat Cloud Sign In on the main menu:

Creating an Account
Before you can use the service, you need to create your Navicat ID and password using the Create Navicat ID link on the Sign In screen. The ID does double duty as both your registered email and ID.
Once submitted, a confirmation email is sent to the email address that you provided. Click the Activate Now link in the email, and you’re ready to login to Navicat Cloud immediately, via the Sign In screen.

Working with Projects
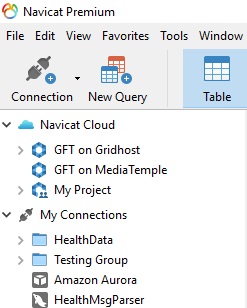
Upon successful login, you will see your Navicat Cloud projects in the Object Pane:
To create a new project:
- Select the Navicat Cloud.
- Right-click it and choose New Project.
You can add members to a project as follows:
- Right-click a project and choose to Collaborate with.
- Click Add Members.
- Enter the members’ Navicat ID.
- select the member role.
- Click Add.
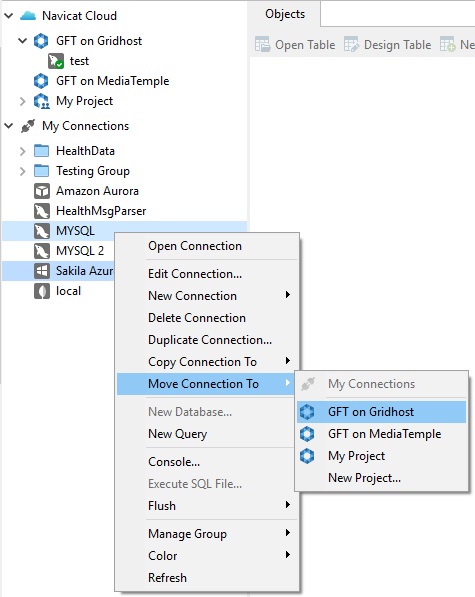
It’s good to migrate your connection settings to Navicat Cloud first because you can’t do much of anything until you’ve established a connection to the database server. All that was required to store a connection on Navicat Cloud was to right-click a connection under My Connections and choose the Move/Copy Connection To > Project from the popup menu:
Viewing Your Usage
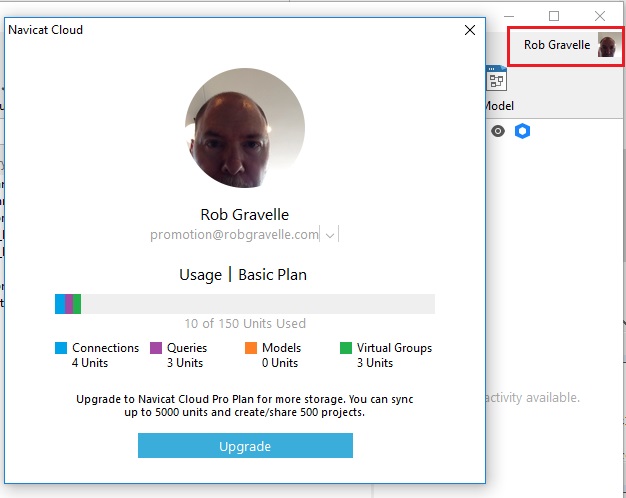
Navicat Cloud comes with 150 units of free storage whereby each connection, query, model, and virtual group counts as one unit. Once you reach the storage limit, Navicat Cloud stops synching and displays a warning message. You won’t lose any files or information and your files will be synched again automatically when storage space once again becomes available either by cleaning up stored objects or by purchasing additional storage units.
You can check how much limit you have left on your Navicat Cloud account from the account profile on Navicat:
- Sign in to your Navicat Cloud account.
- Click on your name from the top right corner to open your account profile window.
- Click on View Details.
Conclusion
In this tutorial, we learned how to connect to Navicat Cloud to invite and collaborate with your co-workers. Want to learn more about Navicat Cloud? You can do so by visiting the official Navicat site.
Related Posts
How to Install SQL Server Express on Windows 11 using PowerShell or CMD
How to install only PSQL client in Windows 11 or 10?
10 data management mistakes we commonly see
What is Pandas Read SQL?
PopSQL Editor Software Review: Write queries, visualize data, and share results
How to install MySQL on Ubuntu 20.04 LTS Focal Fossa