Virtual machines are not anything new in the world of technology and we all deal with them to test some new programs, use legacy applications and for a number of other purposes. While it is pretty easy to create a virtual machine and get started with it, if you have the operating system installer with you, but sometimes there is one more thing that can be useful in multiple circumstances. I am talking about virtualizing a physical machine. With the help of that, you can use your own computer within a virtual machine when you are working on your office computer, or on a different computer, but you want the exact same environment for doing the work on that computer.
Though not everybody might need to virtualize their physical machine every now and then, it can sometimes very useful if you do not want to go through the process of installing new programs on your computer, where you might not have the permissions to do that. Setting up a virtual machine and installing an operating system on it can be a real pain, and time taking exercise as well. With the help of a virtualized physical machine, a lot of tasks can be sorted. Even if you do not want to virtualize your physical machine every day, it is worth knowing how to do that, and it is something that I will discuss today here. What you need is is VMware Workstation Pro installed on your computer.
So, without any further delay, let’s get started with how you can use VMware Workstation along with VMware Converter to virtualize your physical machine.
Virtualizing a local physical machine
Step 1: I am considering you are already having VMware Workstation installed on your computer. But in order to virtualize a physical machine, you will also need the VMware Converter, which you can download here on your Windows computer.

To download the VMware Converter, however, you will need to create a VMware account where you will have to enter the information about yourself, which includes, the country you are from, your phone number, email ID, the state where you live, the Pin code, and other personal information. If you are comfortable with it proceed with the download.
Step 2: After your download the VMware Converter, you can install the same on your computer, and the process is exactly similar to the installation of other Windows programs, but there is one thing that you should keep in mind at the time of installation.
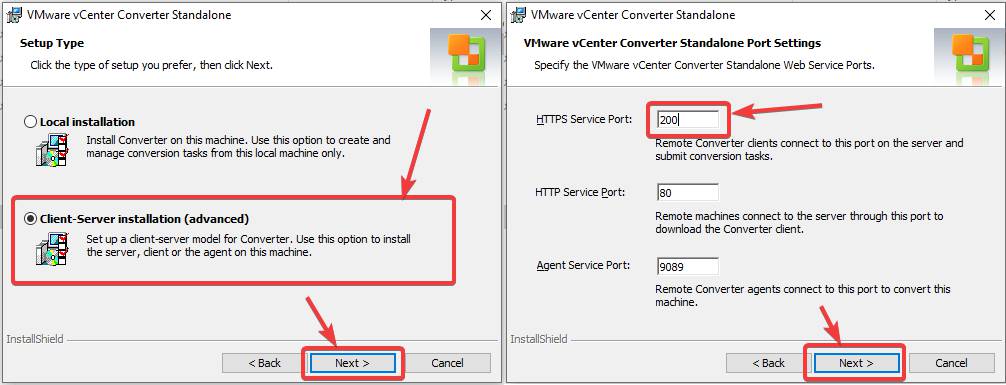
During the installation process, there will be two installation options, viz. ‘Local installation’, which can be used to handle virtualization tasks from a local machine. With the ‘Client-Server installation (advanced)’, you can virtualize your computer, as well as a remote computer by deploying the converter agent. With the client-server installation method, you can even choose the converter components that you want to install. I will virtualize my own computer locally, and will thus, go with the second option. I will also recommend you go with the second option if you want to virtualize your own physical machine.
The HTTPS Service Port can also cause issues, and I will thus, recommend you to use any other port number for the HTTPS Service Port. I am using ‘200’, but you can even use a different unused port number to continue.
Step 2: Just leave the other settings to the default. After the installation is complete, you will have to change a small setting by opening ‘Local Security Policy’ right from the start menu. You can change the settings later on after you have virtualized the intended computer.

Step 3: After you have opened ‘Local Security Policy’, expand ‘Local Policies’, and then click on ‘Security Options’, everything on the left side of the window. Now double-click on ‘User Account Control: Run all administrators in Admin Approval Mode’, select ‘Disabled’, and then click on ‘OK’.

Now you are ready to virtualize your own computer.
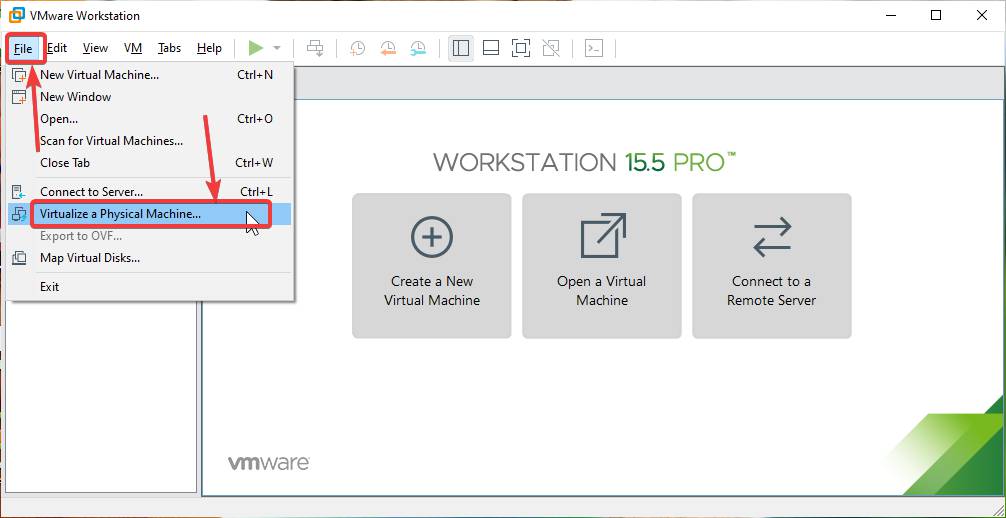
Step 4: You can either open ‘VMware vCenter Converter Standalone Client’ or the ‘VMware Workstation Pro’, as you can virtualize your physical machine, using both the tools. I will open VMware Workstation Pro, and after you open it, click on ‘File’, and then click on ‘Virtualize a Physical Machine…’.
Step 5: Now, the physical machine virtualization wizard will open where you will have to proceed, by clicking on ‘Next’.

Step 6: You will have to enter the necessary information about your computer. First, you will have to enter the hostname or the IP address of the physical machine. If your computer is connected to a network, you can enter the IP address, assigned by the network to your computer. You can find it by typing ‘ipconfig’ in the case of Windows, or ‘ifconfig’ on Linux. Alternatively, you can also enter the hostname, which you can find in your computer properties, as shown in the screenshot below.

Step 7: Next, you will have to enter the user name on the physical machine, and the IP address that you use, to log in to your computer. The username that you will enter, should have administrative privileges, and if you are the only user on your computer, you might already have administrator privileges. Now, click on ‘Next’.

Now, you might get a message about an invalid security certificate, Just click on ‘Connect Anyway’.

Step 8: After the initialization is complete, which will hardly take a few seconds, you will have to enter a name for the virtual machine that will be created after virtualizing your physical machine. Next, you will also have to select a location, by clicking on ‘Browse…’. After you select the location, click on ‘Next’.
Before you choose the final location to create the virtual machine, make sure, you are choosing a location on a drive, where you have adequate space to accommodate all the drives your physical machine has. However, dynamic hard drives will be created so that you do not run out of space while creating the virtual machine

Step 9: The creation of the virtual machine will take significant time depending upon the size of your hard drives. For 450 GB filled out of a 2 TB volume, and a 100 GB on another volume, as it is for me, it took almost 3 hours to complete. This time could be more or less for you.

Step 10: After the process is complete, the new virtual machine will be created, and it will be available under the list of the virtual machines in VMware Workstation Pro. Depending upon your system configuration, and the operating system that you are using on your physical machine a suitable amount of RAM and a number of processors will be assigned to the virtual machine.

Though you can change the amount of RAM assigned, and other configuration, just like the way, you change the RAM and other settings in case of other virtual machines on VMware Workstation Pro.
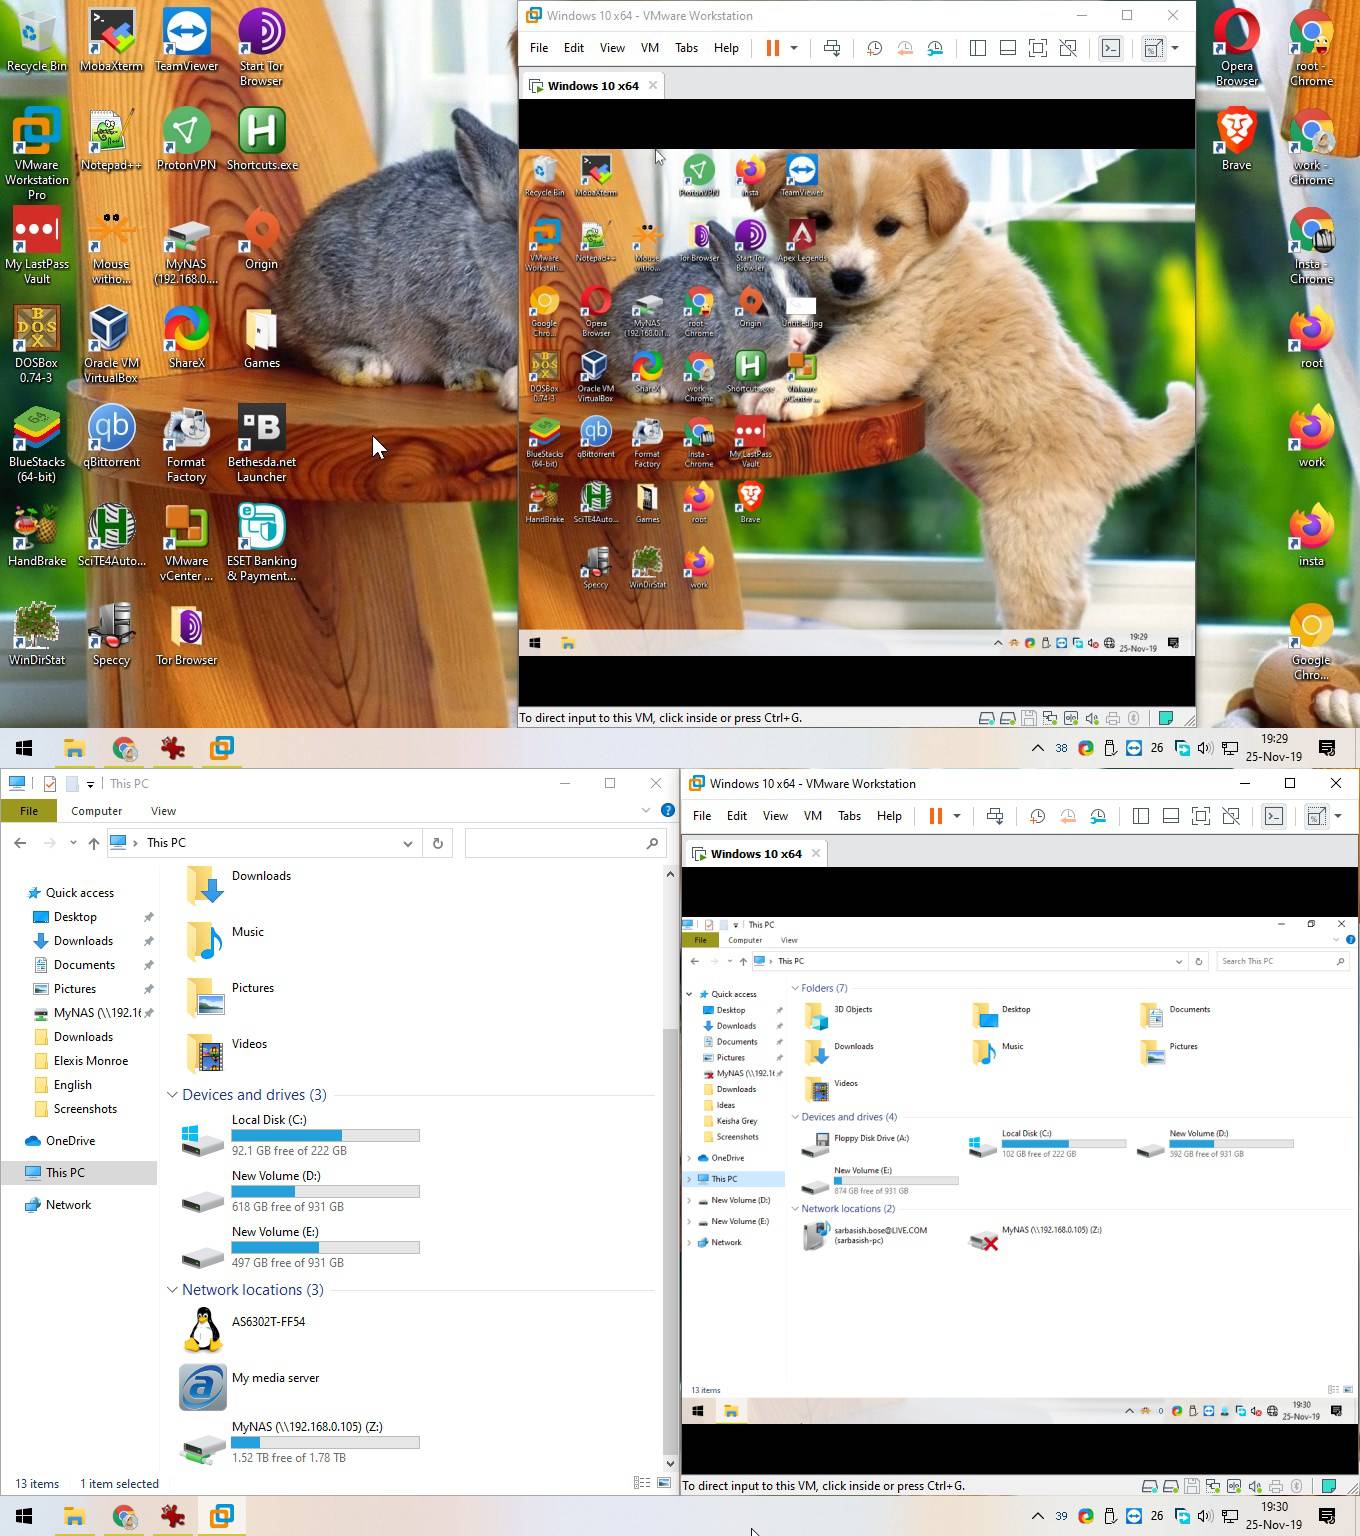
You can see the screenshot of my physical computer, and the virtualized physical machine running side by side. Almost all the settings on the physical machine will be inherited to the virtual machine that is created.
So, it is pretty easy to create a virtual machine from your physical machine. This can really be useful if you want to test some programs and want to see the behavior of the same on your computer, under the same software environment. You can even carry the virtualized physical machine on an external storage device to use it on a computer or somewhere else. Virtualizing a physical machine can also be useful if you are going to format your system, but due to lack of time, you can’t take a proper backup of your old system. By virtualizing your physical machine, you can complete the format, and later find out the important elements from your old system, and bring them back to the new one, before you eventually discard the old virtual machine. However, to keep using the virtualized physical machine, and the physical machine at the same time, you might require a new license for the virtual machine, if it is Windows or any other proprietary OS.
That was all about, how you can have a virtual machine from your physical machine, or virtualize a physical machine. Do you have any questions? Feel free to comment on the same below.
Related Posts
How to enable Virtualbox nested VTX/Amd-V on Windows 10/11 or Linux
How to Install Sandbox in Windows 11 or 10 Home Editions
Top 8 Best Free Kitchen Design Software Options in 2024
How to install Redhat Podman on Windows 10 or 11 via CMD
Install Docker Desktop on Windows 11 or 10 via PowerShell
How to Install Minikube on Windows 11 or 10 using CMD or PowerShell