At the time of dealing with multiple files on a windows computer, inspecting every single file can be a big problem and at the same time, it can also affect the productivity of the user, who needs to carry out some tasks with the files in question. Inspecting every single file means, the user will have to open every single file to find out the content of the file and that will kill a lot of useful time that could have been used for something else. Luckily, Microsoft Windows has a preview feature, which can help you see the content of a file without the need of opening it on your computer.
In the case of text files, images, and documents, you can get to see the whole content of the file and it is after that you can take your decision of how you want to deal with the same. However, in the case of other file types like videos, the process of previewing a file might not be that convenient but it is at least better than opening the video file in a particular application that is installed on your computer. So, today I will talk about how you can enable the preview pane on a Windows computer on Windows Explorer, and I will also talk about, how you can enable or disable the preview pane with just a single shortcut key that can also be useful in a number of situations depending upon your workflow.
So, without any further delay, let’s get started with, how you can enable the preview pane on Windows Explorer and also how to enable or disable it with just a single shortcut key.
Enabling or disabling the preview bar on WIndows 10
Step 1: Open Windows Explorer on your computer, and click on the ‘View’ tab on top of Windows Explorer. Now click on ‘Preview pane’ to enable it. If the preview pane is already enabled, clicking on the same will disable the pane. Thus, it is a toggle button to enable or disable the preview pane on Windows.

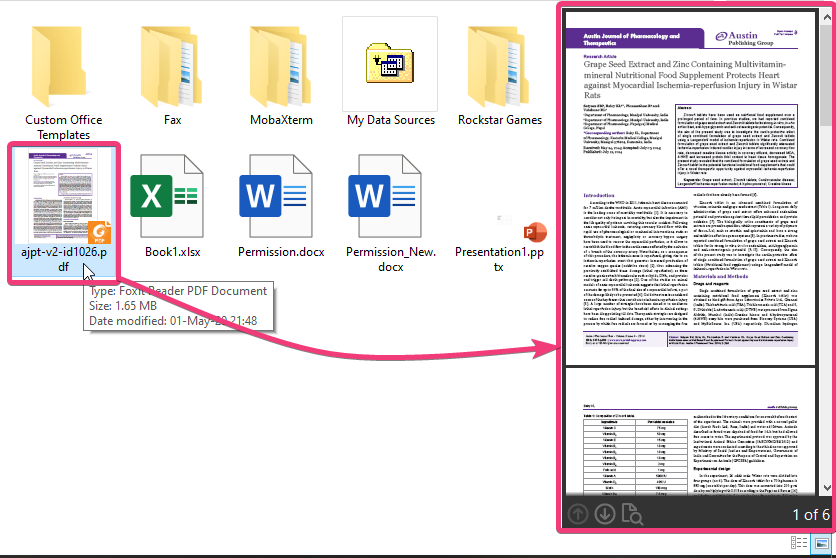
Step 2: After you have enabled the preview pane, select an image, video, PDF, document, etc., and you can see a preview of the file in the preview pane, as shown in the screenshot below.
As this is a basic preview pane, you can’t preview all types of files like ISO images, archives, or other file types that mostly don’t have a straightforward preview, or if the file type is not recognized by Windows.
But, you might have already realized, the existence of the preview pane reduces the amount of space for displaying the list of files. Thus, keeping the preview pane open all the time isn’t going to be of much use. So, there is a shortcut key to enable or disable the preview pane. Just use the ‘Alt + P’ shortcut key to toggle the preview pane on or off.
However, if you really want to keep the preview pane open all the time, you can also adjust the area of the preview pane. Just move the mouse pointer to the border between the file list and the preview pane. You will get the horizontal adjustment option to adjust the area of the preview pane easily.

The preview pane is really helpful on Windows computers and this feature is not new on Windows 10. Even in the older versions of Windows like Windows 7 and 8, this feature was there, and you can enable or disable the preview pane almost the same way.
So, that was all about, how you can enable or disable the preview pane. Do you have any questions? Feel free to comment on the same below.
Other Articles:
Related Posts
How to create email groups in Gmail? Send one email to multiple recipients in a matter of seconds.
Getting the right dashcam for your needs. All that you need to know
How to Install 7-Zip on Windows 11 or 10 with Single Command
Install Google Earth on Windows 11 or 10 Using a Single Command
How to install Gaming Services on Windows 11
How to Install Telnet Client on Windows 11 Using PowerShell